The Perfect 10 Day Alps Itinerary for France and Switzerland
Are you looking for the perfect itinerary for the French and Swiss Alps for your next summer vacation? Then take a look at our 10 day Alps itinerary! First, you’ll be visiting the cute mountain town of Chamonix, France to hike around the epic Mont Blanc. Then, you’ll head to Zermatt, Switzerland to get the best viewpoints of the famous Matterhorn, and finally, you’ll finish your trip in Switzerland’s famous Jungfrau region. In this guide, we’ll share with you a day-by-day planned- for- you Alps itinerary to follow and give you all our best tips for travelling through the French and Swiss Alps!

If you love the outdoors, hiking, and mountain views, then we’re willing to bet that the Alps are high up on your travel bucket list (and if they aren’t, they absolutely should be!). With their jagged peaks, idyllic subalpine meadows, epic hikes, scenic cable car rides, and cute mountain towns, there really is no better place to experience outdoor adventure and travel!
The Alps are pretty widespread, though, spanning across 8 different countries, each with their own collection of unique views and hikes. So planning a trip to the Alps can be a bit daunting.
But we’re here to help!
Some of the most photogenic and famous places in the Alps are found in France and Switzerland, and we’ve created a perfect 10 day Alps itinerary that will take you to the best parts of both countries!
In the first part of this Alps itinerary, you’ll visit the charming mountain town of Chamonix, France, which is the homebase for exploring the trails and sights around the incredible Mont Blanc massif. During your time here, you’ll hike to epic alpine lakes and take some of the most scenic cable car rides in the world.
Next, you’ll cross over into Switzerland to the famous mountain town of Zermatt, known for its views of the Matterhorn. Here, you’ll hike epic trails with stunning views of the famous mountain, visit the highest cable car station in Europe, and even try your hands at mountain carting!
Finally, this Alps itinerary ends in the famous Jungfrau region of Switzerland. Known for its quaint mountain villages, epic views of the Jungfrau massif, rolling green hills backdropped by snow-capped jagged peaks, and popular high mountain excursion sites, the Jungfrau region perfectly encapsulates what many think of when they dream of visiting the Alps.
And in just ten days, you’ll visit the highlights of each of these places!
In this ten day French and Swiss Alps itinerary, we’ll give you a detailed day-by-day plan to follow that has been thoughtfully curated based on our own personal experiences travelling through the French and Swiss Alps, so that all you have to do is hop on the plane and go! We’ll also share some of the more important logistics to make sure your trip to the Alps goes smoothly and without a hitch- things like when to go, how to get around, what travel passes to get, and more.
Sound good?
Let’s get to it!
In this French and Swiss Alps itinerary:
About This French and Swiss Alps itinerary
Before we get to our day-by-day Alps itinerary, there are some key logistics we need to go over first to help you better plan your trip. So, let’s get into it…
How to get around the Alps
In this Alps itinerary, you’ll be visiting three main areas: Chamonix in France, Zermatt in Switzerland, and Interlaken and the Jungfrau region in Switzerland.
Both Zermatt and much of the Jungfrau region in Switzerland are car-free areas, and you’ll be using a combination of trains and cable cars to get around.
Chamonix isn’t car-free, but it’s a very walkable town, and the entire valley is very easily and conveniently accessible by public transportation (by both bus and train).
Because of this, we’d recommend saving your money and not renting a car for this Alps itinerary. For most of it, your rental expenses will be wasted as your car sits in parking lots for days on end while you are using cable cars and public transport to get around.
Here’s what we recommend:
Chamonix
When in Chamonix, use the local buses and the Mont Blanc Express train to travel through the valley to the different towns and cable car stations. Most of the hikes, viewpoints, and sightseeing spots in Chamonix are located high up in the mountains that surround Chamonix Valley, so you’ll take the train or bus to different towns, and from these stations, it’s usually a short walk to get to any of the cable car stations you’ll be using.
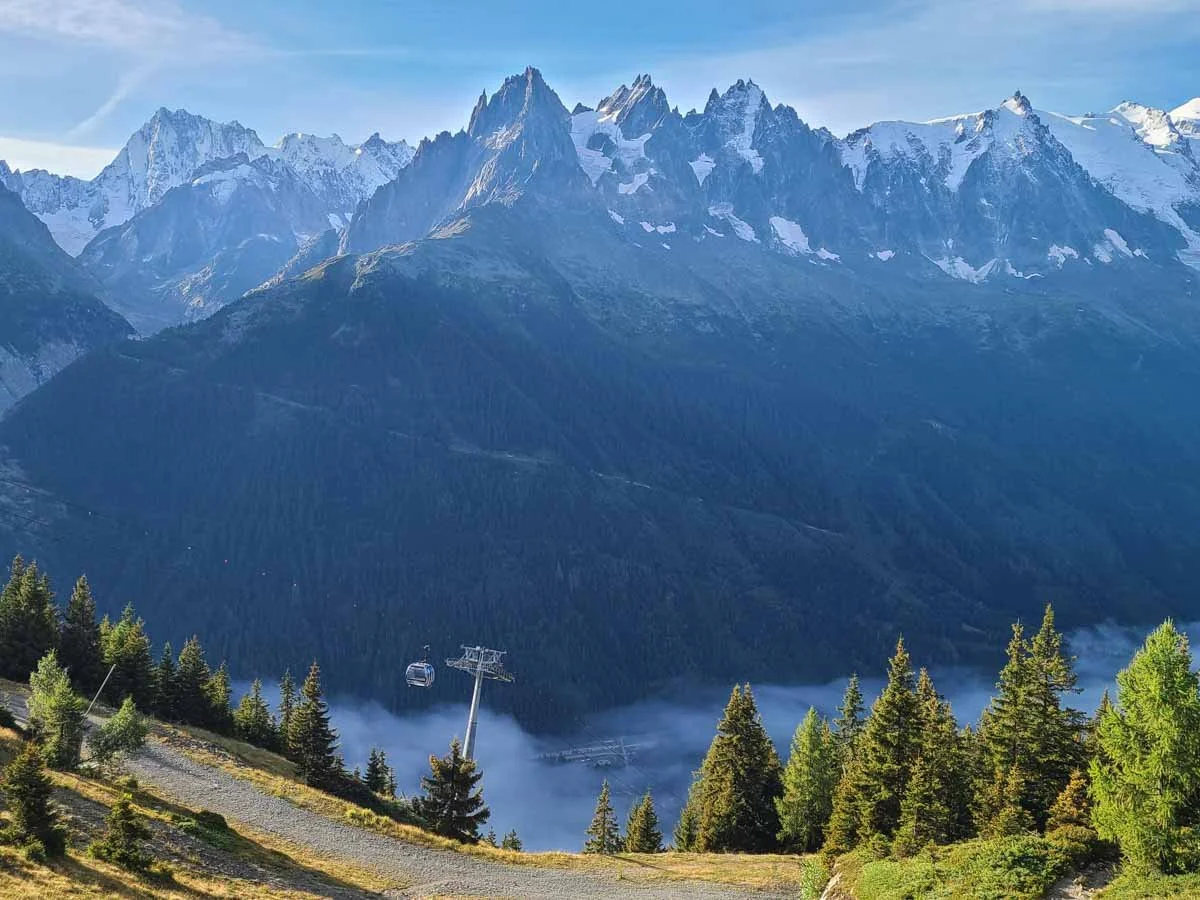
One of the many gondola lines in Chamonix, France
We’ll go into more detail about which Chamonix cable car stations are relevant to this Alps itinerary when we outline the exact daily itinerary below. But be sure to also check out our Complete Chamonix Guide to learn a ton more about travelling in Chamonix by train, bus and cable car!
Zermatt
Zermatt is a car-free town, so you’ll have to travel into Zermatt on the Matterhorn-Gotthard Bahn (the Zermatt train). Once in Zermatt, the town is very walkable, but there are also electric taxis and buses you can take to get from place to place.
Like Chamonix, most of the best things to do in Zermatt are located high up in the mountains above the town, so you’ll rely on a few different cable car and cogwheel train routes to get you there, which we’ll outline in our Alps itinerary below.

Traveling through Zermatt via cable car
Interlaken
The Jungfrau region is a large area in central Switzerland that consists of small mountain towns and excursion areas connected by a combination of trains, cable cars, and gondolas. We recommend travelling to this region by train, and then using a combination of lifts to get around the area.
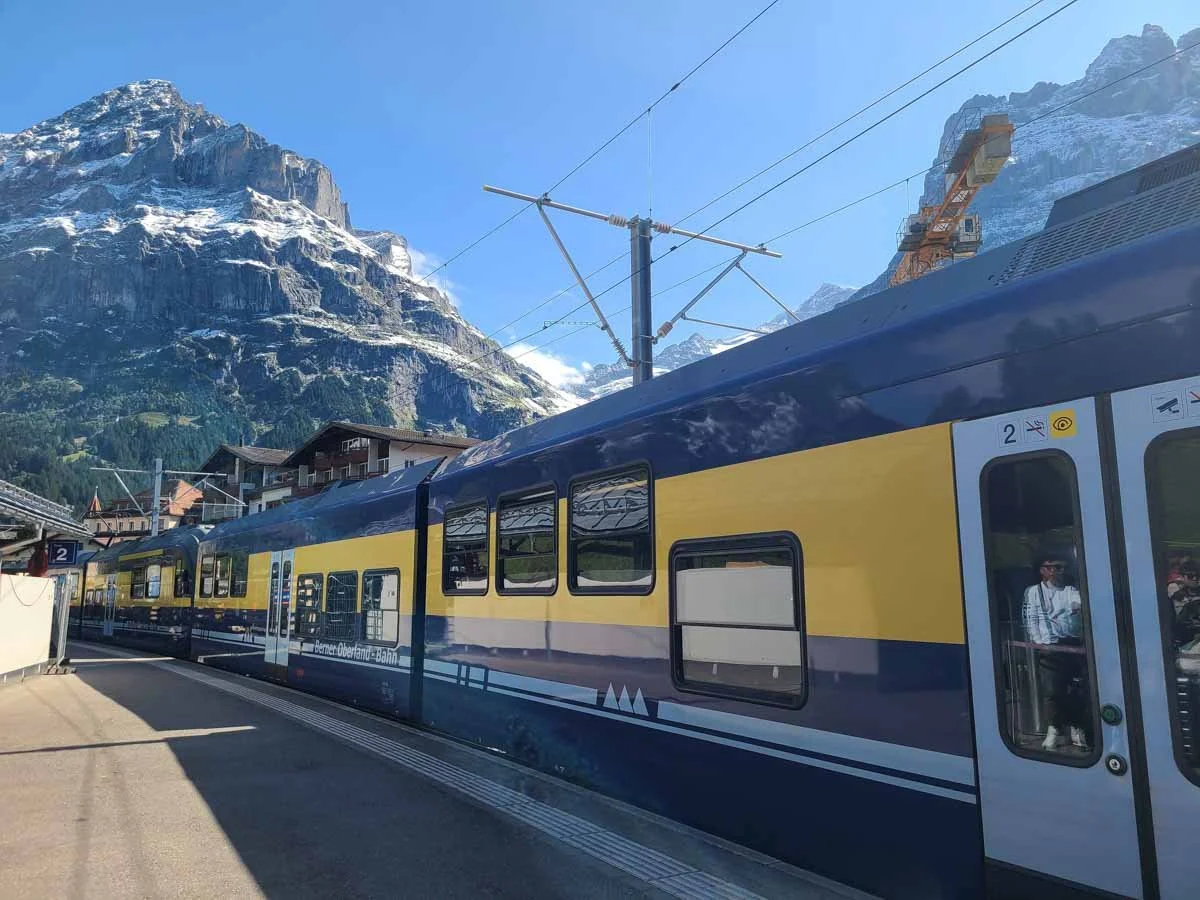
One of the many Jungfrau region trains
Figuring out the logistics of transportation in the Jungfrau region can be a bit complicated, but we’ll be sure to give you a step-by-step plan for each day in our Alps itinerary below. You can also check out our Complete Jungfrau Guide to learn more about the Jungfrau area and how to navigate its overwhelming number of transportation options.
Train travel in the Alps
To get between the different regions of this Alps itinerary, we recommend relying on the Swiss trains. They are super convenient, very easy to figure out, punctual, and run frequently.
You can use the official SBB website (or, we highly recommend downloading the SBB app!) to search for train routes and book your tickets between Chamonix and Zermatt, Zermatt and Interlaken, and Interlaken back to the airport in Geneva. Check out our Guide to the Jungfrau Area of Switzerland for tons more information about train travel in Switzerland, the different ticket types, and how to buy tickets.
What travel passes will I need for an Alps itinerary?
Planning an Alps itinerary can be a bit overwhelming. There are tons of things to do, places to see, ways to get around…and now, we’re adding one more element into that mix: travel passes.
As you might have already gathered, you’ll be taking a lot of trains and cable cars to get around on this Alps itinerary, and the tickets for all of these can quickly add up. It’s part of the reason why travel to Europe is so expensive!
However, there are a ton of different travel passes that you can consider buying in advance to help you save a bit of money when it comes to traveling around. Each of these passes is designed to give you unlimited or discounted travel on the public transportation in specific areas in France or Switzerland for a set number of days. Each pass differs in price, where they are valid, and the discounts they give, and there are many to choose from, so it can get a bit overwhelming trying to decide which ones might be worth getting.
For this French and Swiss Alps itinerary, here are the travel passes we think would be most relevant.
The 2 Day Mont Blanc Multipass: This magical pass gets you unlimited access to pretty much all of the lifts in Chamonix Valley, and it’s a definite money saver. It makes traveling around Chamonix Valley super simple, because you just have to hold onto one ticket that can be scanned at all the lifts, instead of buying multiple different tickets for each individual cable car.
On this Alps itinerary, you’ll be in Chamonix for two full days, but you’ll be using a lot of different chairlifts and gondolas, so buying the 2 day Mont Blanc Multipass is the best option. Head to the Mont Blanc Resort website to see the most current prices and to buy your Multipass. Just note that when you purchase the pass online, you’ll be emailed a QR code which is not your ticket. Instead, bring this QR code with you to Chamonix and scan it at one of the designated kiosks in town to print your physical pass. Super easy!
The Swiss Half Fare Card: This Switzerland travel pass gets you half off all train travel throughout Switzerland, and half off most of the cable cars that you’ll be using in Zermatt and the Jungfrau region, too. It’s a flat fee of 120 CHF and is good for an entire month. Even though you’ll be in Switzerland for much less than this, it will likely still save you money compared to just buying all the train and lift tickets on their own without this pass.
The Zermatt Peak2Peak Pass: This local Zermatt pass gets you a discounted rate on tickets to two popular excursion sites in Zermatt if visited on the same day. We set up this Alps itinerary so that you will be visiting both of these sites on one day, so this pass is relevant. However, this pass is only available in the summer in the months of July and August, so if you are travelling outside of these months, then we recommend just purchasing each of the necessary tickets individually. We recommend checking out our Zermatt Guide for more information about the different Zermatt passes and lift tickets while planning your Alps itinerary!
Best time for this French and Swiss Alps itinerary
Summer-time Matterhorn views
This Alps itinerary is designed for the summer season when hiking trails and high mountain viewpoints are generally open. And while we don’t normally recommend travelling in peak seasons (shoulder seasons for the win!), this is one itinerary where we do actually recommend it. Specifically, we recommend doing this Alps itinerary in July or August, and we say this for a couple of reasons.
The first is because of cable car schedules, specifically those in Zermatt and Chamonix.
In Zermatt, the cable cars up to the mountain excursion sites start earlier in the morning and run a little bit later into the evening compared to other months like June or September. You have a limited time in each place on this Alps itinerary, so maximizing your days is key! Getting earlier starts will allow you to fit more into your days without rushing. Plus, a key lift (the Riffelberg Express) is only open during these months, and this is when the Peak2Peak Pass is also available.
In Chamonix, some of the mountain lifts start closing for the summer season in early September. And like Zermatt, they have longer windows of operation each day in July and August so that you can fit more into your days without rushing or worrying about missing the last lift down for the day.
The other consideration for when to plan this Alps itinerary is weather, which is generally best in July and August. In June, there may still be lingering snow up on the higher elevation trails in the Alps. And September, while historically a nice month, can be a bit of a mixed bag. We travelled through the French and Swiss Alps in early to mid-September and we experienced all sorts of weather, and had a bit of bad luck.
We arrived to Chamonix during September heat waves that brought rain and storms to the mountains, and we ended our time in Interlaken when an unseasonal “polar vortex” dumped feet of snow across the high mountain plateaus, ruining most of our hiking plans. We experienced temperatures ranging from 80 to 30 degrees Fahrenheit in a span of just a couple of weeks.
So the take home here is that if you do decide to do this Alps itinerary in a shoulder season like September, just come prepared for anything!

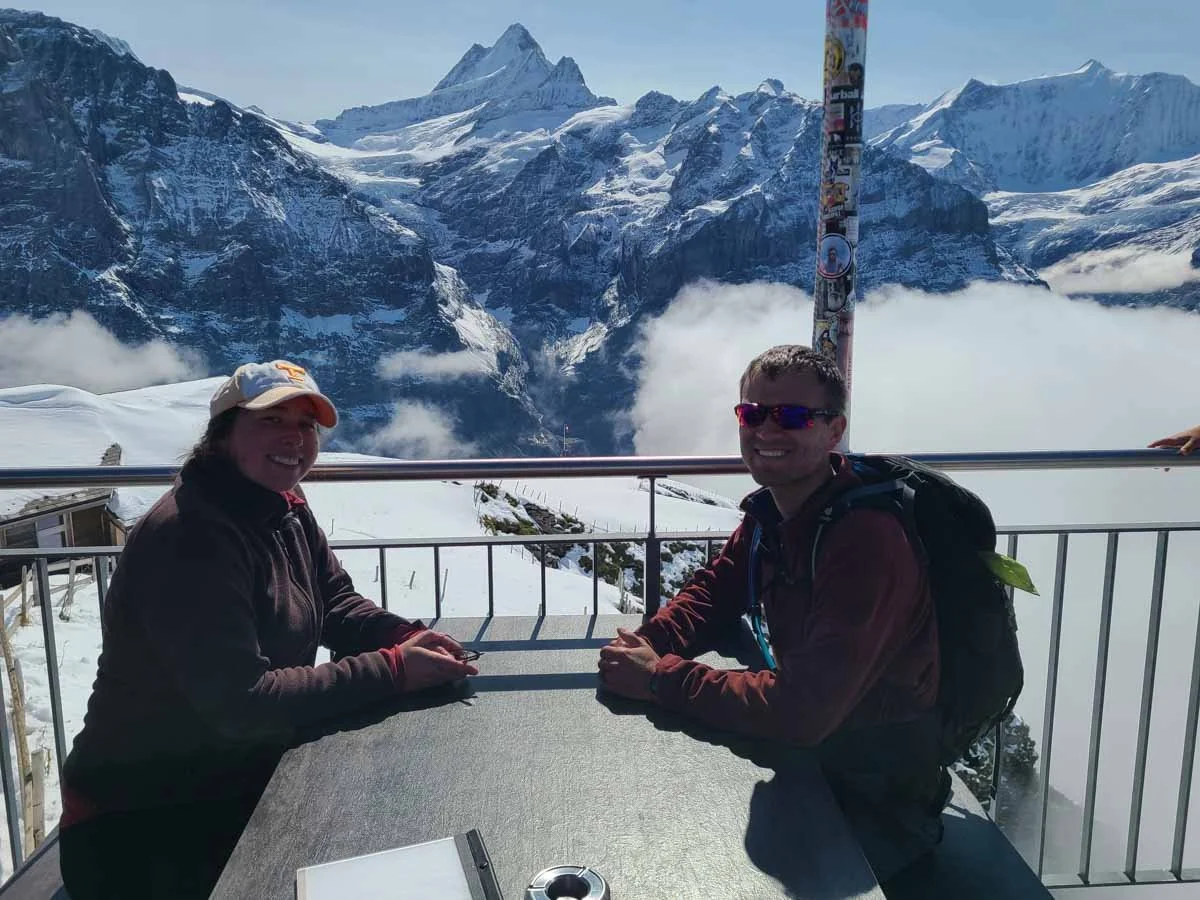
What is normally a beautifully green landscape near Grindelwald, Switzerland was covered in snow in mid-September!
In terms of crowds, the truth is that they will probably be there no matter when you go! The Jungfrau region was incredibly crowded still in mid-September, but the crowds were much more reasonable in Zermatt and Chamonix. The crowd level is likely to be a little heavier in the peak months of July and August, but after our experience, we’d feel that the pros of better weather and cable car schedules outweigh the slightly increased summer crowds.
Really, the best way to avoid crowds on this Alps itinerary is to get early starts on the mountain lifts and hikes!
How many days do you need for a French and Swiss Alps itinerary?
To visit all three regions we mention in this Alps itinerary, we think the absolute minimum amount of time to have is 10 days. This will give you 2-3 days exploring each region, with some time to travel in between.
At the end of our Alps itinerary, we’ll give you some suggestions for how to possibly shorten this itinerary, and how to add more days if you have more time!
10 Day Itinerary for the French and Swiss Alps
Alright, now that we got most of the important logistics out of the way, let’s get into the good stuff!
Here is our day-by-day breakdown of how we would plan for 10 days in the French and Swiss Alps.
Day 1: Arrive to Chamonix, France

It’s time to explore Chamonix, France to start your Alps itinerary!
Today is the day you start your Alps itinerary by traveling to Chamonix, France!
The best airport to fly into is actually in Geneva, Switzerland. Chamonix likes on the French-Swiss border, and it’s only about an hour or so away from Geneva.
To get from Geneva to Chamonix, you can take either a bus (like Flixbus or Easybus), or you can take a shared transfer. We preferred taking the shared transfer because it works around your schedule and they drop you off right at your accommodation anywhere in Chamonix Valley. It’s more expensive than the bus for sure, but after a long travel day, the convenience was worth it.
We’ll consider this first day of your Alps itinerary primarily a travel day. If you arrive to Chamonix by midafternoon or so, take the time to get settled in and oriented to the area.
Head to downtown Chamonix to explore the quaint mountain town, print out your Mont Blanc Multipass at one of the designated kiosks, grab some dinner, and get ready for the next two days exploring Chamonix!
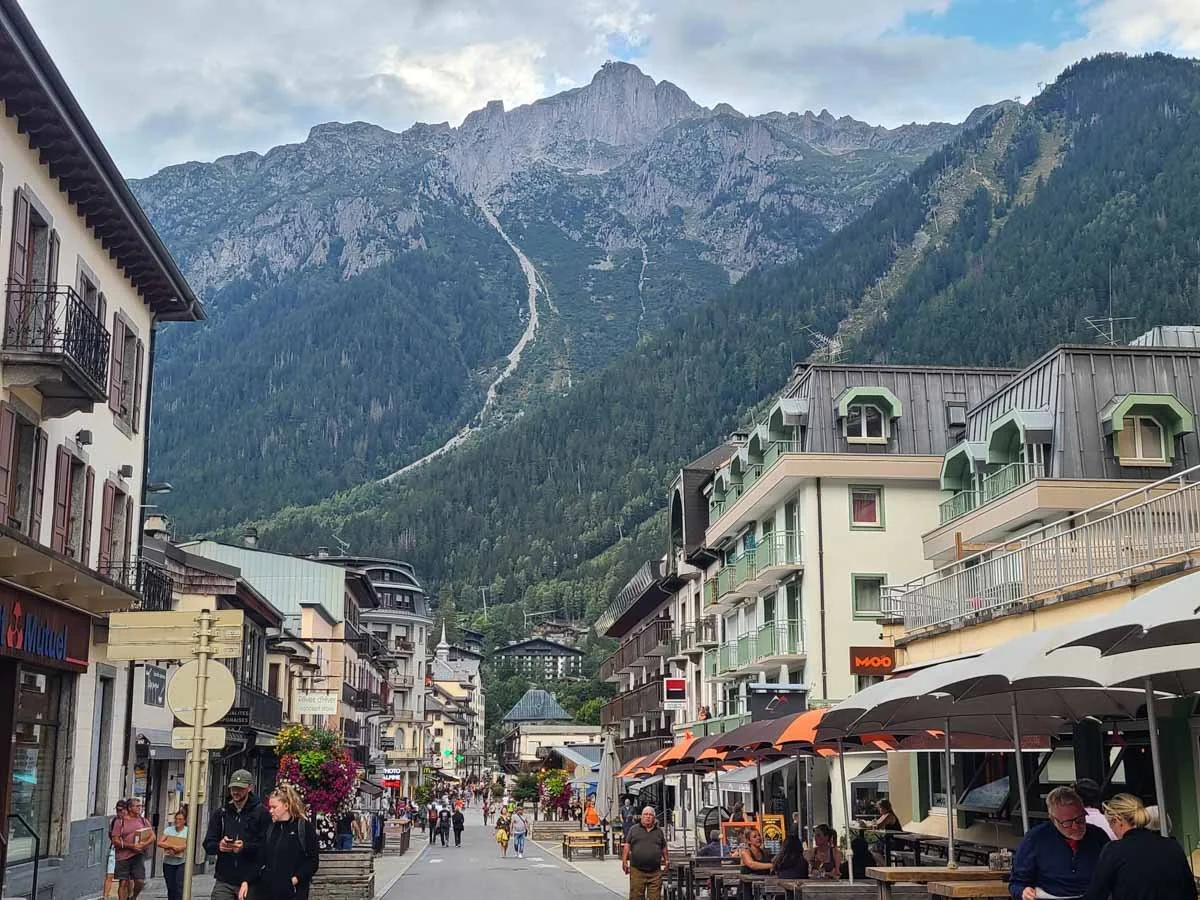
Exploring the cute streets of downtown Chamonix
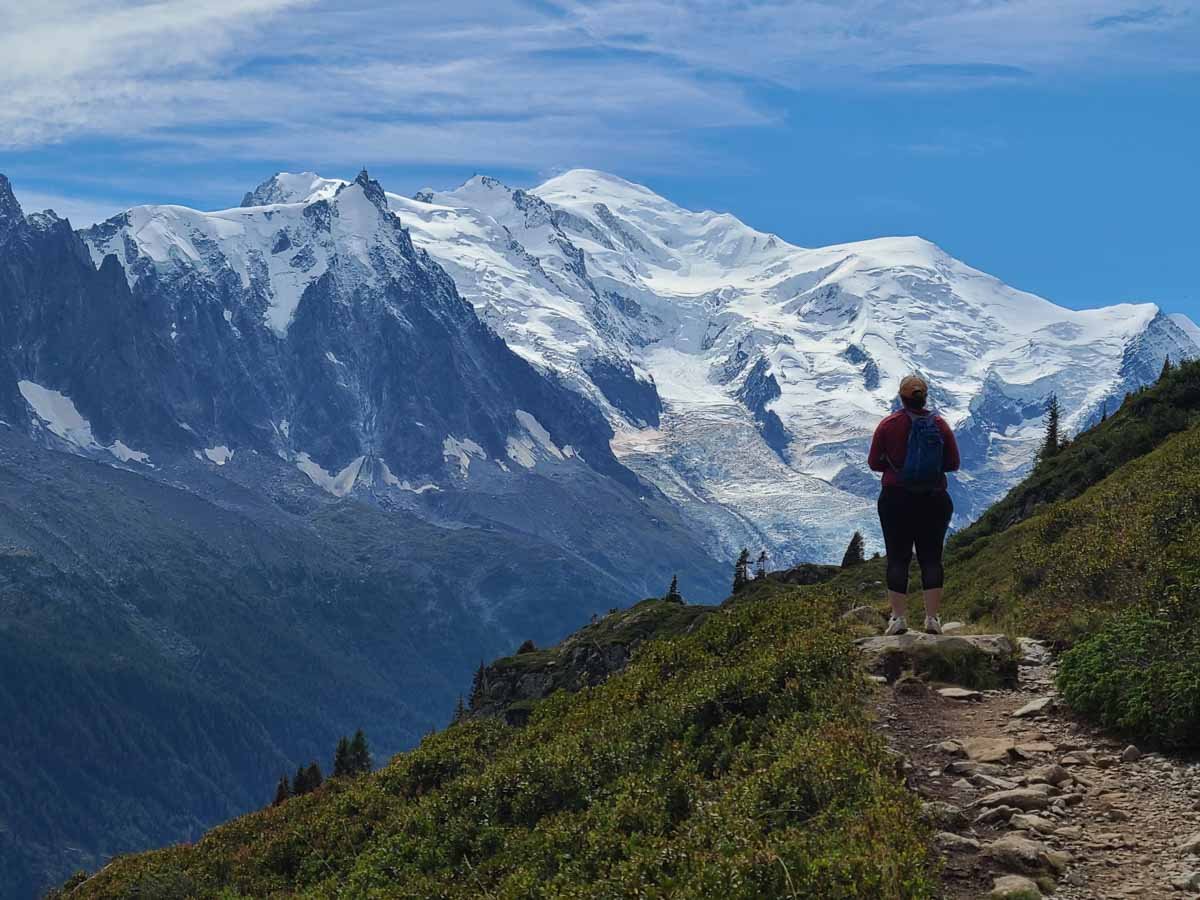
Day 2: Explore Chamonix (Aiguille du Midi and Montenvers)
On this second day of your Alps itinerary, you’ll be visiting two of Chamonix’s most popular attractions, the Aiguille du Midi, and Montenvers.
The Aiguille du Midi is a 12,600 foot peak within the Mont Blanc massif and can be seen throughout Chamonix Valley. At the summit sits a series of walkways and viewing platforms that give you the most epic and up-close views of Mont Blanc and its surrounding peaks and glaciers. And the best part is that it’s super easy to get to- no hiking required! It’s just a cable car ride away.

Epic views of Mont Blanc from the terraces on Aiguille du Midi!
From Aiguille du Midi, you can also take an incredible cable car ride across the Mont Blanc massif into Italy! This cable car ride is called the Panoramic Mont Blanc- it’s an additional cost not included on your Mont Blanc Multipass, but it’s completely worth it.
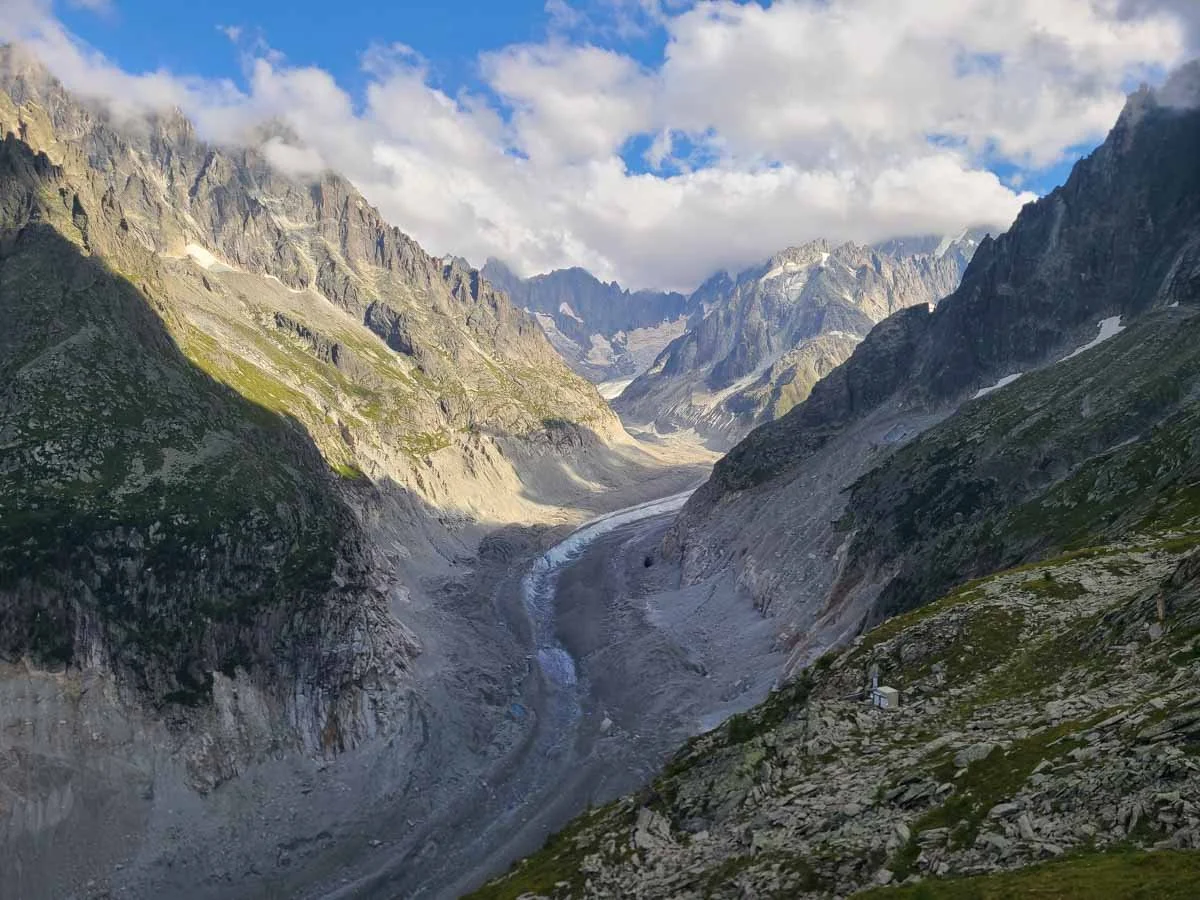
Montenvers is another popular alpine region in the mountains above Chamonix. A small cogwheel train brings you up from the valley to the Montenvers mountain station where you can look over France’s largest glacier, the Mer de Glace. You can even take a gondola down to the base of the glacier and visit a manmade icecave, or dine at a restaurant overlooking the jagged peaks.

A view of the Mer de Glace from Montenvers
To get to both the Aiguille du Midi and Montenvers, you will be using a combination of cable cars and cogwheel trains. However, you can also consider hiking between these two excursion sites by taking the Grand Balcon Nord Trail. This super scenic hiking trail runs along the slopes above the south side of Chamonix Valley, connecting the Montenvers stations to the Plan de l’Aiguille station (the midstation on the way up to Aiguille du Midi). If you are making good time and want to enjoy some time on the trails, then we definitely suggest fitting this hike in today.
Here’s how we would plan this second day of your Alps itinerary to fit everything in.
Morning
Get an early start today! In the peak summer months, the first cable cars start heading up to Aiguille du Midi by about 6:10 am, and especially if you plan on doing some hiking today, you’ll want to get a pretty early start. Getting up to Aiguille du Midi in the morning will also allow you to avoid some of the worst crowds, and gives you a better chance at a good weather window.
In the morning, head into downtown Chamonix. You’ll be headed to the bottom cable car station called “Teleferique Aiguille du Midi”. Here are the locations for the cable car station as well as the bus and train stops to use if travelling here from other parts of the valley:
Bottom station location: Teleferique Aiguille du Midi
Best bus stop: Chamonix Sud on Bus Lines 1 or 2
Best train stop: Aiguille du Midi
We recommend grabbing a quick breakfast at Le Fournil Bakery right near the Aiguille du Midi station (expect a line!). You can even grab some things here to pack for lunch (but if you have time, you can also grab lunch at one of the many mountain restaurants you’ll encounter throughout the day).
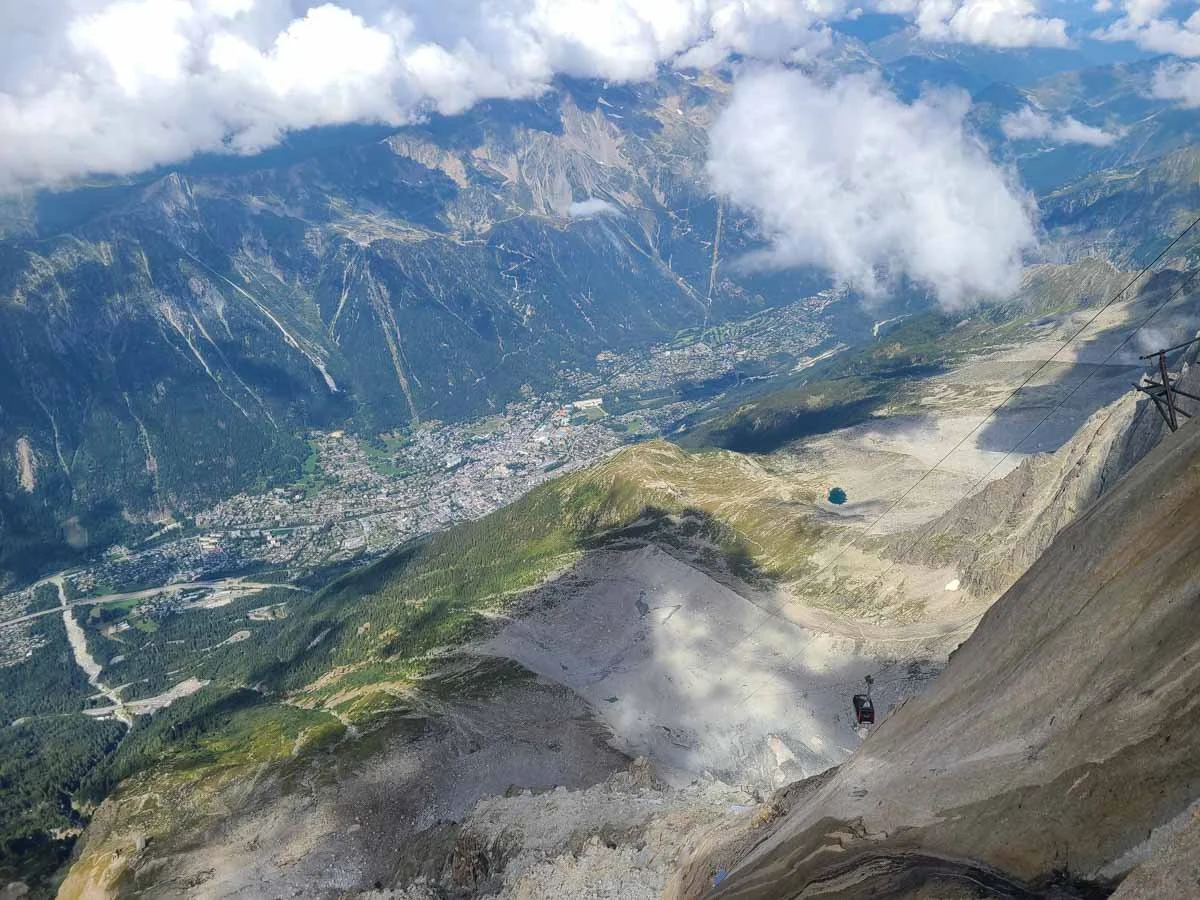
Once you’re stocked up, head to the station, show your ticket, and get in line for the next cable car. To get to the top, you’ll take a series of two cable cars. The midstation is called Plan de l’Aiguille, and you’ll get off here to transfer to the second cable car. Along the entire way up, you’ll get views over Chamonix Valley and Mont Blanc.

The scenic Aiguille du Midi cable car as it heads up from the midstation
Once at Aiguille du Midi, you can spend time walking around the terraces and exhibits. The views up here of Mont Blanc and its massive icefields are incredible! We recommend allowing somewhere between 2-3 hours to visit the Aiguille du Midi, including the cable rides to and from Chamonix.
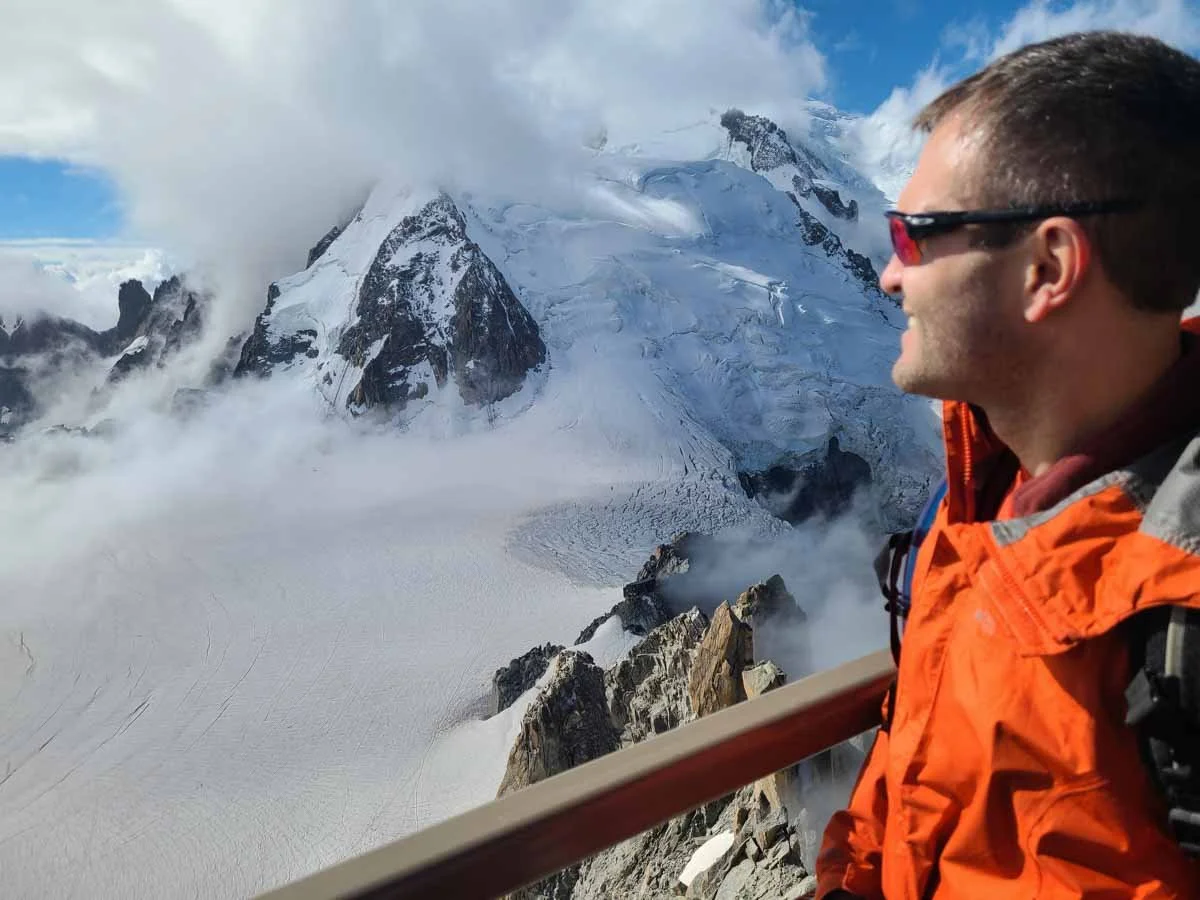
Taking in the view of Mont Blanc and its icefields from a viewing terrace on the Aiguille du Midi
The view from Aiguille du Midi back over Chamonix Valley
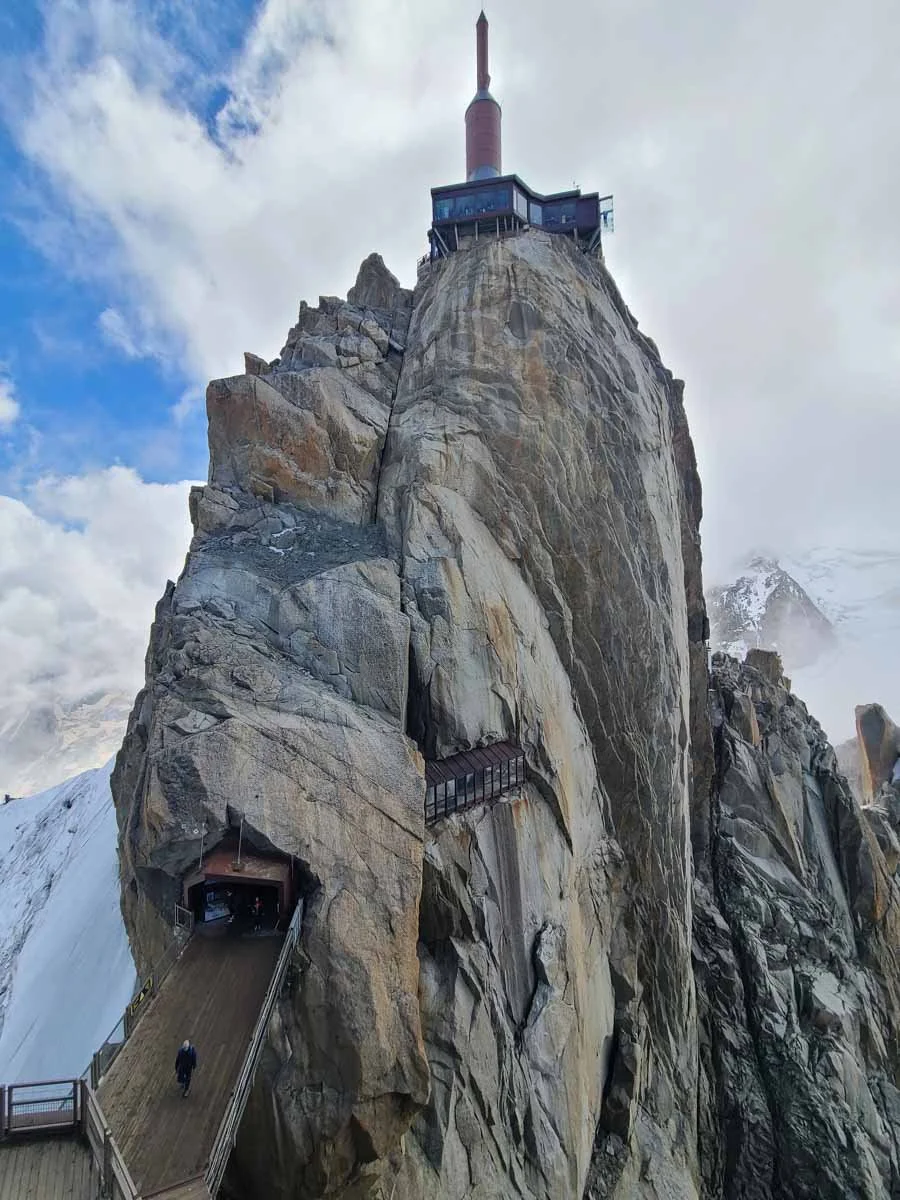
The walkways weaving through the mountain on top of Aiguille du Midi
However, we highly recommend also taking an additional cable car ride, the Panoramic Mont Blanc. This extremely epic gondola brings you from Aiguille du Midi and above the Mont Blanc icefields over to Pointe Helbronner in Italy, which has its own collection of viewing terraces, restaurants, and exhibits. This cable car ride was one of our favorite things we did in Chamonix! The views from this cable car ride were literally jawdropping, and it was such a unique experience to be dangling hundreds of feet in the air over massive glaciers. The roundtrip ride takes about an hour, so plan for this experience to take an additional two hours of your day after accounting for some time in Pointe Helbronner and waiting in any cable car lines.

The Panoramic Mont Blanc cable cars hovering above Mont Blanc’s massive icefields

Views from the Panoramic Mont Blanc cable car
MIDDAY
If you don’t plan on hiking today, simply take the cable cars from Aiguille du Midi back down to Chamonix and head to the station for the Montenvers train.
However, if you want to squeeze in a scenic hike, then take the cable car down to the midstation at Plan de l’Aiguille to start the Grand Balcon Nord hike.
This epic Chamonix hike is 4.5 mile point-to-point trail from Plan de l’Aiguille to Montenvers that will take about 2.5 to 3 hours. It’s a moderate hike and overall downhill in this direction, and you’ll be treated to non-stop amazing views over the valley and up to the jagged peaks of the Alps.

Walking beneath the jagged peaks of the Alps on the Grand Balcon Nord trail

Views of Mont Blanc from the Grand Balcon Nord trail
As you get closer to Montenvers, you also have the option to take a slight detour up to Signal Forbes, a great viewpoint over the Mer de Glace.
The view of the Mer de Glace valley from Signal Forbes
We’ll emphasize here again that if you want to fit this hike in today, you’ll need to get an early start to Aiguille du Midi in the morning (especially if you also do the Panoramic Mont Blanc!). If you don’t feel like doing the entire hike or just don’t have the time, we recommend at least hiking to the scenic Lac Bleu, which is just a 15 minute walk from the Plan de l’Aiguille station.

Lac Bleu
AFTERNOON
Last up on day 2 of your Alps itinerary is Montenvers!
If you hiked the Grand Balcon Nord trail, you’ll come out right at this mountain station. But, if you took the cable cars back down to Chamonix, it’s a quick walk to the bottom station for the Montenvers train (located here, and called the Gare Chamonix Train du Montenvers).
The cogwheel train will take about 20 minutes to get to Montenvers along a scenic mountain route (sit on the left for the best views over the valley on the way up!).

The Montveners cogwheel train
We would recommend planning for about two hours at Montenvers. This will give you time to take in the views from the terraces and take the gondola down to explore the ice cave.
With extra time, visit the Glaciorium (a museum about the Mer de Glace), or grab a bite to eat.

The viewing terraces at Montenvers
Just be sure to check the timetables for the Montenvers train carefully so you don’t miss the last train down to Chamonix! If you do, it will be a long hike back down to town. The train typically stops running by 5:00 or 5:30 pm depending on the time of year, but check the most current timetables here.
EVENING
After a busy day, relax in Chamonix, grab some dinner, and get ready for tomorrow’s adventures!
Day 3: Explore Chamonix (Lac Blanc and Brevent)

On this day of your Alps itinerary, you’ll visit the epic Lac Blanc!
Yesterday, you explored the southern side of Chamonix Valley. On day 3 of your Alps itinerary, you’ll be exploring the Aiguilles Rouge mountain range on the northern side of the valley, and in doing so, you’ll hike to one of the most famous lakes in Chamonix.
MORNING
The views from Lac Blanc are perhaps the most recognizable in Chamonix, and today, you’ll get to experience them for yourself. Multiple trails lead to this iconic lake, and which one you take depends on how long you want to spend on the trails and how difficult you want the hike to be.
After another early morning and breakfast, you’ll want to head to the town of Les Praz, right next to Chamonix, to get to the Station La Flegere.
Here is the location of this cable car station and the best train and bus stops to use:
Bottom station location: Station La Flegere
Best bus stop: Les Praz-La Flegere on Bus Line 1 or 2 (on Google Maps:
Best train stop: Les Praz
From this bottom station, a gondola goes to the midstation of La Flegere. From here, a chairlift goes further up the mountains to the L’Index station.
You can begin the hike to Lac Blanc from either station.

The chairlift to the L’Index station at the start of the Lac Blanc hike
Two trails start at La Flegere and head to Lac Blanc. The first is a more direct route to the lake and is the most popular of all the Lac Blanc trails, while the second makes a larger loop to pass by another epic alpine lake, Lacs des Cheserys. The trails from Le Flegere are generally a little less rugged and more straightforward that the trail from L’Index, but they’re also longer and have much more elevation gain to them.

Views from the trail between La Flegere station and Lac Blanc

Mont Blanc reflecting in Lacs des Cheserys
The trail from L’Index is shorter and has much less elevation gain, but it’s also more rugged and rocky. We didn’t find it particularly difficult, but you do have to be able to navigate rocky terrain, and be sure to keep your eyes peeled for trail blazes to stay on course.

Views from the trail between L’Index and Lac Blanc
We did the hike to Lac Blanc as a loop, starting at L’Index to avoid much of the climb, and ending at La Flegere so that we could visit Lacs des Cheserys on the way back. We thought this was the perfect way to do it! But whichever route you take, you’ll have epic views out across the valley to the jagged peaks of the Mount Blanc massif.
And of course, your reward will be one of the most scenic lakes you’ll probably ever lay eyes on!

Seeing the epic Lac Blanc was one of our favorites parts of this Alp itinerary!
It’s a busy and crowded hike (this is one of the most popular things to do in Chamonix, after all!), but it’s one worth battling the crowds for.
Plan to spend anywhere between 3 to 4 hours hiking to Lac Blanc depending on which route you take. You can also linger at the lake a bit longer by grabbing a bite to eat at the mountain hut restaurant located right on the lake’s shore.
MIDDAY
Just like yesterday, you have the option to squeeze in an additional hike today if you have the time and energy. This trail is the Grand Balcon Sud, and like the Grand Balcon Nord on the opposite side of the valley, it runs along the slopes above Chamonix Valley but along the North side instead.
It’s one of the best hikes in Chamonix for epic non-stop views out to Mont Blanc and its jagged peaks across the valley.

Epic Mont Blanc views from the Grand Balcon Sud trail
The Grand Balcon Sud connects the midstation at La Flegere to the midstation on a different cable car line (the Planpraz station). This cable car line just so happens to be the next thing you’ll do today after the Lac Blanc hike, so hiking the Grand Balcon Sud is the perfect way to connect the two experiences.
The Grand Balcon Sud trail is about 3.5 miles long and not technical, but it does climb quite a bit as it heads to Planpraz, so it should take you about 2-3 hours.
Mont Blanc views
If you feel like you won’t have time for this trail today, don’t worry too much because the views from the Lac Blanc hike and the next activity on this itinerary are very similar to those you would see on the trail. The Grand Balcon Sud is really just a chance to spend more time hiking!
AFTERNOON
Your afternoon will be spent visiting Brevent, a high mountain viewpoint with incredible panoramas over Chamonix Valley and in-your-face views out to Mont Blanc. We felt this was one of the best views of Mont Blanc that we got in Chamonix!

Perfect views of Mont Blanc from the Brevent cable car station!
If you skipped the Grand Balcon Sud hike, you’ll take the lifts back down to Les Praz after your hike to Lac Blanc.
From Les Praz, take the bus or train back to Chamonix so that you can get to the bottom station for Brevent, called the Telepherique du Brevent.
Here are the locations for this cable car station and the best bus and train stops to use:
Bottom station location: Telepherique du Brevent
Best bus stop: Chamonix Center on Bus Line 1 or 2
Best train stop: Aiguille du Midi
From the bottom station, you’ll take a gondola up to the midstation at Planpraz, and then a cable car up to the Brevent viewpoint.
If you hiked the Grand Balcon Sud, you’ll end up at Planpraz where you can simply take the cable car up to Brevent.

The Brevent cable car as it leaves the Planpraz station
At Brevent, enjoy the views from the various terraces, and grab a snack or meal at the café or restaurant.

A view down Chamonix Valley from Brevent. Can you spot the cable car?
When you’re done, take the cable cars back to Chamonix (again, make sure to look at the timetables carefully so you don’t miss the last ones down!).
Spend your last evening in Chamonix relaxing and grabbing dinner in town.
Day 4: Travel to Zermatt and visit Rothorn
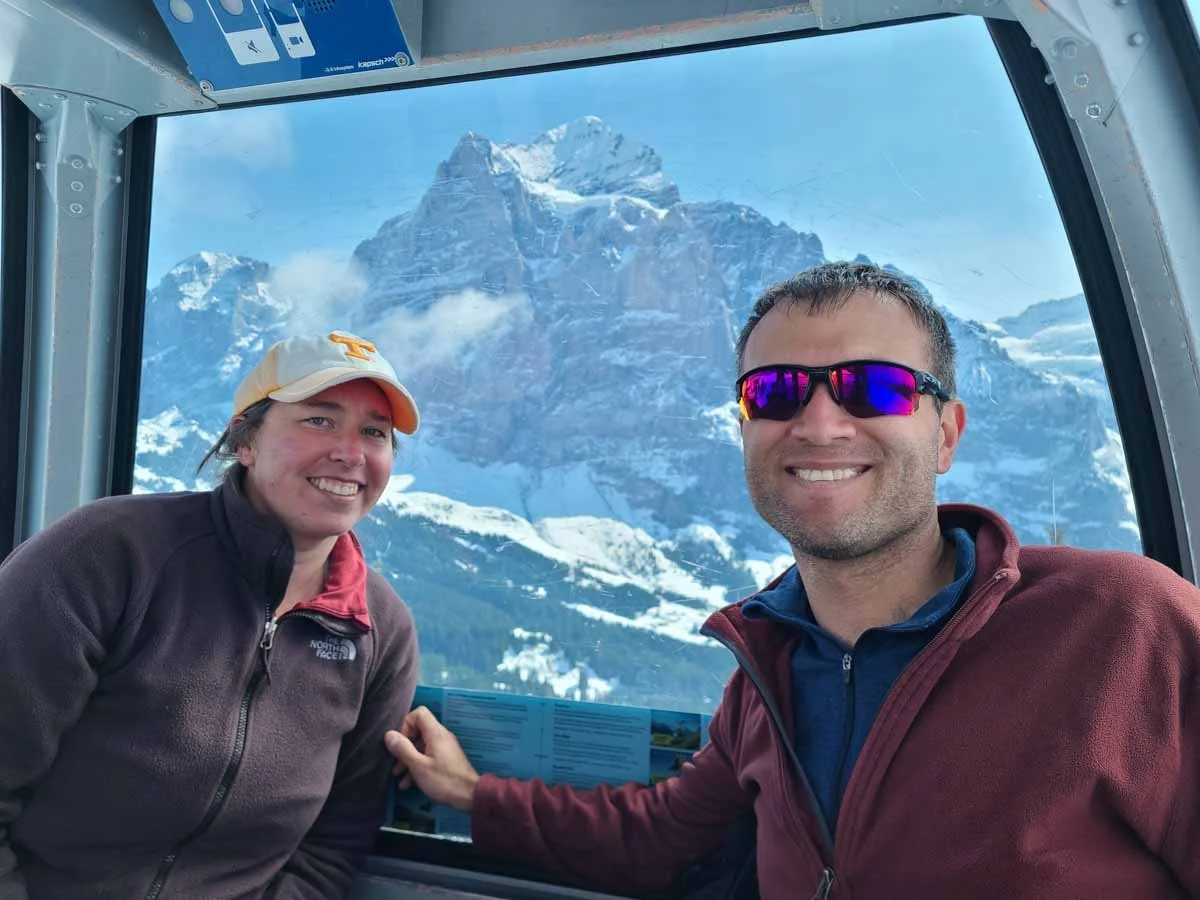
On day 4 of your Alps itinerary, you’ll be leaving Chamonix (cue sad faces) and heading to the famous mountain town of Zermatt, Switzerland (cue happy faces)!
Next up on your Alps itinerary…Matterhorn views from Zermatt!
Grab an early train out of Chamonix, as it will take about 4.5 hours to travel by train to Zermatt, and you’ll want to have about 3 to 4 hours to explore Zermatt in the afternoon (before the cable cars stop running for the day!).
Once you arrive in Zermatt, drop off your bags and get ready to explore!
After you’re situated, you’ll explore one of Zermatt’s three mountain excursion sites: the Sunnegga, Blauherd, Rothorn cable car route.
The bottom station for this cable car route can be found here, right in downtown Zermatt. Zermatt is pretty walkable, but if you need to, you can grab an electric taxi to get you to the station.
The Rothorn cable car route consists of three mountain stations. The first is Sunnegga, the midstation is Blauherd, and the summit station is Rothorn.
We’d recommend taking the series of three lifts all the way to the top station first, and then working your way back down the mountain with a mix of hiking, cable cars, and even with a mountain cart!

The Rothorn cable car heading up to the summit!
Here’s how we would plan the afternoon on the Rothorn cable car route:
First up: Take the funicular, then gondola, and finally cable car all the way to the Rothorn summit. Take in the panoramic views from the viewing terraces out to the Matterhorn and back to the Findeln Glacier. This won’t take too much time, but it’s still worth coming up here!

Matterhorn views from the Rothorn station
The Findeln Glacier
Once you’re done here, you have two options: you can take the cable car back down to the Blauherd station, or you can hike down.
Of course, we recommend the latter! The Crystal Trail (or Kristallweg) is a relatively easy hiking trail that runs between Rothorn and Blauherd. Along the way, it goes by the scenic Fluhalp mountain hut with great views of the Findeln Glacier, and it also goes right by one of Zermatt’s most scenic lakes, Stellisee. Here, the Matterhorn perfectly backdrops the lake, and on clear and calm days, the lake often nicely reflects the mountain on its surface.

Hiking the Crystal Trail from the Rothorn summit

Matterhorn views from the Crystal Trail

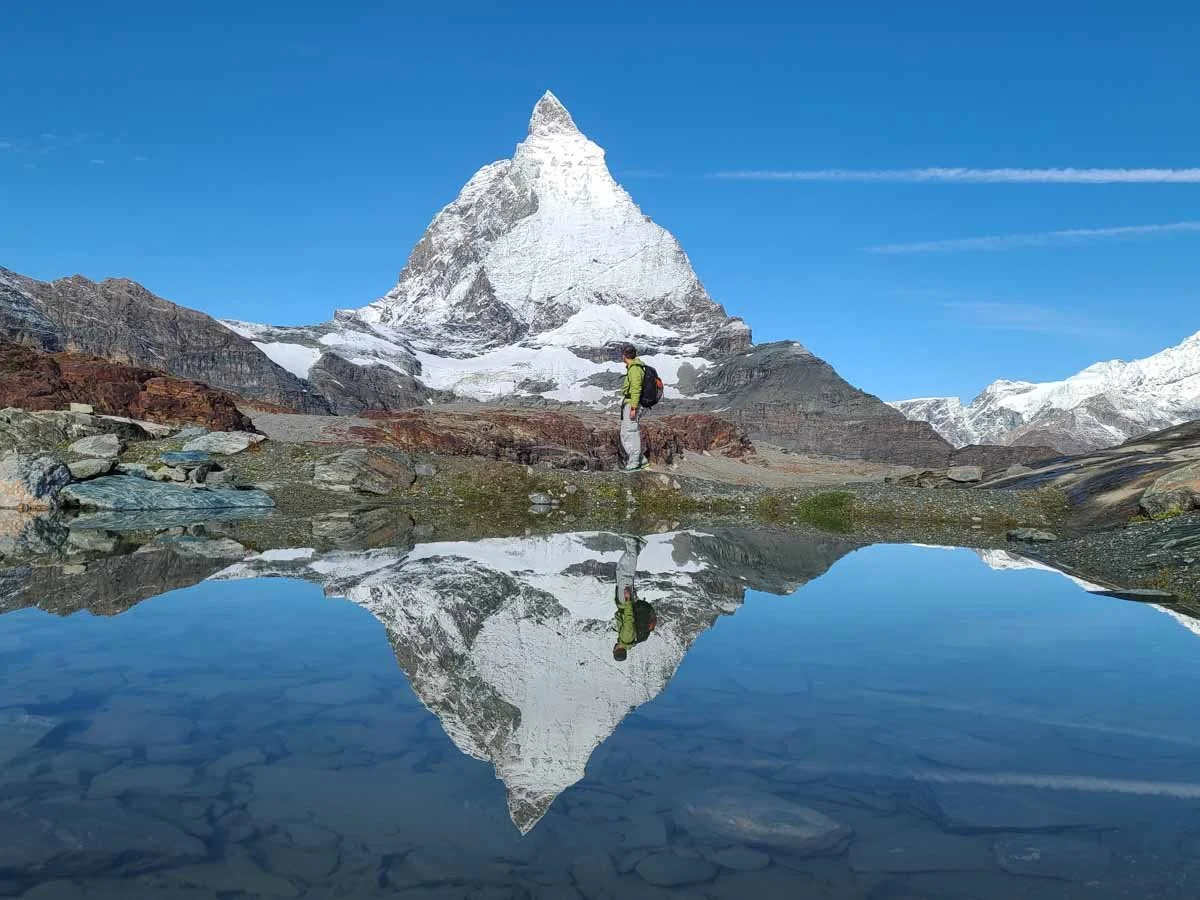
Matterhorn reflections on Stellisee
At just 5 kilometers (around 3.2 miles), it’s an entirely downhill hike that will take about an hour and a half or less- so it’s a great bang for your buck hike with amazing views of the Matterhorn and surrounding peaks and glaciers.
If you prefer not to hike this trail, then simply take the cable car from Rothorn back down to Blauherd. While in Blauherd, we recommend at least making the short hike out Stellisee from this cable car station. It’s just 1 kilometer (0.6 miles) to the lake’s shore from here, but be sure to walk to the far side of the lake to get those awesome Matterhorn shots over the lake. The way back will be a gentle but scenic uphill walk.

Hiking the trail to Stellisee Lake in Zermatt
Next up on the agenda is a little bit of fun- a chance to be act like a real-life version of Mario Kart!
At the Blauherd station, you can rent a mountain cart and go speeding down the mountain to the Sunnegga cable car station. It’s a quick and bumpy ride, but it’s definitely the most fun way to get back down the mountain!

Mountain carting was definitely one of the most unique things we did on this Alps itinerary!
Once back in Sunnegga, take the funicular back down to Zermatt and grab dinner in town. Check the timetables for the funicular here to make sure you catch it before it stops running for the day.
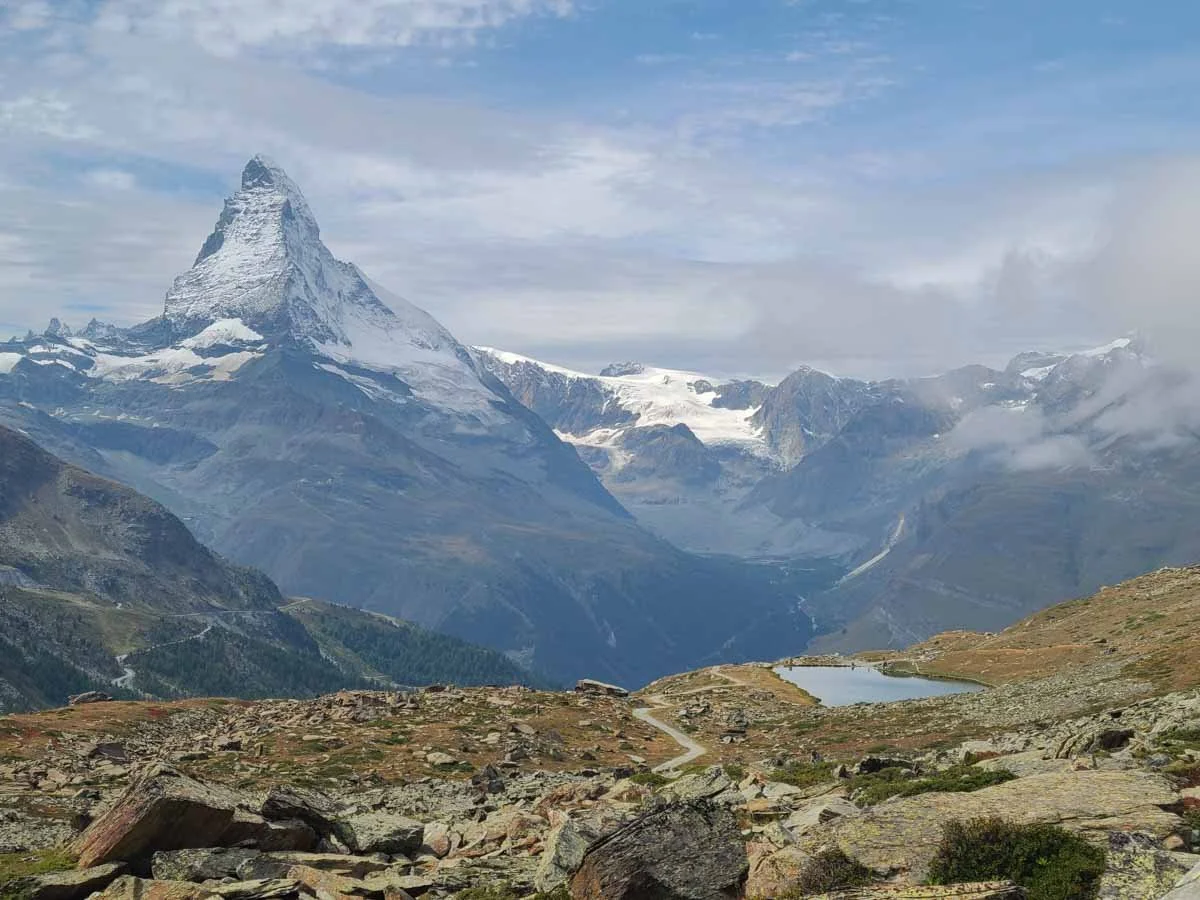
Day 5: Visit the Matterhorn Glacier Paradise and Gornergrat
Get ready because today will be one of the most epic days of your Alps itinerary! You’ll be tackling the two most popular cable car routes in Zermatt, get up-close views of the Matterhorn, ride on one of the most scenic cogwheel trains in the world, and get to hike some of Zermatt’s best trails!
So, let’s get to it!
Today you’ll visit the Matterhorn Glacier Paradise in the morning, and Gornergrat in the afternoon.
Start the day by heading to the bottom station for the Matterhorn Glacier Paradise cable car route (found here). Again, you can walk to this from anywhere in town, or take an e-taxi or e-bus up to the station. Since you’re visiting two sites today, make sure to get a very early start by taking one of the first lifts up from Zermatt.
To get to the Matterhorn Glacier Paradise, you’ll take a series of 3 to 4 lifts that travel through a few different mountain stations along the way. To start the day, we recommend travelling straight through all of the stations to get right to the top at Matterhorn Glacier Paradise.

The scenic cable car ride to the Matterhorn Glacier Paradise in Zermatt
The Matterhorn Glacier Paradise excursion site is one of the best places in Zermatt, and it’s Europe’s highest cable car station! The views from the terrace are incredible- you’ll see a unique view of the Matterhorn, massive glaciers and icefields, and a sea of jagged peaks spread across three different countries! On a clear day, you can even spot Mont Blanc in the distance where you were just a few days ago.
Matterhorn views from the viewing terrace at Matterhorn Glacier Paradise

Matterhorn Glacier Paradise views
While here, take in all the amazing views, and spend some time visiting a unique ice palace under the Theodul Glacier. You can also peruse a gift shop, grab a bite to eat, and watch a film in a unique cinema setting. We’d say to plan on spending about an hour and a half up here.
When you’re done at Matterhorn Glacier Paradise, head back down on the cable car to the mountain station just below, called Trockener Steg.
This mountain station is the start of our favorite hike in Zermatt- the Matterhorn Glacier Trail! This relatively easy trail is truly epic as it travels through a moon-like landscape of gray and red rock littered with tons of scenic tarns and lakes, which, on a calm day, perfectly reflect the Matterhorn.

Up close views of the Matterhorn along the Matterhorn Glacier Trail

Throughout the entire hike, the Matterhorn is so close you’ll feel like you can reach out and touch it.
The Matterhorn Glacier Trail is a point-to-point hike that goes from Trockener Steg to another cable car station at Schwarzsee. It’s about 6.5 km (or 4 miles) long, and in this direction, it’s mostly downhill (but there are some short steep climbs mixed in). It’s straightforward, but a bit rocky and rugged at times.

Approaching Schwarzsee on the Matterhorn Glacier Trail
The Matterhorn Glacier Trail should take you about 2 to 2.5 hours, depending on how long you linger to gawk and take pictures (which, if you’re anything like us, will be often!).
While on the Matterhorn Glacier Trail, you do have the option to make a detour up to the Hornlihutte. The Hornlihutte is a mountaineering hut that is often used as a base to climb the Matterhorn. The trail to get to it is absolutely epic, but it’s a challenging one, too.
It’s rugged and rocky, very steep, has quite a bit of exposure, and uses a lot of metal features like stairs and rails to get by the steepest or most exposed sections. We loved this Zermatt hike, but adding this hike will make this day extra long (it will add about 3 more hours or so of hiking to the day).

The epic trail to the Hornlihutte in Zermatt

The Hornlihutte hike had some of our favorite views in Zermatt!
Once you make it to Schwarzsee after your hiking is done, it’s time to take the gondola back down to the next cable car station at Furi.
In Furi, you can take a cable car called the Riffelberg Express to cut over to the second mountain excursion site of the day. This cable car line acts as a shortcut between the two mountains and is only operational in July and August (a reason why we recommend doing this Alps itinerary during these months!).
If you’re visiting Zermatt outside of these months, you’ll have to take the cable cars all the way back down to Zermatt, and then walk across town to get to the bottom station for the Gornergrat Railway (located here). From here, take the cogwheel train all the way to the top station.
By taking the Riffelberg Express, you’ll save a bit of time. It will connect you to the Riffleberg station, which is a station about halfway up the Gornergrat Railway.
In Riffelberg, hop off the gondola and get on the next train up to Gornergrat. This cogwheel train is the highest openair cogwheel train in Europe and is famous for its incredible views out to the Matterhorn, so enjoy the ride!

The famous Gornergrat cogwheel train
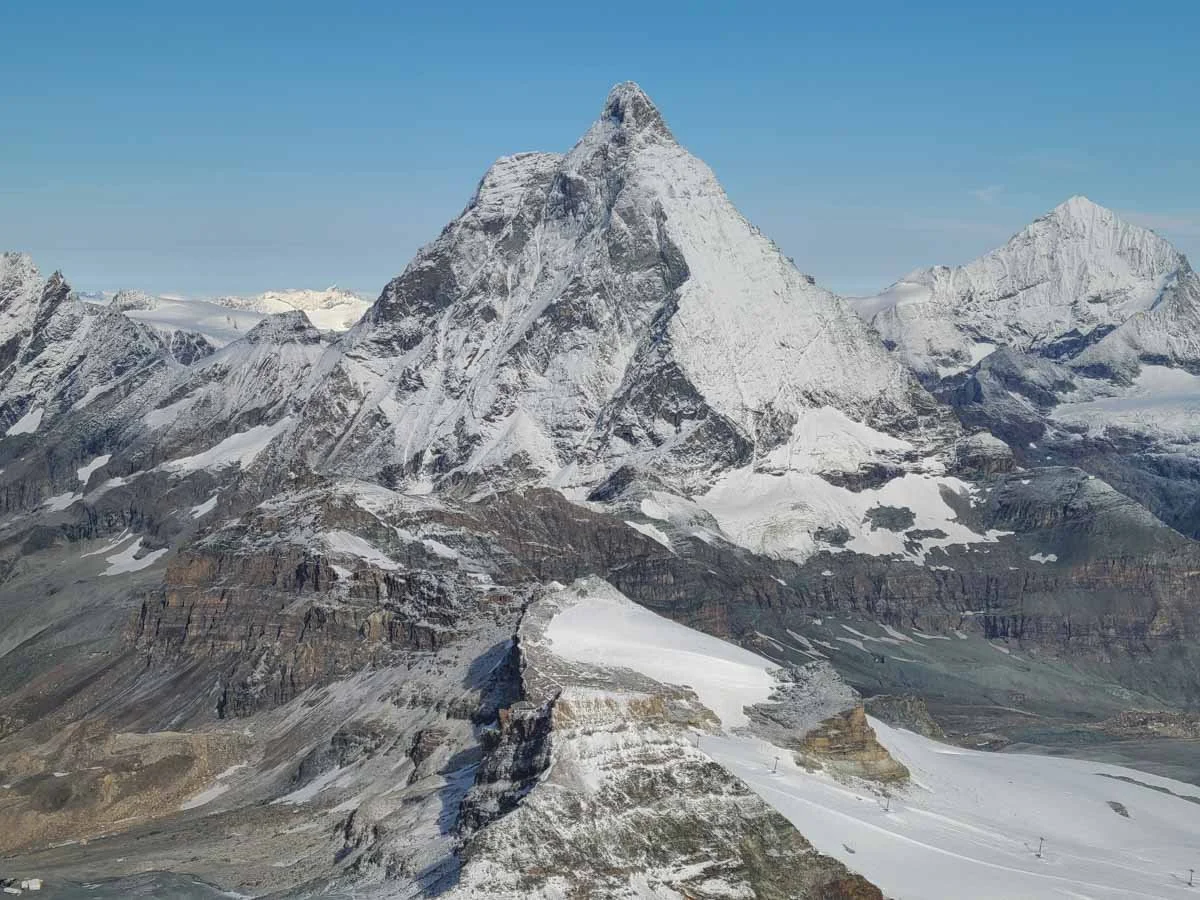
Gornergrat is one of the most popular places to visit in Zermatt, and once you get here, you’ll quickly see why. The views of the Matterhorn here are breathtaking.
But the Matterhorn is not the only star of the show up here. Seemingly right at your feet, the massive Gorner Glacier cascades off the peaks off the Monte Rosa massif and it’s quite a sight.

One of the viewing terraces on Gornergrat with epic Materhorn views
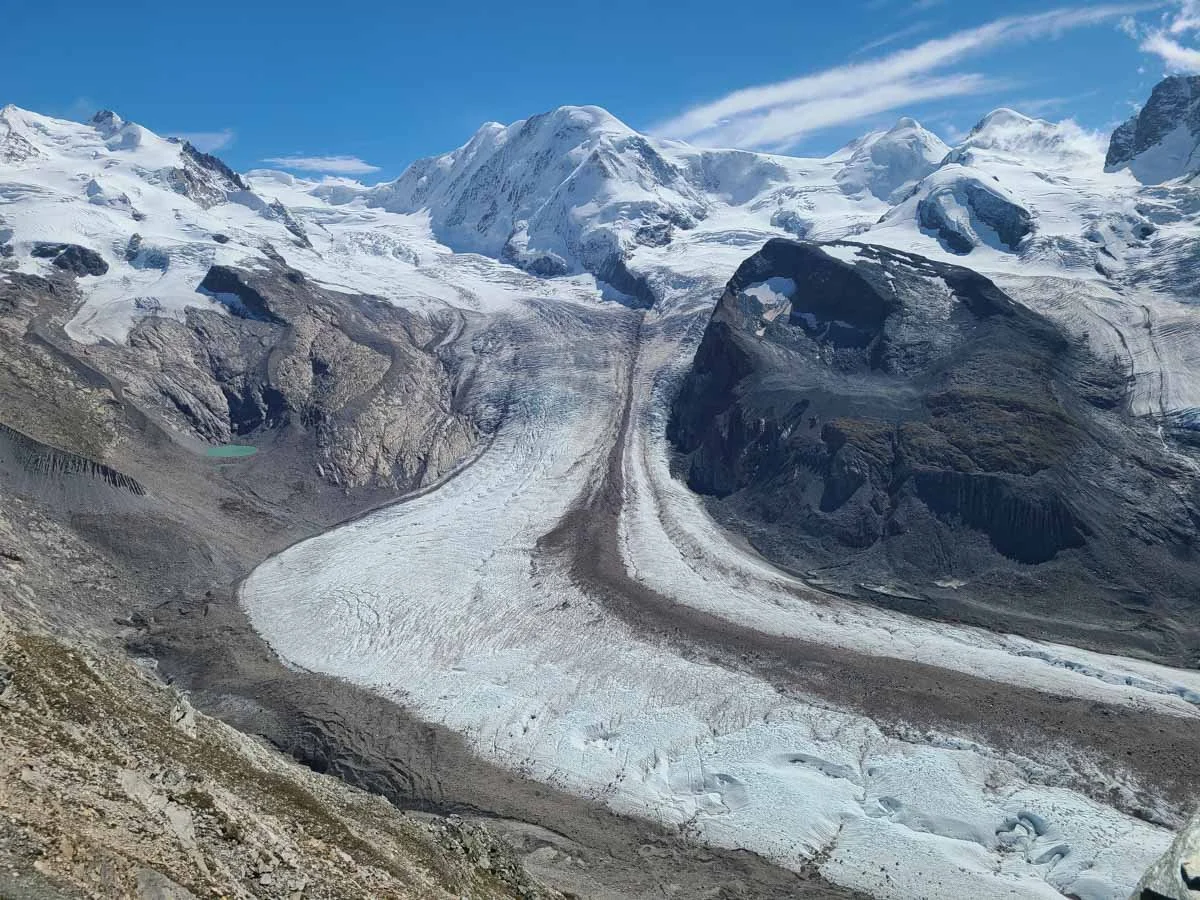
The incredible view of the Gorner Glacier from Gornergrat
While up here, walk the short scenic loop around the summit, take in the views, pop into some of the shops, grab a bite to eat if you’re hungry, and you can also visit the ZOOOM the Matterhorn exhibits, where you can have some cool virtual reality experiences of the Alps.
Plan to spend about an hour or so up here.
When you’re done at Gornergrat, we highly recommend hiking down to the next train station below (Rotenboden) rather than taking the train back down. The hike from Gornergrat to Rotenboden is beautiful, with views of the Matterhorn the entire way. It’s all downhill, and it can get a bit rugged, but it’s short and quick (it will take about 45 minutes to an hour).

Hiking from Gornergrat to Rotenboden
At the end of this hike near the Rotenboden station is one of the most famous spots in Zermatt- Riffelsee Lake.
This incredibly picturesque lake is well-known for its view of the Matterhorn, and for its perfect reflections of the mountain on clear and calm days. The best time to see these reflections are early in the morning or in the evening, so by this point in the day, you might get lucky!

Evening reflections at Riffelsee Lake in Zermatt
You’ll finish your hike from Gornergrat at Riffelsee, and when you’re done admiring the lake, you can simply walk to the Rotenboden station to take the next train back to Zermatt, or you can continue hiking to the next station down (Riffleberg).
The shortest route to Riffelberg will take you just 20-30 minutes, and it’s quite easy but very scenic and full of views, so we recommend it!
Hiking from Riffelsee to Riffelberg
In Riffelberg, take the next train back down to Zermatt and spend the evening in town. The nice thing about the Gornergrat Railway is that it actually runs pretty late into the evening (unlike many of the cable cars around the Alps!), so you should have plenty of time to fit everything in without rushing to make the last train back to Zermatt.
Day 6: Travel to Interlaken (with a detour)
On this day of your Alps itinerary, you’ll say goodbye to Zermatt and hello to the Jungfrau region- one of Switzerland’s most popular and scenic places!
You’ll travel by train from Zermatt to Interlaken, but along the way, you’ll make a detour to one of two places to spice up your travel a day a bit. You can choose between a famous Gatorade-blue alpine lake, or an overlook over the longest glacier in the Alps. I know- quite a choice to make!
Here are your options.
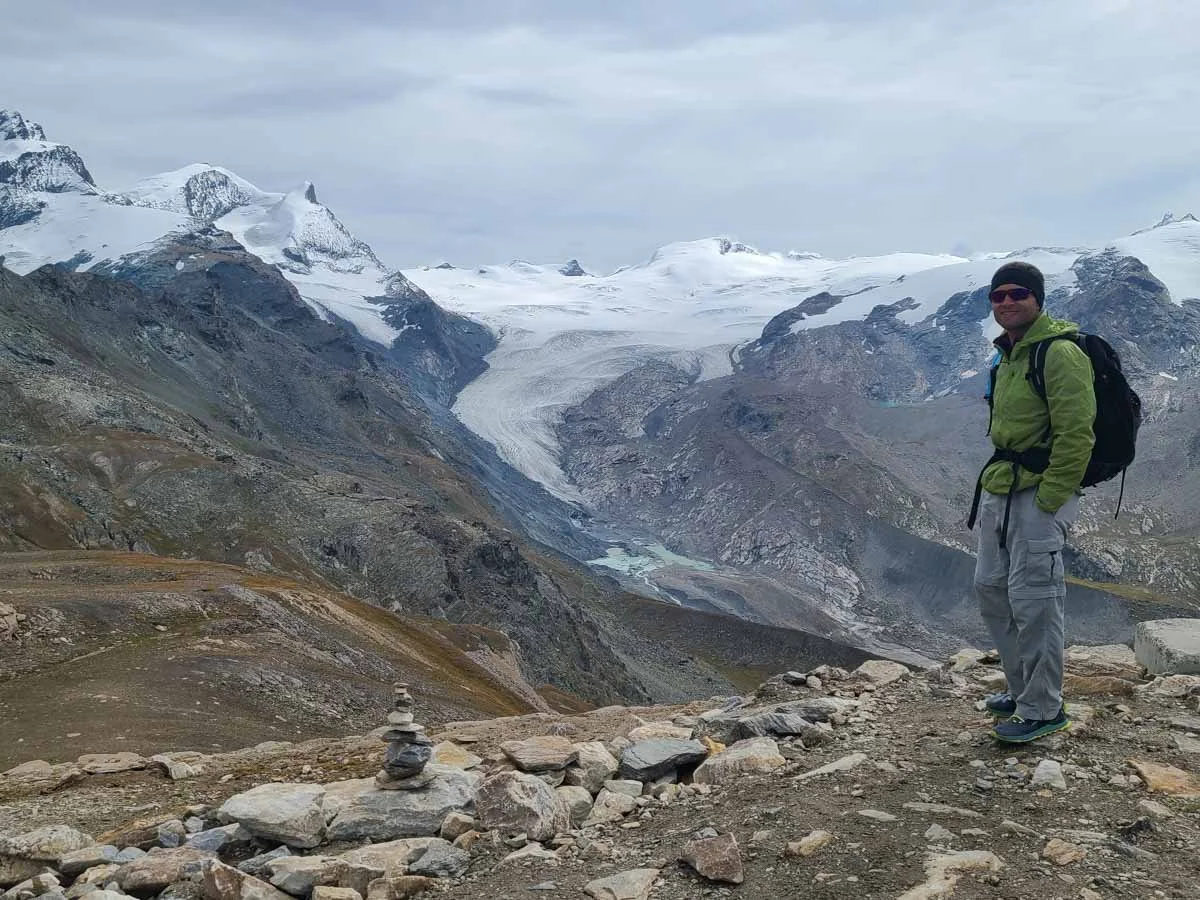
Visit the Eggishorn
If you’re opting for a glacier viewpoint to break up your travel, then today you’ll be visiting the Eggishorn viewpoint. It’s located in the Aletsch Arena, a mountain excursion area in Switzerland that sits between Zermatt and Interlaken. It encompasses a high mountain plateau and ridge with several cable car routes that will bring you up to different viewpoints over the massive Aletsch Glacier, the longest glacier in the Alps!
Today, you’ll only have time to visit one of these cable car routes and viewpoints, and we highly recommend making it the Eggishorn viewpoint. This is the highest viewpoint over the glacier, and from up here you can see its massive expanse as it cascades down the backside of the Jungfrau massif and wraps around the valley below.

Views of the Aletsch Glacier from the Eggishorn
It’s a great way to break up your travel day, and to even get a short hike in as well, as you’ll see in just a bit.
To get to the Eggishorn, you’ll take the train from Zermatt to the town of Fiesch. It’s a short detour off the route to Interlaken, requiring a train transfer in Visp.
Once in Fiesch, you’ll arrive right inside the cable car station for the Eggishorn. Buy your tickets here and hop on the next gondola!
The gondola will take you to a midstation (Fiescheralp), where you’ll disembark and connect to a cable car that will take you the rest of the way to the Eggishorn. On the way up, the views back down over the valley and across to the jagged peaks get better and better, and once you get high enough, you can actually spot the Matterhorn in the distance if it’s a clear day!

Views from the Eggishorn cable car, including a peek at the Matterhorn!
Once you’re at the top on the Eggishorn viewpoint, the views of the Aletsch Glacier will quickly appear, and they are truly breathtaking.
Take some time to walk around the short interpretive loop, stopping at different informational signs and a few different viewing terraces over the glacier. And since it will be about that time, grab some lunch at the mountain hut restaurant right near the cable car station.

Taking in views of the Aletsch Glacier from the Eggishorn scenic loop
We also highly recommend the hike up to the true summit of the Eggishorn, which is the small peak that can be seen from the cable car station.
It’s a short hike (less than a mile roundtrip), but it’s very steep and rocky. But the payoff is huge, as you’ll be rewarded with panoramic views over the Aletsch Glacier, the Jungfrau massif, and the surrounding Alps.

Standing on the Eggishorn summit

Hiking back down from the Eggishorn summit
The best part about this entire experience on the Eggishorn, though, was that it was so quiet! We felt like we found a true hidden gem in the middle of Switzerland, and we only saw a handful of other people at the top. It was a welcome respite from crowds at the other places on this Alps itinerary, that’s for sure!
We would recommend to plan on spending about 2.5 to 3 hours visiting the Eggishorn, which will include time for the roundtrip cable car rides and a hike to the Eggishorn summit.
When you’re ready, simply return to Fiesch on the cable cars and hop on the next train to Interlaken.
Visit Oeschinen Lake
If instead of an epic glacier view you’re after a pristine alpine lake, then head to Oeschinensee.
This lake has become a super popular destination in the Bernese Oberland region of Switzerland, and it’s no surprise why- with its bright blue color, vivid green meadows and picture-perfect mountain backdrop.
Oeschinensee was on our to-do list on our own Alps itinerary, but we just didn’t get to visit due to bad weather. But we definitely wanted to still put this epic place on your radar and give you the option to see it yourself, as this would make a perfect stopover on your travel day between Zermatt and Interlaken.
To get to Oeschinensee, you’ll travel to the town of Kandersteg. This town is pretty much on the way to Interlaken from Zermatt, so it doesn’t require a huge detour.
In Kandersteg, you’ll take a cable car most of the way up the mountainside, and at the top, it will be a quick and relatively easy walk to the shore of the lake.
At the lake, you can simply admire the views from shore and grab a bite to eat at the lakeside restaurant. Or, you can be a bit more active and rent a boat to take out on the lake, and even ride an alpine coaster!
But the thing we recommend most is the Oeschinensee Panorama Trail, a moderate 4.5 mile loop trail that climbs above the lake to incredible views over Oeschinensee. This hike will take about 2.5-3 hours to complete, so a visit to Oeschinensee can last about 5 hours or so if you include the cable car rides, the hike, and exploring around the lake shore.
When you’re ready, take the cable car back to Kandersteg and take the next train to Interlaken.
Arriving in Interlaken
Interlaken is the official gateway to the popular and scenic Jungfrau region of Switzerland. From Interlaken, trains go to both Lauterbrunnen Valley and Grindelwald Valley, and from either of these mountain towns, you can access the amazing high mountain plateaus of the Jungfrau region with a collection of cogwheel trains and cable cars. The mountain plateaus are in turn filled with epic hikes and viewpoints overlooking the famous Jungfrau massif.
Throughout the Jungfrau region, there are lots of little mountain towns you can choose to stay in, but for this Alps itinerary, we are going to assume you are staying in Interlaken. This is what we did, as it was slightly cheaper in terms of accommodation, and it was centrally located to all the things we wanted to do.
However, you can choose to stay in whichever town you like! Lauterbrunnen and Grindelwald are great bases for exploring the area, as you can easily access the chairlifts and gondolas to the higher plateaus from either one. There are also lots of quaint mountain villages perched above the valleys, and are super charming to stay in. However, the logistics for transportation to get between these towns and anywhere else in the region might be a little more complicated and time-consuming. We recommend taking a look at our massive Guide to the Jungfrau region to learn how to decide where to stay.
Over the next three days on this Alps itinerary, you’ll spend time in Lauterbrunnen Valley, Grindelwald Valley, and in the area around Interlaken, so we think Interlaken is a nice central location and we’ll describe our itinerary using Interlaken as your base.
Day 7: Explore Lauterbrunnen Valley and beyond
Yay…it’s finally time to start exploring the famous Jungfrau region! This is a great way to end your Alps itinerary.
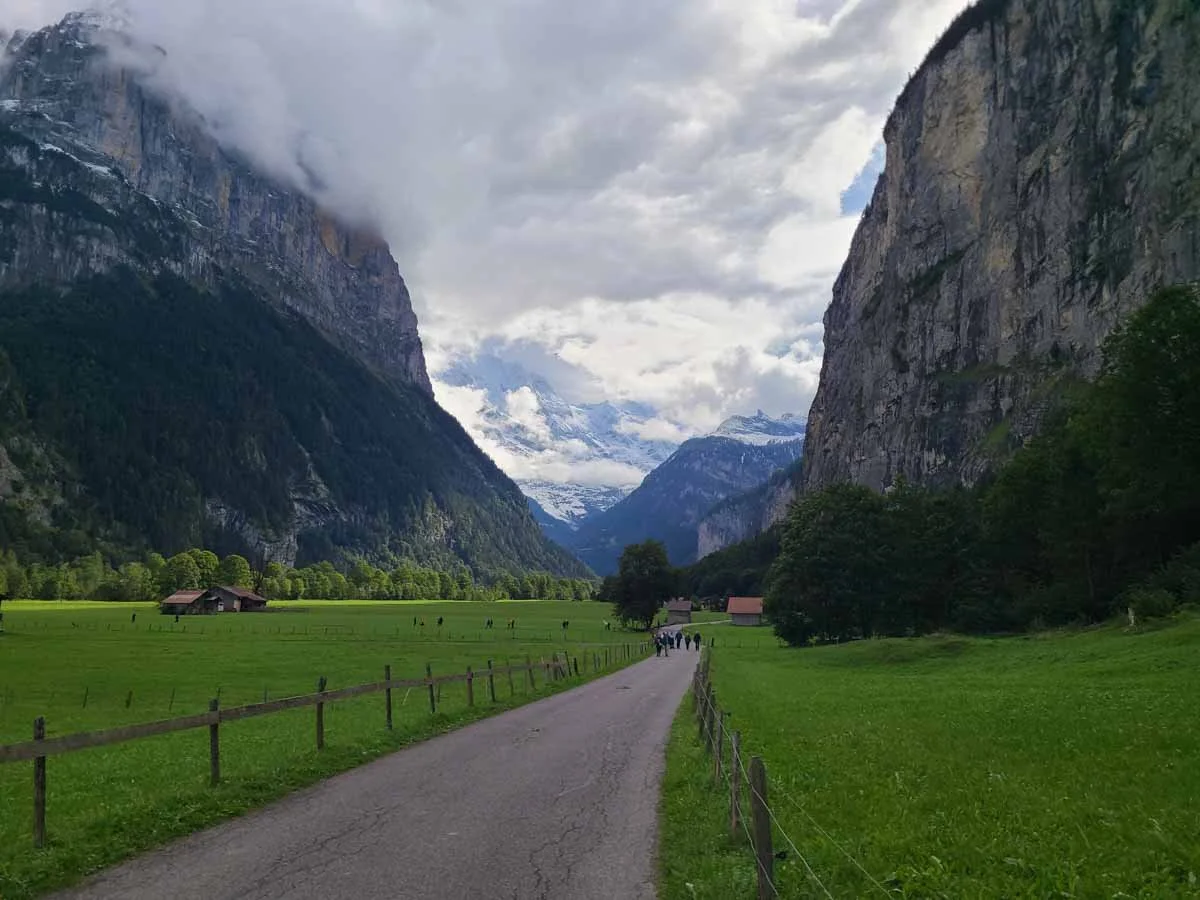
And first up is Lauterbrunnen Valley. The scenic town of Lauterbrunnen has Switzerland written all over it- with its towering cliffs, cascading waterfalls, mountain views, Swiss cows, and cute mountain architechure, it’s probably the scenery most people envision when they think of Switzerland. In fact, it’s so beautiful that it even served as inspiration for the hamlet of Rivendell in the Lord of the Rings series!

The picturesque Lauterbrunnen Valley
Not only is it beautiful, Lauterbrunnen also serves as a gateway to the high mountain plateaus of the Jungfrau region, and today, in addition to Lauterbrunnen, you’ll be visiting Murren and the Schilthorn on one of these high mountain plateaus.
Here’s how we would plan this day.
The Schilthorn
Take the train from Interlaken into Lauterbrunnen in the morning. Try to get an early start, because you’ll be visiting the Schilthorn first and you can get up there early to avoid the heavy crowds.
The Schilthorn is one of the best places to visit in the Jungfrau region. It’s 2,970 meter summit gives an epic view over the Jungfrau massif and the Swiss Alps. It’s also home to the Piz Gloria, a famous 360 degree rotating restaurant with panoramic views over the Alps!
The Schilthorn also has Spy World, a James Bond exhibit. We know, it seems kind of random, but the Schilthorn was actually used as a filming location for one of the James Bond movies!
To get to the Schilthorn, you’ll take a series of trains and lifts from Lauterbrunnen.
Once you arrive in Lauterbrunnen, a cable car station will be just across the street from the train station. Take this cable car up to Grutschalp. At this station, you’ll transfer onto a train that will take you to Murren.
Once in Murren, walk across town to find the cable car station for the Schilthorn. It will take about ten minutes to get there.
Take this cable car will first take you to Birg, where you can then transfer to the final cable car up to Schilthorn.
It’s quite the journey, but worth it!
Spend an hour or so at the Schilthorn, and then return on the cable cars to Murren. On the way down, we recommend spending some time at the Birg station. There are more viewing terraces here, as well as a fun Thrill Walk where you can walk across see-through platforms affixed to the cliffside.
Murren
Once back in Murren, spend some time exploring this cute car-free mountain town perched on the cliffs above Lauterbrunnen Valley.

The quaint mountain town of Murren

Murren, Switzerland
We recommend spending the next few hours doing one of two things depending on how adventurous you’re feeling.
The first option would be to hike the Northface Trail, a 6.8 km (4.2 mile) point-to-point hike that weaves through the subalpine meadows and farmland around Murren. Along the way, you’ll get amazing views out to the Alps.
The trail starts in Murren and ends in the small hamlet of Allmendhubel just above Murren. There’s a small restaurant here if you want to grab a bite to eat before heading back to Murren on a quick funicular ride.
The Northface Trail in Murren
The second option is to tackle the Murren via ferrata! This one-way via ferrata starts in Murren and ends in another mountain village, Gimmelwald. You can rent equipment for it (a harness, helmet and carabiners) from the Intersport store right in Murren and then tackle the course on your own, or if you feel more comfortable with a guide, you can always hire one.
This via ferrata looks like fun, but also like it’s quite a challenge, with exposed metal bars attached thousands of feet up on a cliffside, tight rope walks, and suspension bridges. So if you’re feeling a bit daring, this is definitely something to check out!
When you finish the via ferrata in Gimmelwald, you can return to Murren via cable car to return your rental equipment.
Once back in Murren after either the hike or via ferrata, return to Lauterbrunnen, but this time, we recommend a different route that the one you came to Murren on! Instead of travelling through Grutschalp, take the cable car down to a town called Stechelberg down in the valley. This town lies at the far end of Lauterbrunnen Valley. While you can take a bus from here back to Lauterbrunnen, there is a nice paved walking path that connects the two towns, and we recommend taking this back to Lauterbrunnen.
The path between Lauterbrunnen and Stechelberg

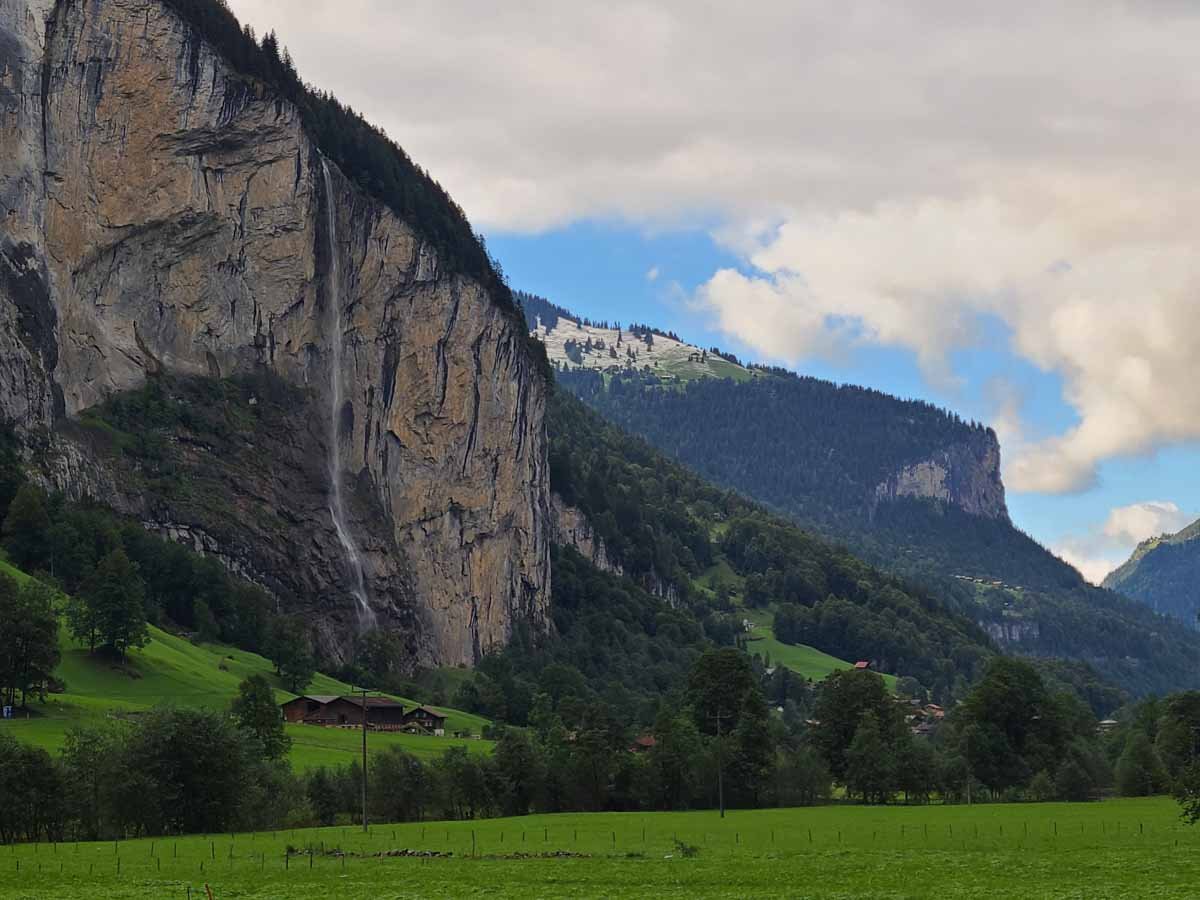
The scenic waterfalls of Lauterbrunnen
Walking through the valley is so peaceful. The valley is sandwiched between towering cliffs, and cascading down the cliff faces are 72 waterfalls (which is what makes this valley so idyllic and scenic!). See how many you can find as you stroll along the walking path back to Lauterbrunnen.
The walk between Stechelberg and Lauterbrunnen is about 6.5 km (4 miles) and will take about 2 hours to walk. However, we recommend making one stop along the way to Trummelbach Falls.
Trummelbach Falls is a popular spot in Lauterbrunnen. It’s one of Lauterbrunnen’s 72 waterfalls, but it’s unique in that it’s entirely within the cliffside rather than cascading down its face. Pretty cool!

One of the cascades of Trummelbach Falls
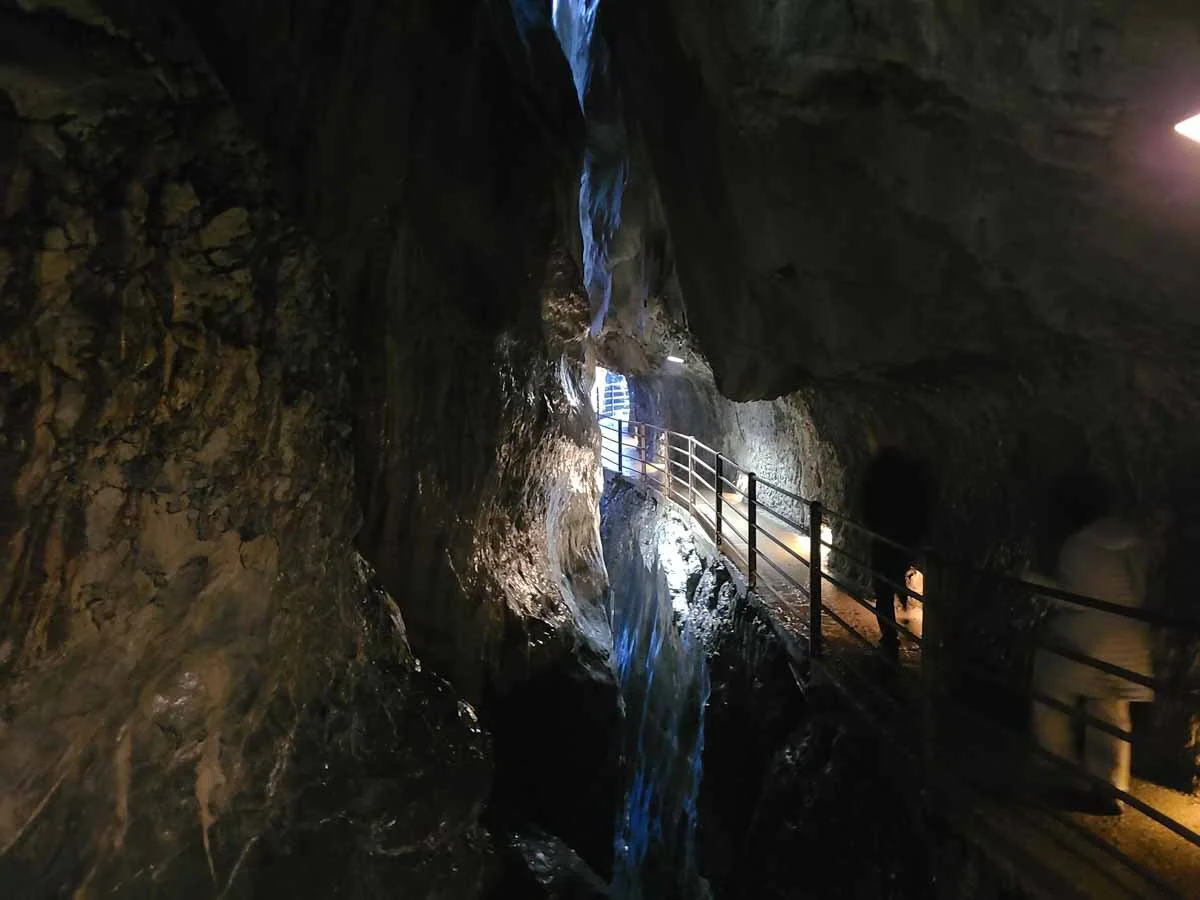
One of the walkways on the Trummelbach Falls path
A series of walkways and stairs will bring you through rocky tunnels and passageways alongside its ten powerful cascades, and you can hear and experience the power of Trummelbach Falls and see the unique formations it has created as it cuts its way through the mountain.
Trummelbach Falls is about halfway between Stechelberg and Lauterbrunnen. Simply show up at the entrance, buy your ticket, and head to the falls!
Once you’re done visiting Trummelbach Falls, continue the walking path to Lauterbrunnen (it should be about a 45 minute walk from Trummelbach Falls to town).
Once in Lauterbrunnen, the most prominent waterfall you’ll see tumbling down the cliffside is Staubbach Falls. It’s easy to see from almost anywhere in town, but you can take a quick 10 minute path to walk behind the waterfall as well (you can find the start of it here). And be sure to check out our Lauterbrunnen guide to learn about a few of our other favorite viewpoints around town!

Staubbach Falls sits on the right side of Lauterbrunnen Valley and can be seen throughout town
Spend the evening strolling around Lauterbrunnen, admiring the Swiss cows with their iconic bells, and grabbing dinner before returning on the train to Interlaken.
Day 8: Visit Grindelwald
On this day of your Alps itinerary, you’ll be exploring the other side of the Junfgrau region by heading into Grindelwald.
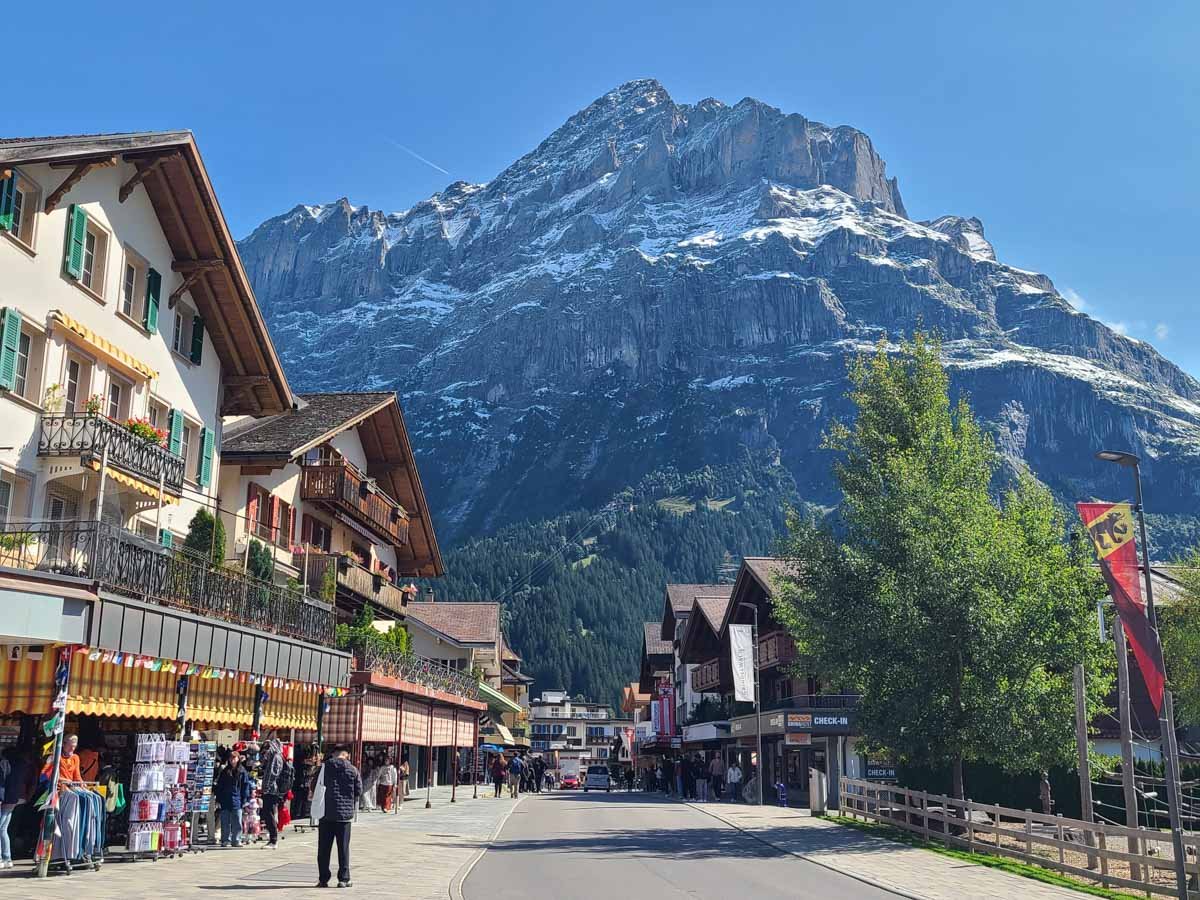
The town of Grindelwald
Like Lauterbrunnen, Grindelwald is another cute mountain town that serves as a base for adventures and hikes on the high mountain plateaus above the valley.
Here’s how we would plan the day!
MORNING
In the morning, you’ll get an early start and choose between two epic mountain excursion sites.
GRINDELWALD FIRST
The first is called, well, First. First is a popular mountain excursion site above the town of Grindelwald with epic views over the Eiger and the rest of the Alps above Grindelwald Valley, and there are a couple of fun and unique things to do here.

The Grindelwald First excursion site above Grindelwald Valley
The First Cliff Walk is a short walk along a metal pathway affixed to a cliffside. It’s a bit of a thrill and it has amazing views out over the Jungfrau massif and Grindelwald Valley. The walk ends at a viewpoint that hangs out over the cliffside. Expect there to be a bit of a line here (we had to wait about 20 minutes to take a picture here!).
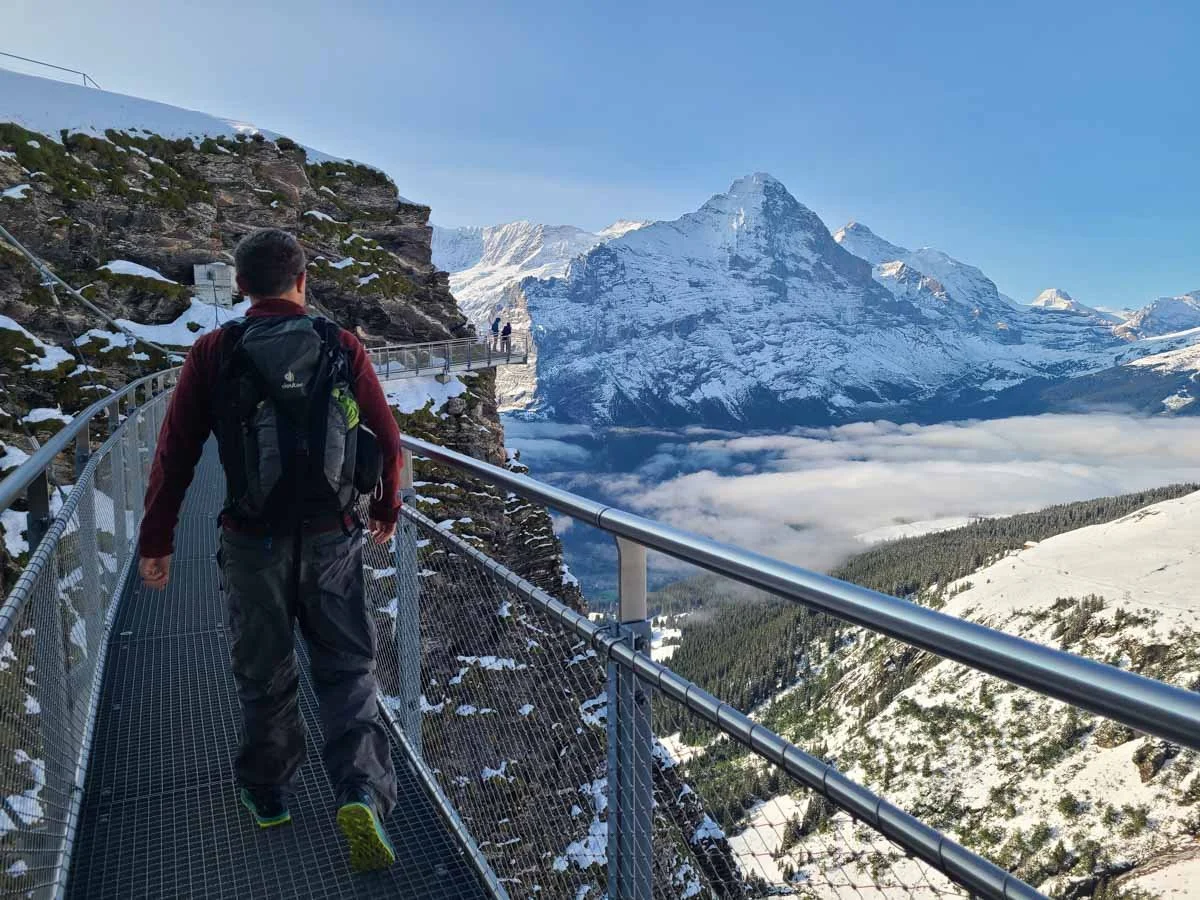
Walking along the Grindelwald First Cliff Walk

The viewing platform at the end of the First Cliff Walk
The hike to the famous Bachalpsee Lake also starts from First. This is a relatively short and straightforward hike through the subalpine meadows around First to a beautiful lake backdropped by the jagged peaks of the Alps. Normally, the bright greens of the surrounding meadows contrast beautifully with the lake’s deep blue colors, which is part of what makes the lake so famous, but in our case, the entire area looked more like a winter wonderland, and the paths were slick and challenging to navigate (again- this is why we recommend doing this Alps itinerary in peak summer months rather than shoulder months where the weather can be a bit of a mixed bag!). It was still beautiful nonetheless!

Bachalpsee Lake
You can also relax, grab some food, and enjoy the views from the patio at the Berggasthaus First restaurant right by the cable car station. We enjoyed sitting here watching the clouds roll in and out of the valley below.
Enjoying the views from Grindelwald First!
And if you’re feeling adventurous, there are a handful of activities that are part of the “Top of Adventure” experience at First. Two ziplines, mountain scooters, and trottibikes connect the different cable car stations between Grindelwald and First, and using these is a fun way to get down the mountain! You can choose to do just one, or a combination of them using an Adventure Package ticket that also includes unlimited rides on the First gondola!
The First Flyer is a zipline that travels up to 84 km/hr as it runs from First down to the midstation of Schreckfeld.
The First Glider is a different zipline where you lie flat on your stomach as you’re pulled backwards from Schreckfeld to First before making the fast ascent back down.
Then, from Schreckfeld, you can take a combination of mountain scooters and trottibikes to get to the midstation of Bort, and finally back down to Grindelwald.
How to get to First:
From Interlaken, take the train into Grindelwald from Interlaken Ost. Be sure to take the train all the way to its final stop (“Grindelwald”) and not the stop before it (“Gindelwald Terminal)”. From the train station, it’s about a ten minute walk to the First cable car station (follow the main street through town and look for signs for First).
The cable car ride to First is about 30 minutes and super scenic, so enjoy the ride! It passes through two midstations on the way, but simply stay on the gondola as it passes through to get all the way up to First.
Smiling at these gorgeous cable car views from the Grindelwald First cable car!
Jungfraujoch
The second option for the morning is to visit Jungfraujoch. Jungfraujoch is perhaps the most popular place to visit in the Jungfrau region. This high mountain excursion site is referred to as “The Top of Europe”- and for good reason, as it sits at the highest railway station in Europe at 3,454 meters up. And from this vantage point, you’ll certainly feel like you’re totally immersed in the mountain world of the Alps.
From this viewpoint, you’ll be surrounded by peaks and massive icefields and glaciers, including the famous Aletsch Glacier- the longest glacier in the Alps. In fact, this is the same glacier that you would have seen if you visited the Eggishorn earlier on in this Alps itinerary, but now you’ll get to see it from a different vantage point.
Jungfraujoch also has an ice palace with intricately carved ice sculptures, the world’s highest Lindt chocolate shop (yum!), a few different restaurants to choose from, and a hike that crosses the snow to the Monchsjoch Hut.
Visiting Jungfraujoch is definitely a unique experience to have if you want to really feel immersed in the Alps without having to do the hard work of mountaineering to get there! In fact, getting there is pretty easy, but it does require a few different modes of transportation.
How to get to Jungfraujoch:
From Interlaken, take the train to the Grindelwald Terminal station (the second to last stop on the train).
From here, the most direct route to Jungfraujoch is to take the Eiger Express gondola from Grindelwald to the Eigergletscher station. Then, in Eigergletscher, connect with the Jungfrau Railway that will bring you up to Jungfraujoch.
AFTERNOON
We recommend spending your afternoon on the high mountain plateau between the Lauterbrunnen and Grindelwald Valley and tackling some of the most epic hikes in the area.
The first is the Mannlichen Panorama Trail, a 5 km (3 mile) point-to-point hike with non-stop in-your-face views of the Jungfrau massif and surrounding Alps. Up on this plateau, you really get those idyllic Swiss views of rolling green meadows backdropped by massive snowy peaks, and this hike really showcases it!
Here’s how to get to the start of this epic hike:
If you visited First in the morning, head back to Grindelwald on the cable cars, and head to the Gindelwald Terminal station. Take the gondola from here directly to Mannlichen.
If you’re coming from Jungfraujoch, take the Jungfrau Railway back down to Kleine Scheidegg, and from here, transfer onto the Wengernalpbahn (a cogwheel train) to get to Wengen. Finally, at Wengen, you’ll take a cable car to Mannlichen.
Once in Mannlichen, walk the short but steep Royal Walk up to a viewpoint of the area before tackling the Mannlichen Panorama Trail. This scenic trail travels from Mannlichen to Kleine Scheidegg. You can hike it in either direction, but we recommend starting in Mannlichen as it will be mostly downhill, and the views of the Jungfrau massif will be in front of you the whole time.
Once you make it to Kleine Scheidegg, you can take the Wengernalpbahn back down to Grindelwald Terminal.
If you’d like, spend some time wandering the streets of Grindelwald and grabbing some dinner before returning to Interlaken.
Day 9: Choose a hike around Interlaken
Today is your last full day of your Alps itinerary, but we’ll make it a good one!
For your last day in the Alps, you can choose between two epic ridge hikes that are easily accessed out of Interlaken.
Schynige Platte
The first is the Schynige Platte area. This mountain excursion site lies at the end of a ridge above Grindelwald Valley. Up here are a number of hikes you can choose from of varying lengths and difficulties. You can choose to do a short scenic loop that sticks by the train station at the top, or you can do massive point-to-point ridge hike that connects Schynige Platte with First. No matter what you choose, you’ll get amazing panoramic views over either side of the ridge.
There’s also a restaurant up here so you can grab some lunch in between adventures.
To get to Schynige Platte, take a quick train ride from Interlaken to the town of Wilderswil, which is a town on the way into Lauterbrunnen and Grindelwald Valleys. In Wilderswil, you can transfer onto the Schynige Platte Railway, which will bring you up the mountain side on a scenic ride to the Schynige Platte station at the top.
A good day hike to do at Schynige Platte that will take just a few hours is the Schynige Platte Panorama Trail, a 6 km (3.7 mile) loop along the ridge.
If you want to spend all day on a challenging trail, then take on the Faulhornweg, a 16 km (10 mile) hike that will bring you all the way to First above Grindelwald. If you plan to do this, start your day early so that you can be sure you’ll catch the last cable car from First back down to Grindelwald. From Grindelwald, you can take the train back to Interlaken.
Brienzer Rothorn
Your other option for an amazing ridge hike is to hike the Brienzer Rothorn Trail. This is a point-to-point incredibly scenic ridge trail that connects the Rothorn Kulm viewpoint above the town of Brienz to the Turren cable car station, and spans part of the mountain ridge above Brienz lake.
To get here, you’ll take a train from Interlaken to Brienz at the far end of Brienz Lake (it should take about 20 minutes or so).
Then a scenic cogwheel train (the Breinz Rothorn Bahn) leaves Brienz and travels up through the mountains to Rothorn Kulm. Spend some time enjoying the views up here before taking off on the ridge trail.
The Brienzer Rothorn Trail is about 5.4 km (or 3.3 miles) and will take you to the Turren cable car station, where you can catch a cable car ride down to the town of Lungern. From here, take the train back to Interlaken.
Harder Kulm
Once back in Interlaken from either adventure, if you still have some time and energy left, we recommend taking the funicular up to the Harder Kulm viewpoint (the station is located here near the Interlaken Ost train station).
A quick ride will take you up to a viewpoint and restaurant overlooking the entire Interlaken area, the distant Jungfrau massif, Brienz and Thun lake, and the entire Jungfrau region that you just spent the last three days conquering. It’s a great way to end your Alps itinerary!
Day 10: Fly out
Sadly, your epic French and Swiss Alps itinerary has come to an end, as all good things do. Today, you’ll head back via train to Geneva to catch your flight out.
With our Alps itinerary, you’ll have seen some of the best sights the French and Swiss Alps have to offer, but likely, you’ll be dreaming of the next time you’ll be able to return, as there is so much to see and do- it’s impossible to see it all in just ten days. We know we are!
How to shorten or extend this Alps itinerary

Have more or less than ten days to explore the Alps?
Here’s what we recommend!
If you have 9 days, we recommend cutting Day 6 from this Alps itinerary. Of course, you’ll still travel from Zermatt to Interlaken, but don’t make any detours. Head straight to Interlaken in the morning to ensure you have most of the day to explore in the area, and basically jump right into the activities described on Day 7. You may have to cut something out depending on how you late you get started.
With 8 days, cut Day 6 like we just described, and then choose one day from the Jungfrau region to cut out.
If you have less than eight days for this Alps itinerary, we recommend just removing one location entirely. If you try to see it all with such a short amount of time, we think your trip will just feel too rushed, and you won’t get to explore any one place completely.
We’d recommend combining Zermatt and Chamonix, or combining Zermatt and Interlaken. This will allow you to reduce transportation time and costs and spend about 2 to 3 days in each place.
With more than ten days for an Alps itinerary (lucky you!), spend an extra day or two in any of the places you want. We have full itineraries for up to four days in Chamonix, and up to 4 days in Zermatt as well. Plus, we have massif guide all about the Jungfrau region of Switzerland which shares more amazing things to do there and how to plan out your time most efficiently.
French and Swiss Alps Itinerary Map
We made this map to help orient you to all the places you’ll see on this Alps itinerary. We’ve color coded activities by day to make it easier to visualize.
More France and Switzerland Guides
Want more resources to help you plan your perfect Alps itinerary? Be sure to check out all our France and Switzerland guides for more inspiration and travel tips!
CHAMONIX GUIDES
Best Things to Do in Chamonix in the Summer (+ Complete Summer Travel Guide!)
The PERFECT One to Four Day Chamonix Itinerary (Summer Edition)
ZERMATT GUIDES
Best Things to Do in Zermatt (+ Complete Summer Travel Guide!)
The PERFECT One to Four Day Zermatt Itinerary (Summer Edition)
How to Visit Matterhorn Glacier Paradise in Zermatt + BEST Things to Do
How to Visit Rothorn, Blauherd, and Sunnegga in Zermatt + BEST Things to Do
The Matterhorn Glacier Trail in Zermatt: Complete Trail Guide, Map + Tips
How to Hike to the Hornlihutte in Zermatt: Complete Trail Guide
Hiking the Crystal Trail (Kristallweg) in Zermatt: Complete Trail Guide, Map, + Tips
JUNGFRAU GUIDES
Are you planning to visit the French and Swiss Alps? We hope this Alps itinerary helps you plan your perfect trip! Let us know if you have any questions in the comments below, and as always, happy travels!