Best Hikes in Mount Rainier National Park (+ Tips, Maps, and More!)
Are you looking for some epic hikes in Mount Rainier National Park to tackle on your next visit? The good news is that there is no shortage of amazing trails that bring you through wildflower-filled meadows, to waterfalls and lakes, and to epic viewpoints of Mount Rainier. The bad news is that you might have trouble picking which ones you want to do! In this guide, we’ll help you out by sharing our favorite Mount Rainier National Park hikes as well as give you all our best tips for hiking in the park.

Mount Rainier National Park is the perfect destination for hikers. The hikes in Mount Rainier have a little bit of everything…epic waterfalls, meadows of colorful wildflowers that make you feel like you’re in a scene out of the Sound of Music, walks through peaceful old-growth forests, opportunities to view cool wildlife, and, perhaps most importantly, jaw-dropping views of Mount Rainier and its glaciers.
And the great part about hiking in Mount Rainier is that there really is a trail for everyone, from easier walks through forest and meadows, to trails that climb to distant panoramic viewpoints of Rainier and its foothills, to hikes that take you into the rocky and rugged subalpine terrain and bring you about as breathtakingly close to Mount Rainier as you can get without actually climbing it. And don’t worry, even the easiest of the Mount Rainier trails still rewards hikers with incredible views, so regardless of whether you’re looking to do a short and easy Mount Rainier hike or one that’s more challenging, you won’t be disappointed!
But herein lies the problem… with almost 300 miles of trails weaving around every possible corner of Mount Rainier, how do you choose which hikes to do with a limited time in the park? We’re glad you asked!
In this guide, we want to share with you all our favorite hikes in Mount Rainier National Park (plus some ones that are still at the top of our own bucketlist for next time!). This list includes hikes ranging from very easy to moderately challenging, so there is something for everyone. Plus, we’ll share all our best tips for hiking in Mount Rainier National Park, including how to plan for your visit, what to bring, when to go, and more. So, let’s get to it!
In this Mount Rainier National Park hiking guide:
How to Spend One Day in Mount Rainier: Paradise and Sunrise
Mount Rainier Itinerary for 3 to 4 Days
Where are the Best Hikes in Mount Rainier National Park?
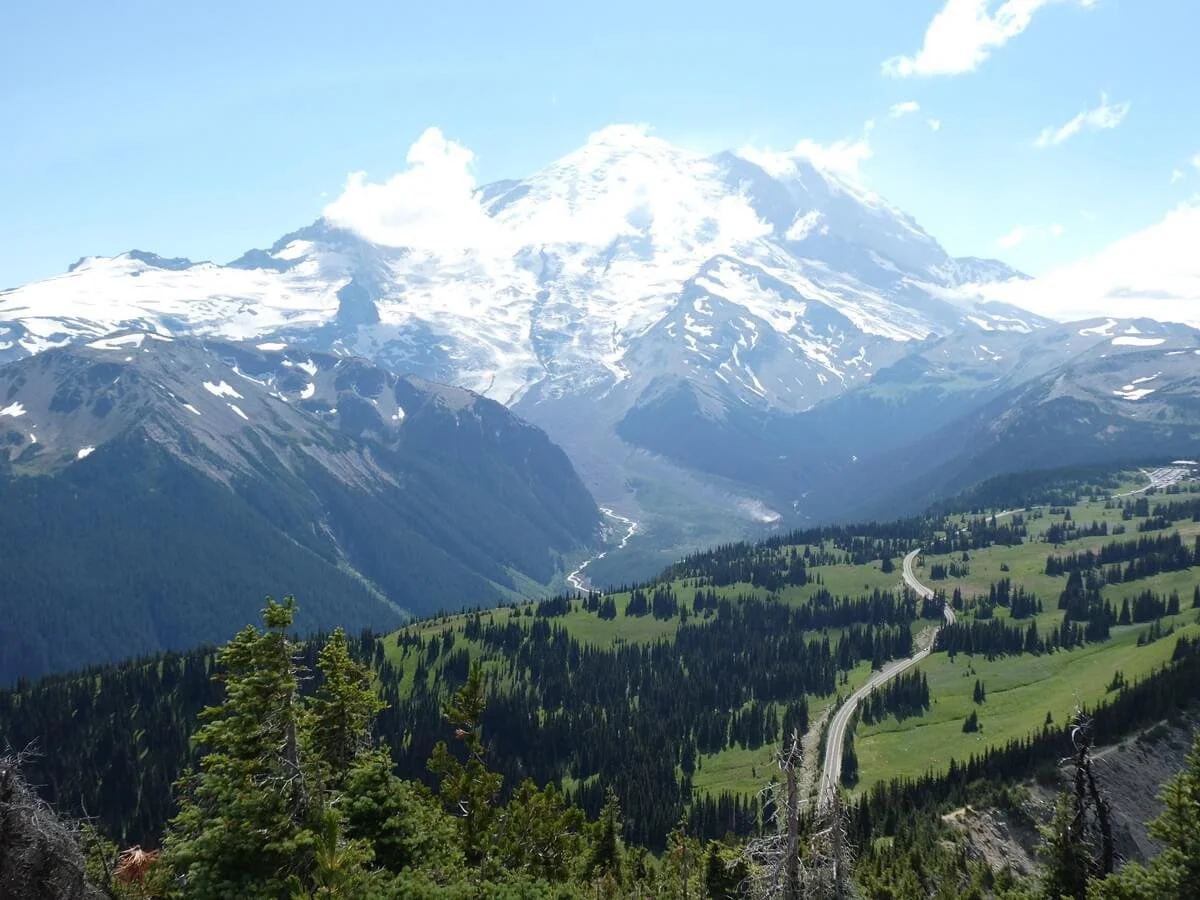
The road into Sunrise, where some of the best hikes in Mount Rainier are found!
Before we start, it’s definitely important to point out that Mount Rainier National Park is big.
So big, that there are 5 different regions of the park found along the different sides of the mountain, and four separate park entrances… and it can take up to a couple of hours to get between them. Yea, it’s big.
Each region of Mount Rainier has its own collection of hiking trails, so here we’ll summarize each region to give you a better idea of where you might want to focus your time when choosing your Mount Rainier hikes.
Paradise- Paradise is located on the southern slopes of Mount Rainier and is hands-down the most popular and visited region of Mount Rainier National Park. It’s a gorgeous area, famous for its meadows of colorful wildflowers and unobstructed close-up views of Mount Rainier itself. Because of this, Paradise has some of the best hikes in Mount Rainier where you can walk through the meadows, hike to waterfalls, spot wildlife, and of course, get those epic mountain views. Because it’s so popular, Paradise can get pretty crowded, so expect to share the trails with lots of people here.
Longmire- This region of Mount Rainier is a National Historic Area located at the Southwest corner of the park, just west of Paradise. Hikes in this region are heavily forested, but if you hike up high enough to the ridges and viewpoints, you can clear the treeline and get beautiful views of Mount Rainier.
Ohanapecosh- Located in the Southeast region to the east of Paradise, this part of the National Park has a couple of easy hikes along rivers and creeks through old-growth forest and to waterfalls. These Mount Rainier hikes aren’t so much about those epic mountain views like in other areas of the park, but more about peaceful forest walks, and they’re good if you’re looking for something on the easier side or if Mount Rainier isn’t out (which happens often!).
Sunrise- Sunrise is the second most popular spot in the park, located on the eastern slopes of the mountain, and actually has our personal favorite hikes in Mount Rainier National Park! The road into Sunrise takes you to the highest point that you can drive to in a car, and, like Paradise, this area is packed with mountain views, beautiful meadows, and wildlife. The trails in the Sunrise area include easy meadow walks with gorgeous views, and rugged alpine hikes to stunningly close views of Mount Rainier and its glaciers.
Carbon River/Mowich Lake- This area is located in the Northwest corner of Mount Rainier and is relatively quiet compared to the more popular areas like Paradise and Sunrise. The Carbon River area is currently only accessed by foot (or bike) as the old washed out road has been converted to more of a trail, but the Mowich Lake area has access via a long rough dirt road which leads to the trailheads for a couple of great Mount Rainier hikes through forest and subalpine meadows. These hikes lead to great views for those willing to make the trek out here.
Mount Rainier entrances
There are four main entrances through which you can enter Mount Rainier National Park and access the five regions we summarized above.
The Nisqually Entrance: This is located in Ashford, in the Southwest corner of the park, and gives access to Paradise Valley Road, which drives through Longmire (driving time: 6 miles/12 minutes) and up to Paradise (driving time: 18 miles/36 minutes).
The Stevens Canyon Entrance: This entrance is located in the Southeast region of the park, in the Ohanapecosh area. From here, Stevens Canyon Road brings you up to Paradise (driving time: 21 miles/40 minutes). It connects with Paradise Valley Road that goes back down to Longmire and Ashford.
The White River Entrance: This is the entrance for the Sunrise area of the park. From this entrance, it’s a 14 mile drive that takes about 40 minutes as the road climbs almost 3,000 feet to the Sunrise parking lot.
Carbon River/Mowich Lake Entrance: This gives access to the Northwest corner of the park. However, unlike the other entrances, there is no formal entrance gate into either area of this region, though a park pass is still required! Make sure to have already purchased your pass at another entry station or online in advance (more on this below). Like we said above, Carbon River no longer has vehicle access, but Mowich Lake does via 15 miles of rough washboarded gravel road.
To give you an idea of how big Mount Rainier National Park is and how spread out the Mount Rainier trails can be, here are some driving times between the different regions of the park:
Paradise to Sunrise: 2 hours (about 50 miles)
Paradise to Mowich Lake: 3 hours (about 100 miles)
Paradise to Ohanapecosh: 45 minutes (about 20 miles)
Sunrise to Mowich Lake: 3 hours (about 80 miles)
Ashford (near Longmire) to Ohanapecosh: 1 hour (about 35 miles)
Ashford to Sunrise: 2.5 hours (about 70 miles)
As you can see, there are some big drive times between the different areas of the park. With less time, you’ll likely be focusing on Mount Rainier hikes in just one or two sections of the park. If you have several days, you can visit more areas.
Mount Rainier National Park map
This Mount Rainier map is taken right from the park brochure. We’ve highlighted the different regions and entrances to give you an idea of where everything is in relation to one another.

This map taken from the National Park Service brochure is labeled with the major entrances (white) and main regions (blue) where all of the best hikes in Mount Rainier are found
Things to know before hiking in Mount Rainier National Park
Here are just a few things to keep in mind before hitting the trails in Mount Rainier.
When is the best time to hike in Mount Rainier National Park?

One of the best times to hike in Mount Rainier is during wildflower season in July and August!
The best time to hike in Mount Rainier is generally early to mid- July through to late September or early October, depending on conditions. In this timeframe, you’re most likely to have little snow on the trails, facilities will be open, and access roads are likely to be open.
Keep in mind, though, that snow can linger on some of the high elevation trails well into July. When we visited in mid to late July, we still saw lots of snow on the Skyline Trail, and some snow patches on trails throughout Sunrise. But at this point, it should be doable without the need for special winter gear (though a pair of trekking poles would be useful!). Make sure to check up on trail conditions on the park’s site, and also read fellow hiker’s reviews on AllTrails to get a good idea of what the conditions will be like before you hike in Mount Rainier.

Some hikes in Mount Rainier hold onto snow will into the summer season!
July and August are certainly the busiest months in the park, but this is when the wildflowers are in bloom. Fall has cooler weather and fewer crowds, but less bugs, and the colorful wildflowers are replaced with colorful fall undergrowth along the trails.
Also be sure to check on road conditions and closures before heading out. The only road that doesn’t close for the winter is the road from Ashford into Longmire and Paradise (through the Nisqually Entrance). Steven’s Canyon Road to Paradise, the road to Sunrise, Mowich Lake Road, and WA-410 all close for winter, generally from about late September/early October to late June/early July (depending on the specific road and that year’s conditions).
Mount Rainier National Park entrance fee
To hike in Mount Rainier National Park, you’ll need to have a park pass, which costs $30 per vehicle and is good for 7 consecutive days in the park. You can buy it in advance online or at one of the park entrance gates at the Stevens Canyon, Nisqually, and White River Entrances. If you buy it online, be sure to save it to your phone ahead of time or print it out and bring it with you to show at the park gates, because you won’t always be able to rely on cell service out here!
But as of recently, you don’t need to think about just the park pass to get into Mount Rainier. There’s now one more piece to the puzzle for hiking in Mount Rainier…
Reservations for Mount Rainier National Park

Lines often form at the more popular entrance gates to Mount Rainier- reservations will hopefully solve this!
Due to a rise in visitors, Mount Rainier National Park has implemented a timed entry reservation system for its two most popular regions…Paradise and Sunrise. So if you want to hike in Mount Rainier, you’ll definitely have to think in advance about where you want to hike and plan out all necessary reservations accordingly. (Hint: There is a still a way to hike in Mount Rainier without reservations, we’ll cover that in just a sec…)
We give more information in our Mount Rainier itinerary and guide, but here are the need-to-know details for the Mount Rainier reservation process. Also keep in mind that a reservation for Paradise will not also get you into Sunrise, and vice versa. Two separate reservations will be needed if you want to visit both!
Reservations for Paradise
Reservations to enter Paradise are needed between May 24th to September 2nd between 7 am and 3 pm. If you visit outside these date or times, you don’t need to make an advanced reservation (you’ll just need the park pass!).
The reservations are good for both the Nisqually Entrance and the Stevens Canyon Entrance.
The reservation cost $2 and is per vehicle (not per person!).
The reservation is a timed entry, meaning you’ll select a two- hour window of time that you want to enter the park, but once you’re in, you can spend the rest of the day in the park.
Paradise reservations are available on recreation.gov and are released at 8 am Pacific Time about 90 days in advance in blocks of about one month, as follows:
On February 21st, reservations open for visits between May 24th – June 30th.
On April 1st, reservations open for visits between July 1st – July 31st.
On May 1st, reservations open for visits between August 1st- September 2nd.
You can also get next day reservations (great for those planning a more last- minute trip!), which open on recreation.gov at 7 pm Pacific Time the day before your planned visit starting on May 24th.
Reservations for Sunrise
Sunrise reservations are required from July 4th to September 2nd between 7 am and 3 pm (again, if you visit outside of these dates and times, no reservations are needed!).
This reservation is good for entry through the White River Entrance of the park.
Similar to Paradise, reservations are for a timed entry and available on recreation.gov for $2 each.
Advanced reservations open up roughly 90 days ahead of time at 8am Pacific Time in about one month blocks as follows:
On April 1st, slots open for July 4th-July31st
On May 1st, slots open for August 1st-September 2nd
Some slots are saved for a next day timed entry, and these are released into the system at 7 pm PT the day before, starting on July 3rd.
Keep in mind that reservations are likely to go pretty fast, so be sure to have an account on recreation.gov set up in advance and be on the site ready to click once reservations open!
For tons more information with answers to any questions you might have about the reservation process, check out the FAQ section on the National Park site.
Can I hike in Mount Rainier National Park without reservations?
The good news is that, yes, the system is flexible enough so that you can still hike in Mount Rainier even if you didn’t manage to get a timed entry reservation. Phew, thank goodness! Securing reservations and permits these days can be hard!
The best way is to simply get to Mount Rainier before timed entry reservations kick in (i.e. before 7 am) or you can wait until after 3 pm. Getting there before 7 am is ideal because it will give you the entire day to tackle the hikes in Mount Rainier, but many people might have the same idea, making it a busy time to go and with long lines at the entry gates. Getting there after 3 pm is doable in the summer months when longer daylight means you can still squeeze in a shorter hike or two before sunset.
You can also plan your visit to the park in the shoulder seasons before and after reservations are required for entry. If you’re looking to hike in Mount Rainier, we would recommend planning on coming after those dates (so, in the fall) because it’s more likely that trails will still be snow-free and access roads will be open.
Another great way to hike in Mount Rainier without a reservation is to have a camping reservation or permit for a campground that is located in either Paradise or Sunrise…so either Cougar Rock or White River Campgrounds. Your camping permits will basically take the place of a timed entry reservation. The former will get you into Paradise without a timed entry reservation on the days your camping reservation is good for, and the latter will get you into Sunrise without timed entry on the days your camping permit is good for. This also applies to any lodging you have in the park (so, if you are staying in either the Paradise Inn or the National Park Inn, you won’t need timed entry reservations for Paradise for the duration of your stay).
And of course, if you don’t have reservations, you can always focus your time on the Mount Rainier hikes found outside of Paradise and Sunrise. Yes, Paradise and Sunrise are the more popular areas and have great hiking trails, but there is so much more to the park than just these two areas, as you’ll see soon in our list of favorite hikes in Mount Rainier…speaking of which…
Best Hikes in Mount Rainier National Park (By Region)
Okay, now that we got all the boring (but important!) information out of the way, let’s get to the good stuff!
This list of Mount Rainier hikes is arranged by the five different regions in the park to help you figure out where you might want to focus your time.
Hikes in Mount Rainier National Park: Sunrise

The parking lot and visitor center in Sunrise- the start of some of the best hikes in Mount Rainier National Park
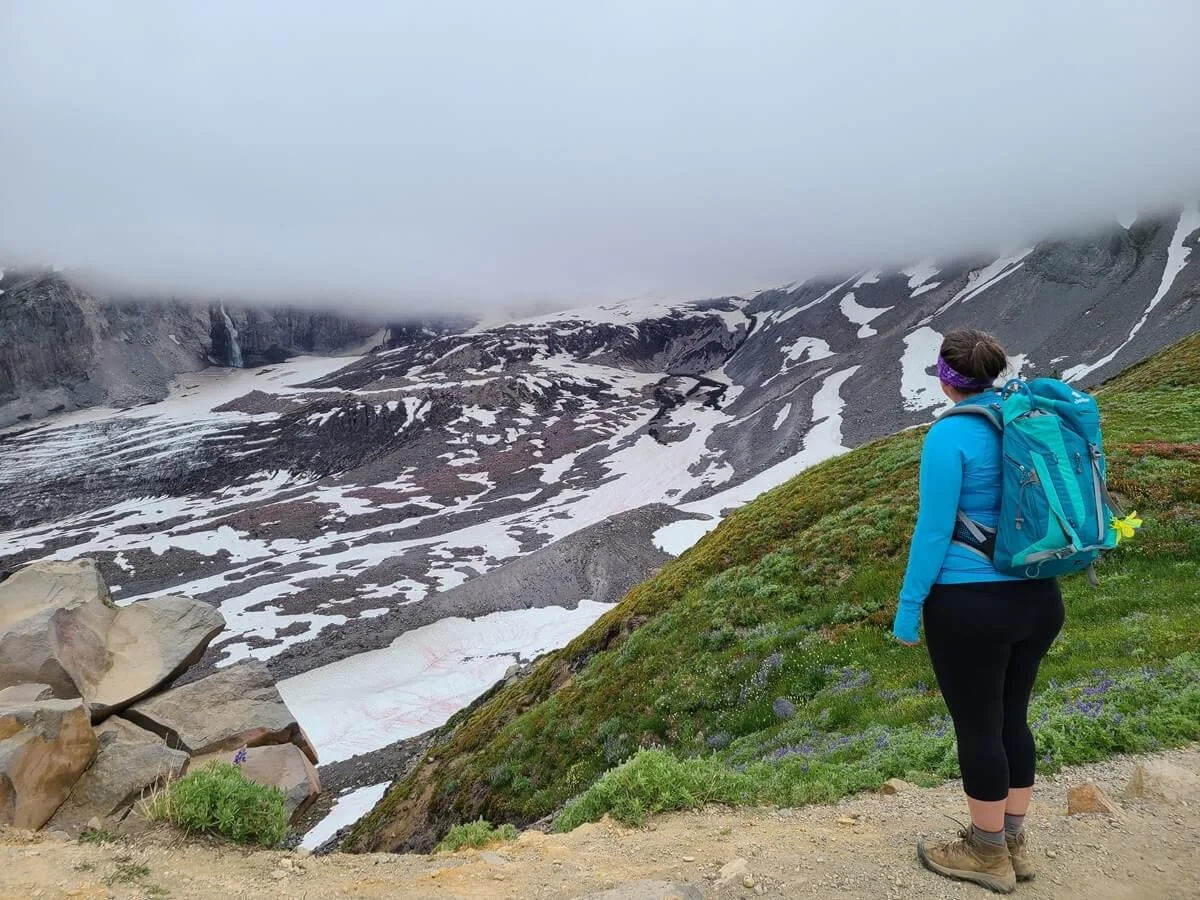
Sitting at 6,400 feet, Sunrise is the highest point in the park you can reach with a car, and from up here, the views of Mount Rainier are absolutely stunning. A whole network of intersecting trails takes you through meadows and wildflowers to views of Mount Rainier, the Emmons Glacier, and the surrounding foothills and valleys. While it’s the second most popular place to visit in the park, Sunrise was our personal favorite, and had our favorite hikes in Mount Rainier!
Map of Mount Rainier hikes in Sunrise

This map of Mount Rainier hikes in Sunrise can be found at the visitor center in Sunrise. We’ve labeled most of the Sunrise hikes we talk about below with different colors to better orient you to the area!
Mount Fremont Lookout Trail

Staring out at Mount Rainier from the Mount Fremont Lookout
Distance: 6 miles out and back
Elevation gain: 1,100 feet
The Mount Fremont Lookout Trail is one of the most popular hikes in Mount Rainier, famous for its epic views of the mountain from an historic fire lookout.
This Mount Rainier trail is relatively easy, starting with a quick climb from the Sunrise parking lot up to the Sourdough Ridge, where you’ll get huge views out to Mount Rainier and over the entire Sunrise area.

Epic views from the Mount Fremont Lookout Trail
The trail then crosses by Frozen Lake and continues to steadily climb along the slope of a ridge that ends at the Mount Fremont Lookout. All along the way, the views of Mount Rainier are stunning, and if you keep your eyes peeled, you’ll likely spot mountain goats grazing in the meadows below!
While there is a steady climb, the trail never gets too steep, and there is nothing technical, but the pay-off is huge on this Mount Rainier hike. (And a little tip: Many people like to hike to the Mount Fremont Lookout for sunrise or sunset to capture the amazing alpenglow off the mountain from the trail!)

Alpenglow at sunset from the Mount Fremont Lookout Trail in Mount Rainier
Sourdough Ridge to Frozen Lake Loop

Views from the Sourdough Ridge Trail in Mount Rainier
Distance: 3 mile loop
Elevation gain: 500 feet
If you’re looking for a Mount Rainier hike that’s a little bit easier but still packed with views, then hiking the Sourdough Ridge Trail to Frozen Lake is a great option. The Sourdough Ridge Trail is what most hikers in the area take, as it leads to several other popular hikes in Sunrise, but it’s absolutely worthy enough to do on its own, especially if you’re looking for something a little bit shorter and easier!
A quick climb from the Sunrise parking lot will get you up to the Sourdough Ridge. Once on the ridge, there is some climbing left but it’s mostly easy hiking up here, and with perfect views out to Mount Rainier to enjoy as you go.
Views over Sunrise from the Sourdough Ridge Trail in Mount Rainier
Once at Frozen Lake, you’ll come to a five-way intersection. You can either backtrack the way you came back to the Sunrise parking lot, or follow signs for the Wonderland Trail back to the Sunrise parking lot to make it a loop (this will be the trail to your immediate left when arriving at the junction from Sourdough Ridge).
Dege Peak

Smiling on top of Dege Peak- an awesome short hike in Mount Rainier National Park
Distance: 4 miles roundtrip
Elevation gain: 770 feet
Dege Peak is a great Mt. Rainier hike to avoid the larger crowds in Sunrise that stick mostly around the Frozen Lake area. This trail doesn’t lead to those epic in-your-face views of Mount Rainier that many Sunrise trails do. Instead, it actually takes you further away from the mountain to a viewpoint with 360 degrees views out to Mount Rainier, the distant Cascades, and the entire Sunrise area. It’s a great hike for a different perspective of the mountain, and it’s not overly long or difficult, either.
To hike Dege Peak, you’ll hike up from the Sunrise lot to Sourdough Ridge, but instead of hiking west towards Frozen Lake along the ridge where most other Sunrise hikes are, you’ll hike east along the ridge. The views of Rainier are just as amazing on this side of the ridge (though you’ll keep having to turn around for them in this direction!). It’s a steady climb along the ridge to the junction for the Dege Peak spur trail. This last .3 miles up the spur trail to the summit is the steepest and will get your heart pumping, but the view at the summit is totally worth the climb.
Views of Mount Rainier dominate the hike to Dege Peak!
On the way back from Dege Peak to Sunrise, you can now enjoy the non-stop views of Mount Rainier that are now entirely ahead.
Sunrise Rim Trail to Glacier Overlook

View from the Glacier Overlook in Mount Rainier National Park
Distance: 3.4 miles roundtrip
Elevation: ~400 feet
The Sunrise Rim Trail leaves from the opposite end of the Sunrise parking lot than the Sourdough Ridge Trail. The views of the mountain aren’t as constant as those from the Sourdough Ridge (at least along this beginning portion of the trail), but the Sunrise Rim Trail provides a relatively easy hike through wildflower-filled meadows, past a small lake, and to two really amazing viewpoints of Mount Rainier and the Emmons Glacier (which just happens to be the largest glacier in the lower 48…no big deal, right?!).
After just 0.1 mile from the parking lot, you’ll come to Emmons Vista viewpoint, which provides a great view of Mount Rainier and the Emmons Glacier.

The view of Mount Rainier from Emmons Vista
From there, it’s a gradual downhill walk where you’ll lose about 150 feet of elevation before flattening out for the next ¾ mile. It’s a generally easy walk through trees, meadows and wildflowers until you reach Shadow Lake, a small picturesque tarn tucked between the trees.

Hiking the Sunrise Rim Trail in Mount Rainier
From Shadow Lake, the bulk of the climbing on this trail begins. You’ll climb about 200 feet in the next 0.3 miles (so it’s a bit steep!) to reach the final viewpoint of this hike…Glacier Overlook. Here, you’ll get another amazing view of Mount Rainier, the Emmons Glacier, and down into the White River Valley that we think is worth the trek.
You may even spot a marmot or two enjoying the view with you!

A marmot enjoying the view at Glacier Overlook in Mount Rainier
To return, you can head back the same way you came, or if you’re up for extending this Mount Rainier hike, there are two ways to do it:
You can backtrack from the viewpoint back down to Shadow Lake and at the junction here, take the Wonderland Trail to Frozen Lake. From Frozen Lake, head back to Sunrise via the Sourdough Ridge Trail. This loop would combine the best of both worlds…hiking along the quieter Sunrise Rim Trail to amazing views over the Emmons Glacier, but also getting to hike the incredibly scenic Sourdough Ridge Trail. It will bring this hike to about 4.5 miles total, but if you don’t plan on hiking the Sourdough Ridge Trail for any other hike in the Sunrise area, we think this loop would be worth it! We’d recommend doing it in the counterclockwise direction, though, for the best views where Mount Rainier is in front of you along the Sourdough Ridge (so, start on the Sourdough Ridge, and then take the Wonderland Trail over to the Sunrise Rim Trail).
The second way to extend this Mount Rainier hike is to do the next trail on our list…
Burroughs Mountain Trail

The Burroughs Mountain Trail is one of the best hikes in Mount Rainier!
Distance: 4 – 9 miles
Elevation: 900 feet – 2,500 feet
The Burroughs Mountain Trail was our favorite hike in Mount Rainier National Park! There are non-stop views of the mountain, and if you go far enough along the trail, you get about as close as you can get to Mount Rainier without actually climbing it. So close that you can hear the glaciers breaking and cracking right in front of you.
You might have noticed that the distance and elevation we cited above has a huge range. That’s because there are several different ways you can do this Mount Rainier hike.
The Burroughs Mountain Trail consists of three different summits/viewpoints, aptly named the First Burrough, the Second Burrough, and the Third Burrough. Each Burrough gets you closer and closer to Mount Rainier, but the trail to each also gets successively a bit more rugged. In fact, the trail from the Second Burrough to the Third Burrough is technically an unmaintained trail. It’s steep, rocky, and often has snow patches that you’ll have to cross as you head up the Burrough. Many people choose to stop at the First or Second Burrough, which is totally fine because the views from both are still super epic!

View from the Second Burrough on the Burroughs Mountain Trail
Aside from the fact that there are three different Burroughs, there are also two approaches you can take to get to them. You can either take the Sourdough Ridge Trail to Frozen Lake, and then head up to the First Burrough and beyond. Or, you can continue along the Sunrise Rim Trail past the Glacier Overlook viewpoint and up to the First Burrough and then beyond.
What we would recommend ourselves (and it’s exactly what we did!) is to do the complete Burroughs Mountain Loop Trail, which makes this hike a loop by taking the Sourdough Ridge Trail up to the Burroughs, and then the Sunrise Rim Trail back down (or vice versa). This way, you get to see all the different views and perspectives of Mount Rainier possible and don’t have to repeat the same trail heading back.
Because of all the different options you can do for this Mount Rainier hike (making it a roundtrip hike or a loop, and depending on which Burrough you hike out to), this hike can be on the shorter, easier side or on the longer and more challenging side. Be sure to check out our complete guide to hiking the Burroughs Mountain Loop to get an idea of what to expect along the entire trail and see what route option you’d want to take.
Emmons Moraine Trail
Distance: 3 miles
Elevation gain: 700 feet
This Mount Rainier trail doesn’t start from the Sunrise parking lot, but rather from the White River Campground located about halfway up the road to Sunrise from the White River Entrance.
The Emmons Moraine hike begins on the Glacier Basin Trail as it climbs steadily through the forest along the glacial moraine and White River in the White River Valley. After a mile, you’ll find the junction for the Emmons Moraine Glacier Trail, which travels another half a mile of maintained trail up the side of the moraine. From here, you get a view of Mount Rainier ahead, and of the moraine and a beautifully blue glacier tarn below.
We opted out of doing this Mount Rainier hike due to time limitations and being more than happy with the views we got down into White River Valley from the hiking we did up in Sunrise. However, this would be a good trail to hike in Mount Rainier to avoid the larger crowds up in Sunrise and to explore a different perspective of the mountain and valley.
Naches Peak Loop
The Naches Peak Loop is a popular hike in Mount Rainier National Park
Distance: 3.5 mile loop
Elevation: 700 feet
The Naches Peak Loop is a very popular hike in Mount Rainier…it’s fairly easy with gradual climbing around Naches Peak, has picturesque views of Mount Rainier, and takes your through the classic wildflower-filled meadows that the park is known for. It also traverses around the picturesque Tipsoo Lake, which under the right conditions, can sometimes beautifully reflect the mountain.

Tipsoo Lake
This Mount Rainier hike technically isn’t found in Sunrise, but it’s close. The Naches Peak Loop is actually located at Chinook Pass along WA-410, about 15-20 minutes away from the White River Entrance (which means you don’t need a Sunrise reservation to hike here!). Even if you don’t plan on hiking the full Naches Peak Loop, it’s a beautiful drive to get to the pass, and an easy stop to just walk around Tipsoo Lake itself and snap some pictures of Mount Rainier.

The road to Chinook Pass
We actually didn’t hike the full Naches Peak Loop because we thought our time would be better spent elsewhere. We felt that a lot of the hike wouldn’t have a view of Mount Rainier, and some of the best views of the mountain from the trail were right around Tipsoo Lake itself at the start of the hike, so we just explored around the lake and didn’t do the whole loop. However, because of how popular of a hike it is, we figured we’d mention it. We do agree it’s a nice option if you’re looking for an easier hike in Mount Rainier that has a lot of the elements that make hiking in Mount Rainier so great (views, meadows, wildflowers, and lakes!).
Hikes in Mount Rainier National Park: Paradise

Views over Paradise from the Skyline Trail- one of the most popular hikes in Mount Rainier
Paradise is the most popular area in Mount Rainier National Park. It has a little bit of everything that makes Mount Rainier so amazing to hike in…epic and up-close views of Mount Rainier, waterfalls, reflective lakes, meadows of colorful wildflowers, and lots of wildlife to spot, like mountain goats, marmots, and pikas! Paradise is also home to the park’s main visitor center and a lodge. So, you can bet it’s a pretty busy place to be!
But like many places that are crowded, there’s good reason for it. Some of Mount Rainier’s best hikes are found here. We will admit, we didn’t get quite the experience we wanted at Paradise, as Mount Rainier decided to hide in a cloud the entire time we were there, but we did still manage to complete the most famous trail in the park while we were here, and now we just have a long list of hikes to do when we inevitably come back!
Map of Mount Rainier hikes in Paradise

This map of Mount Rainier hikes in Paradise can be found at the Paradise visitor center. We’ve labeled the hikes we mention below with different colors to help orient you to the Paradise region.
Skyline Loop Trail

Views from the Skyline Trail in Mount Rainier
Distance: 6.4 mile loop
Elevation gain: 1,800 feet
The Skyline Loop Trail is definitely the most popular and well-known hike in Mount Rainier. This large hiking loop takes you through the colorful wildflower-filled meadows of Paradise, past viewpoints of Mount Rainier and the Nisqually Glacier, up through the rugged alpine terrain of Mount Rainier’s southern slopes, and past a famous waterfall backdropped perfectly by Mount Rainier and its meadows. It really can’t get much better than that!
Along most of the Skyline Loop Trail, in-your-face views of Mount Rainier dominate the hike (unless, of course, Mount Rainier is in a cloud like it was for us!), and you get close enough to the mountain to sometimes be able to hear the cracking and calving of the glaciers on its slopes.
The Skyline Trail is also a great place to observe wildlife, like marmots (which were everywhere!), and even mountain goats at the higher elevations of the trail.
Staring right at Mount Rainier from the Skyline Trail…if only the clouds weren’t there!

A marmot taking in the views along the Skyline Trail in Mount Rainier
The main downside to this trail is just how popular it is, and can get insanely crowded by midday, so starting early is key.
Despite its popularity, this Mount Rainier hike should not be underestimated. If doing the full loop, the trail can get steep, rocky, and rugged, and often, snow remains on the trail well into the summer months, so you’ll likely be crossing some snow patches on the hike.

Walking across snow patches along the Skyline Trail in Mount Rainier
Make sure to check out our complete guide to hiking the Skyline Loop Trail in Mount Rainier National Park to learn everything you need to know to tackle this Mount Rainier hike and what to expect along the trail.
The good news is that if you’re not up for the challenge of the full Skyline Loop, there are several options to make this hike shorter and a bit easier (but still with amazing views!). With all the intersecting trails in the area, it’s really a make-your-own adventure up in Paradise, and you can connect and loop around the trails any which way you like.
Some popular alternatives to the full Skyline Loop Trail are:
Skyline Trail to Panorama Point – 4 miles/1,300 feet elevation gain. This hike goes up the western half of the Skyline Loop as an out-and-back hike to a popular viewpoint over the Sunrise area.

Admiring the views from Panorama Point
Skyline Trail to Myrtle Falls- 1 mile/ 100 feet elevation gain. This is a great option for an easy hike in Mount Rainier. This trail makes up the first half mile of the Skyline Loop and is a relatively flat walk along a paved path to a famous and scenic waterfall backdropped by Mount Rainier.

Myrtle Falls is a short easy hike in Mount Rainier - normally the mountain dominates the background!
Alta Vista Trail – 1.5 miles/600 feet elevation gain. This trail is a small loop off the western side of the Skyline Trail. It brings you to the top of a small bump that overlooks the Paradise area.
Glacier Vista- 3 miles, 1,000 feet elevation gain. This hike follows the western half of the Skyline Trail to the Glacier Vista viewpoint overlooking Mount Rainier, the Nisqually Glacier, and the moraine and valley below. It’s a great trail to get an in-your-face view of the mountain but avoids the final rugged climb up to Panorama Point.
We cover all these alternatives and more in our Skyline Loop Trail hiking guide so be sure to check that out for more information about all the Skyline Trail route options!
Nisqually Vista Trail
Distance: 1.2 miles
Elevation gain: 180 feet
The Nisqually Vista Trail is a great option for an easy and family-friendly hike in Mount Rainier. It’s short and entirely paved, and is situated right near the Skyline Trail system.
A lot of the hike is through trees and forest, but there are a few viewpoints along the way where you can get great views out to Mount Rainier and the Nisqually Glacier. I would personally say it’s only worth your time if the Skyline Trail or any of the alternatives listed above are out of reach or not possible. But it’s also good to just add on at the end of your day in Paradise.
Pinnacle Peak Trail
Distance: 2.5 miles roundtrip
Elevation gain: 1,050 feet
If there’s one Mount Rainier hike that we are so sad to have missed, it’s the Pinnacle Peak hike. Unfortunately, time and weather just didn’t work out for us in Paradise. But this hike is number one on our list for when we return.
Pinnacle Peak is found in the Tatoosh Range on the opposite side of the road from Paradise’s main set of trails. The park’s maintained trail takes you up a short but steep climb to the saddle of Pinnacle Peak from which you get amazing views back to Mount Rainier and over Paradise.
An unmaintained trail continues the rest of the way from the saddle to the summit of Pinnacle Peak (another 500 feet up in about .3 miles or so…so it’s steep!). This trail is described as challenging, with lots of loose rock and shale, and many stop at the saddle because of this. But the dramatic views of Mount Rainier from the summit look absolutely amazing. Just make sure to use your own judgement, and if anything seems too sketchy to you, it is never a bad thing to turn around and simply enjoy the views from the saddle.
Bench and Snow Lakes
Distance: 2.5 miles roundtrip
Elevation gain: 700 feet
Another hike on our to-do list, the Bench and Snow Lakes Trail is another relatively easy hike in Mount Rainier that traverses rolling hills as it heads to two beautiful subalpine lakes. The first of the two, Bench Lakes, is about ¾ of a mile into the trail, and is a beautiful lake that can reflect Mount Rainier on a calm clear day.
From there, it’s another half mile to Snow Lake, which is loved for its mountain backdrop and deep blue color.
Hikes in Mount Rainier National Park: Ohanapecosh

Ohanapecosh is home to some easy and peaceful hikes in Mount Rainier
The Ohanapecosh region of Mount Rainier is less about mountain views and more about quiet walks through old growth forest. These Mount Rainier hikes are good to do if the weather is bad, the mountain isn’t out, or you are just looking for an easy and peaceful forest walk.
Map of Mount Rainier hikes in Ohanapecosh
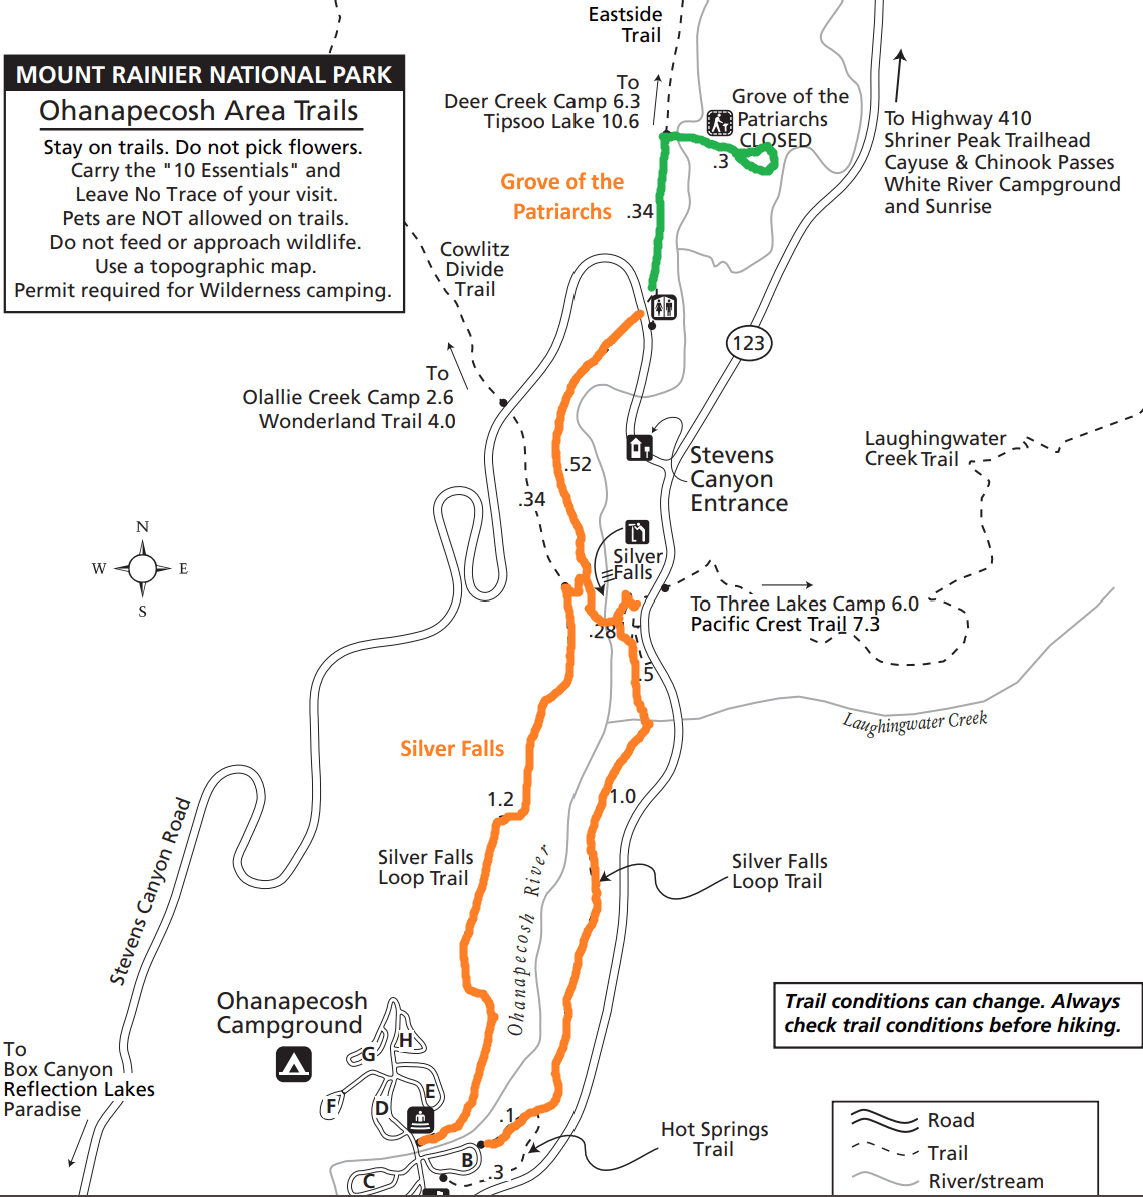
This map of Mount Rainier hikes in Ohanpecosh from the National Park Service highlights both the Silver Falls Trail and the Grove of the Patriarchs Trail
Silver Falls

Silver Falls in Mount Rainier
Distance: 0.6 – 3 miles
Elevations gain: 300 feet
The Silver Falls Trail is a great hike in Mount Rainier to do if you’re looking for something easier and quieter that escapes the hustle and bustle of the nearby Paradise trails. This hike follows the Ohanapecosh River as it rushes and cascades through the forest until it reaches Silver Falls.
We actually really enjoyed this Mount Rainier trail…it was a nice change of pace from the crowds we experienced in other areas of the park (we didn’t see anyone else on the trail somehow!), we loved the peaceful quiet nature of the forest and how the sunrays lit up the trees, and we enjoyed the fact that the only sound we heard was the rushing of water through the forest.


At Silver Falls, a wooden bridge crosses high above the river, with a clear view of the small but powerful waterfall. You can also take a herd trail down to stand on the rocks closer to the falls (but be prepared to get wet, and make sure to have good shoes on as it’s slippery down here).

Standing on the bridge near Silver Falls

View of Silver Falls from the bridge
There are four different ways to hike to Silver Falls in Mount Rainier, which will determine how far this hike will be (but they are all easy!):
The main way people hike to Silver Falls is from the Ohanapecosh Campground. This is a 3 mile loop that takes you up and down each side of the Ohanapecosh River, with the river crossing at the bridge near Silver Falls. This is the longest option of the bunch.
The way we hiked to Silver Falls was on the East Side Trail starting near the parking lot for the Grove of the Patriarchs (it’s on the opposite side of the road from this lot). This lot is small and often full from people hiking the Grove (though it cycles through quickly), so it might be hard to start the hike from here. If you are able to, it’s about 1.5 miles out and back to Silver Falls from here. The trail very gradually descends through the forest until you find yourself walking high above the Ohanapecosh River, with viewpoints out to the cascading river, and eventually of Silver Falls. It took us about 20 minutes to get to the Silver Falls bridge from the parking lot.
The shortest way to Silver Falls is from a pull off on the west side of WA-123, just south of the Stevens Canyon Entrance. There’s a small pull off here that fits just a couple of cars. You’ll start down a steep section of the Laughing Water Creek Spur Trail until it meets up with the Silver Falls Loop Trail. Go right here and Silver Falls is shortly ahead. This trail is only about 0.6 miles but it’s a bit on the steep side as it drops quickly down to the falls.
Finally, there is another small pull off for cars along Stevens Canyon Road, just past the lot for the Grove of the Patriarchs as you’re heading towards Paradise. Cross the street and take the Cowlitz Divide Trail until it meets up with the Loop Trail from the campground.
Grove of the Patriarchs Trail

Walking on the Grove of the Patriarchs Trail in Mount Rainier
Distance: 1.6 miles
Elevation gain: 110 feet
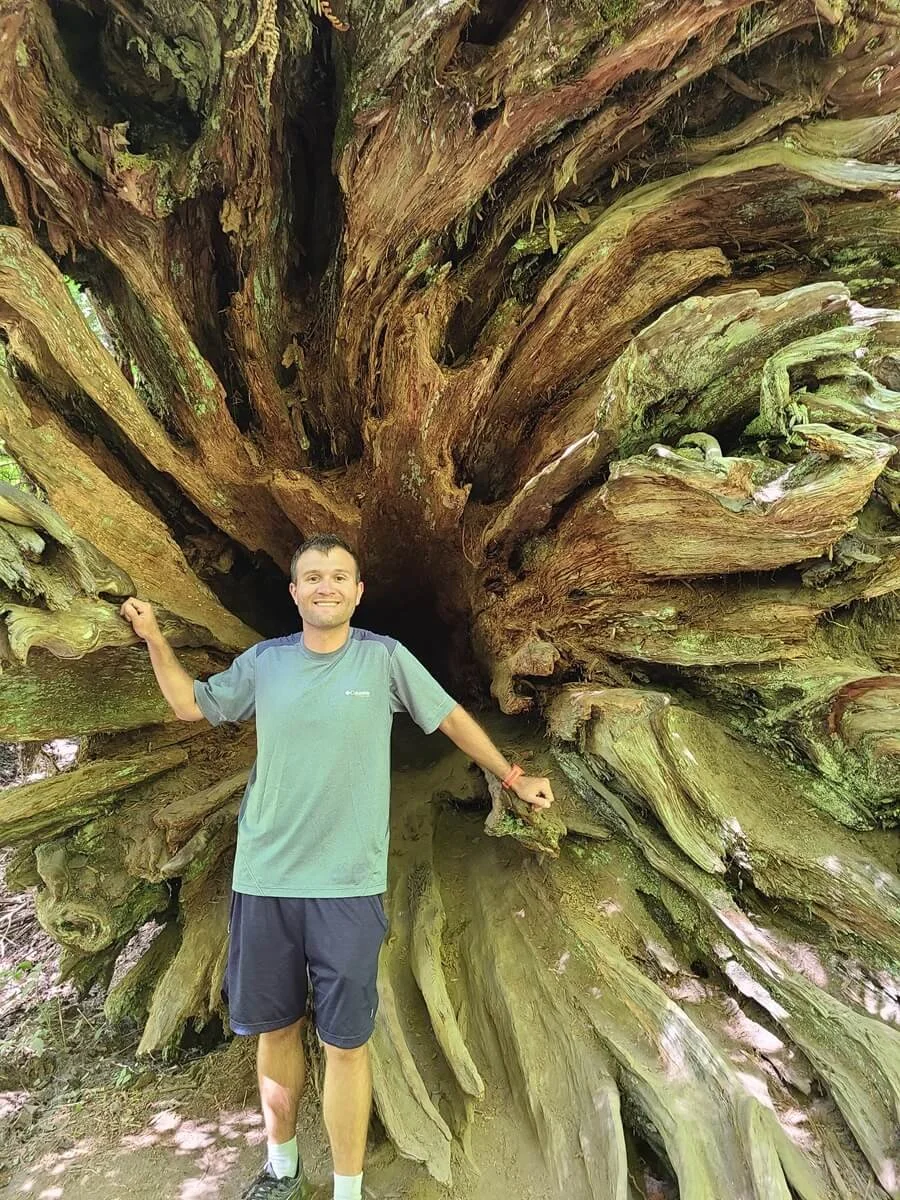
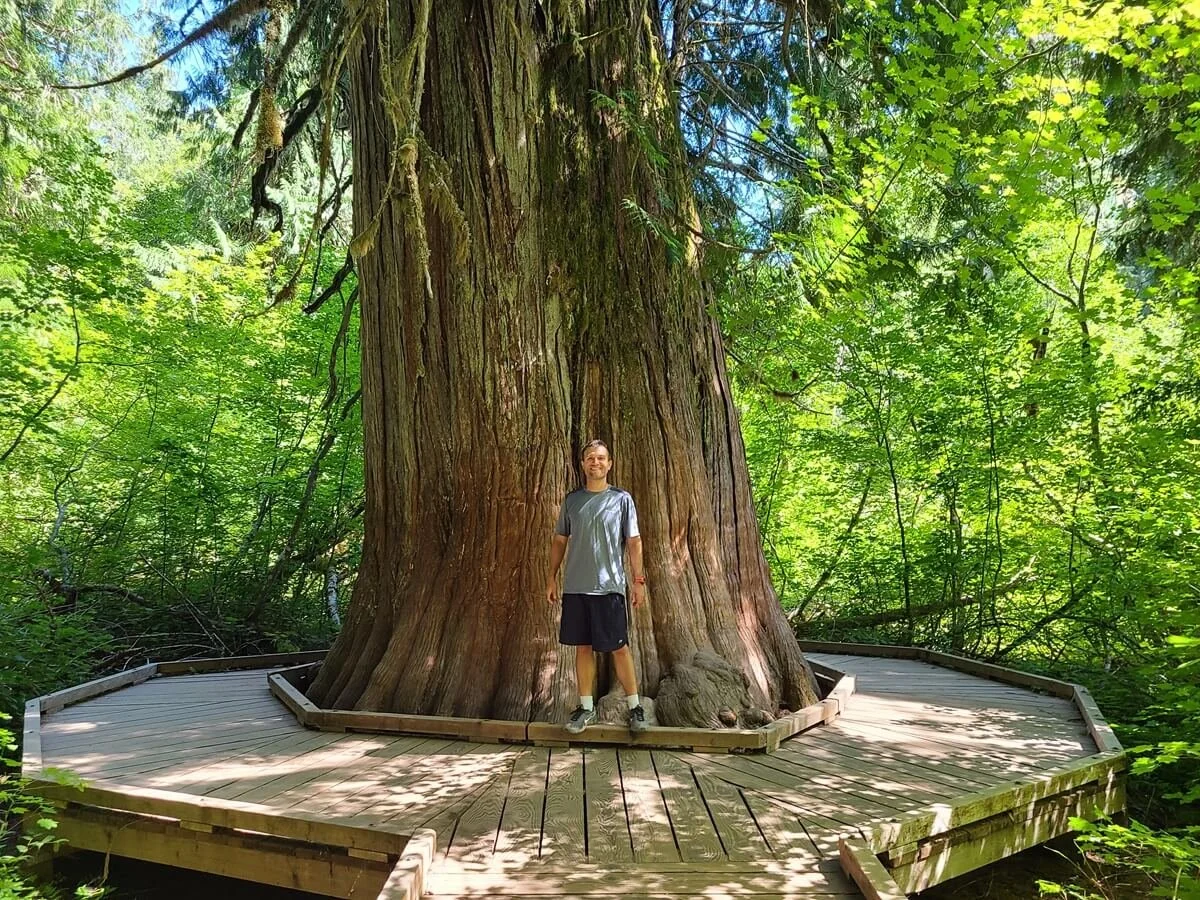
This easy Mount Rainier hike is a unique trail that will bring you to an island in the middle of the Ohanapecosh River. Not only is it cool to visit an island in the middle of a river, but this island is particularly special…it contains an old growth forest of cedar and fir trees, some of which are up to 1,000 years old! Some of these trees are giants, quite reminiscent of walking through the big tree groves of Sequioa National Park (okay, they aren’t quite that big or abundant, but it’s still a similar experience!).

The trail is overall flat and easy, starting off from the lot through the forest as it follows the super clear and cascading water of the Ohanapecosh River upstream. At almost the half mile point, you’ll cross a suspension bridge that brings you over the river and onto the island. The bridge is narrow and wobbly, and is meant for only one person at a time. Therefore, on busier days, expect to wait in line to cross in each direction (we waited about 20 minutes when we were crossing back over). Despite this, the trail overall didn’t feel crowded, and people for the most part spread themselves out pretty well.

The Grove of the Patriarchs suspension bridge
Once on the island, the trail makes a small loop among the old giants on a mix of dirt path and boardwalk.
Posing in front of the giant trees in the Grove of the Patriarchs!
The parking lot for the Grove of the Patriarchs Trail is found just past the Stevens Canyon Entrance on the right side of the road. It’s a pretty small lot so you’ll want to get here early, or you’ll just have to get lucky when passing through. It’s a short trail so people cycle in and out quickly (for reference, we got there at 2:30 on a Tuesday and were able to snag a spot). The good thing about the small lot, though, is that it keeps the crowds down on the trail and the whole hike is a bit more peaceful and enjoyable.
Hikes in Mount Rainier National Park: Longmire
Longmire is west of Paradise, in the Southeast corner of Mount Rainier National Park. It’s most notable for its title as a National Historic District with its large collection of historic rustic style National Park buildings. Here, you’ll find lodging at the National Park Inn, an info center, and even a museum dedicated to the early days of the National Park.
There are a few notable hikes in Longmire, though we didn’t get the chance to visit. Longmire is several thousands of feet below Paradise and so not yet in the exposed subalpine terrain. Instead, it’s heavily forested, and it will take a bit of effort on the trails to climb up to viewpoints where you can see Mount Rainier. However, there are far less crowds here than in Paradise, and several noteworthy waterfalls to explore if that’s your thing!
Comet Falls and Van Trump Park Trail
Distance: 3.8-5.8 miles out and back
Elevation gain: 900-2,000 feet
This Mount Rainier Trail climbs steadily through the forest along the cascading Van Trump Creek until it gets to Comet Falls, one of the highest waterfalls in the park, about 1.8 miles (and 900 feet of climbing) into the hike. This waterfall looks beautiful and well worth the climb.
About a half mile more of climbing past the waterfall, the trail meets up with the Rampart Ridge Trail. Take a right here to continue on the Van Trump Trail to Van Trump Park. Up here, forest gives way to meadows, and great views of Mount Rainier open up. The maintained trail extends for about a half mile past the junction with Rampart Ridge, but it seems an unmaintained trail continues on and you can venture a bit further if you’d like.
On this Mount Rainier hike, you’ll have to work for those mountain views, but it’s a good way to escape the crowds of Paradise and to see some waterfalls along the way!
Rampart Ridge Trail
Distance: 4.6 mile loop
Elevation gain: 1,339 feet
The Rampart Ridge Trail is another mostly forested hike with occasional views out to Mount Rainier. From Longmire, it steadily switchbacks through the forest up to the ridge where the trail then flattens out. The ridge itself is still mostly forested, but there are a few openings along the way where you can get decent views out to Mount Rainier and down into the valley below. Tip: You’ll want to hike clockwise along this trail to get the views in front of you! At the end of the ridge, the trail loops back to Longmire via the Wonderland Trail as it descends down through the forest.
Trail of the Shadows
Distance: 0.7 miles
Elevation gain: Negligible
If you’re passing through Longmire and looking for an easier hike to stretch the legs, or you’re interested in the history of the area, then check out this quick and easy interpretive trail through forest and marsh where you’ll pass several creeks and mineral springs, and you can even explore the Longmire Cabin, an old homestead and the oldest structure in the National Park.
Hikes in Mount Rainier National Park: Mowich Lake

Views from the Tolmie Peak Lookout hike in Mount Rainier
The Mowich Lake area of Mount Rainier is a bit out of the way from the other more popular regions like Sunrise and Paradise. Because of this, it definitely sees less visitors, and is often considered the off-the-beaten-path area of the park, though we wouldn’t entirely agree with this. Let’s just put it this way- you definitely won’t be alone on the trails out here, but we do agree that there’s still nowhere near the number of people you’ll see in Paradise or even Sunrise.
Not only is it a bit out of the way, but the road into Mowich Lake is pretty rough. It’s a long dirt road riddled with potholes, small rocks, and washboarding that will take you about 30-40 minutes to drive. We had a high clearance 4x4 truck, but we saw plenty of cars up at the lot. It’s very doable, just take it slow and watch where you’re driving to avoid the worst obstacles!

Mowich Lake Road and parking at the trailhead
At the end of Mowich Lake Road is a primitive campground along with the trailheads to two more great Mount Rainier hikes.
Tolmie Peak Lookout Trail

The picture-perfect view from the Tolmie Peak Lookout hike in Mount Rainier
Distance: 5.5 miles roundtrip
Elevation gain: 1,600 feet
The Tolmie Peak Lookout Trail is a pretty high reward/low effort trail. This Mount Rainier hike does involve some steady climbing to get to the top, but it’s pretty straightforward and nothing overly steep. And what awaits you at the top is a postcard-worthy view out to Mount Rainier and over the beautifully blue Eunice Lake from an historic fire tower.
Along the way, you’ll get to enjoy the shore of Eunice Lake…that is, if the bugs let you! (Spoiler alert: the mosquitoes are quite literally insane on this trail!)

Looking up at the Tolmie Peak Lookout perched high above Eunice Lake
If you want to know more about hiking to the Tolmie Peak Lookout, be sure to check out our complete guide to this Mount Rainier hike where we’ll cover everything you need to know, including how to get there, when to go, what to bring, and what to expect along the trail.
Spray Park
Distance: 6 miles out and back
Elevation gain: 1,300 feet
The Spray Park Trail is another one of those Mount Rainier hikes that is still at the top of our bucket list for when we return. Mowich Lake is such a remote area of the park that we really only had the opportunity for one hike out here, and we chose the Tolmie Peak Lookout Trail, so Spray Park…we will be back for you!
The Spray Park Trail leaves from the Mowich Lake Campground and heads slightly downhill through the forest for about a mile. It then weaves gradually up and down as it heads to the first notable feature of the hike at about 1.5 miles in…the Eagle Cliff Viewpoint. This clearing through the forest offers your first glimpses at Mount Rainier from the trail as sort of a preview of what’s to come ahead.
Not too far past this viewpoint, a short spur trail branches off the main path for about a quarter of a mile to Spray Falls, an impressive 300 foot waterfall that’s worth the short detour.
Beyond the falls is where the Spray Park Trail gets tough. You’ll climb quite steeply over the next half mile up a series of switchbacks through the forest and eventually emerge onto the lower meadows of Spray Park. Much like Paradise, here you’ll find wildflower-covered meadows with wide open views of Rainier in the distance, but the perk here is that you’ll likely not have to battle the same kinds of crowds along the trail to enjoy them!
The official Spray Park hike continues through the meadows for another half mile. The actual trail continues on for a while, eventually meeting up with the Wonderland Trail, so you can technically hike as far as you’re comfortable with and turn around whenever you’re content with the views (probably never with views like these…but you gotta turn around sometime!).
Hiking in Mount Rainier National Park: What to Bring

You’ll want to come prepared for the rugged hikes in Mount Rainier!
In addition to the usual day hiking necessities, here are some things we would specifically recommend bringing with you on a hike in Mount Rainier National Park.
Good hiking shoes or boots- If you plan on doing any Mount Rainier hikes beyond the easy forest trails of Ohanapecosh, we highly recommend having a good pair of hiking boots that are sturdy and have good ankle support and tread. Many of Mount Rainier’s trails can get rugged and rocky as they head up into the subalpine and alpine environment surrounding the mountain, including the most popular ones like the Skyline Trail, as well as hikes like the Pinnacle Peak Trail, the Burroughs Mountain Trail, and the Mount Fremont Trail.
Layers- You’ll be driving and hiking across all sorts of elevations while in Mount Rainier, and hiking through the alpine territory on some trails means chillier and windier weather. Make sure to pack layers and a jacket or fleece, even on warm sunny days!
Plenty of food and water- Be sure to stock up on water before your hikes. You can fill up near the visitor centers in Paradise and Sunrise. If you’re heading to Mowich Lake, there is no potable water there so make sure to come with plenty of your own. Also pack plenty of food and snacks for the trail. There are limited options for buying food in the park (in Paradise, Sunrise, and Longmire) so bringing packed food from outside the park is your best bet.
Trekking poles- Lots of people like to hike with trekking poles in general, especially to help with steep descents on the trail. I normally don’t, but they were particularly helpful to have here because snow tends to linger well into July on some Mount Rainier hikes, and we definitely ran into our fair share of it. A lot of times, this snow was on an incline or decline, making it extra slick. Having trekking poles provides extra stability as you hike across any snow patches you might encounter on the trail.
Binoculars (or a good zoom lens)- This is helpful to have to be able to observe the park’s awesome wildlife at a safe distance without having to get too close or go off trail. Wildlife like pikas, marmots, and mountain goats are often spotted, particularly around the trails in Paradise and Sunrise.
Trail maps- The trails in Mount Rainier are generally well-marked and easy to follow, but there are a lot of them. Particularly in Paradise and Sunrise, many of them intersect and weave together, so it’s helpful to have a Mount Rainier trail map to plan your route out in advance, keep yourself on track, and prepare for any trail junctions ahead. If you’re using an online map, make sure to download it to your phone ahead of time as service might be nonexistent in the park. Even just grabbing a trail map from the visitor centers at Paradise and Sunrise are great guides to have that will keep you on track while hiking.
Bug spray- Some of the hikes in Mount Rainier can get pretty buggy. We experienced the worst of it in the form of mosquitoes on the Tolmie Peak Trail, but we also ran into a lot of flies on other trails, particularly in Sunrise. We would even recommend a bug net to at least keep them away from your face while you’re resting along the trail or at a viewpoint.
Sun protection- Many of Mount Rainier’s trails are in subalpine and alpine environments that are exposed to the sun with little shade.
Bear spray- Mount Rainier is home to black bears, so we would always recommend hiking with bear spray and knowing how to use it as a last resort in case of an emergency.
How Much Time Do You Need to Hike in Mount Rainier National Park?

With so many amazing hikes in Mount Rainier, it might seem a little overwhelming to plan your trip, especially if you have limited time. We hear ya. We felt the same way.
But the good news is…it’s ok! Because even on the quickest of visits (just a day!), you can still manage to squeeze in a couple of great hikes in. Of course, more time is always better, and in this park, you’d never run out of epic trails to tackle.
In an ideal world, we’d recommend 3-4 days in Mount Rainier. This would allow you to visit and hike in most areas of the park and would help to account for any bad weather or poor visibility of Mount Rainier (which is important…this mountain like to hide…a lot!).
If you want to see how we would organize our time in the park, then head on over to our Mount Rainier itinerary and guide to get ideas for up to four days the National Park.
And, if you only have a day to spend hitting the trails in Mount Rainier (or are just taking a day trip from Seattle…since it’s close enough!), then head on over to our guide on how to spend one day in Mount Rainier National Park for several ideas on how to plan out your day! With one day in the park, you’ll have to focus your time on just one or two regions, but we promise you’ll still be able to hike quite a few trails and get those epic Mount Rainier views.
Where to Stay Near Mount Rainier Hiking Trails
Mount Rainier is close enough to Seattle (about 2.5 hours away from both Paradise and Sunrise) to make a day trip to the park, but it will be a long day. If you want to spend more than just a day, we’d recommend staying much closer to maximize your time there and minimize your driving time back and forth.
Because it’s such a big park, you might want to arrange it so that you are staying somewhere different each night if you plan on visiting multiple regions, for example spending one night near Longmire or Paradise, and then the next near Sunrise (check out our Mount Rainier itinerary for suggestions on how to do this).
Lodging in Mount Rainier National Park
There are only two lodging options within Mount Rainier National Park itself- the Paradise Inn in Paradise, and the National Park Inn in Longmire.
Outside the park, the towns of Ashford, Packwood, and Enumclaw are good bases for exploring several regions of the park at once.
Ashford is best for those looking to explore Longmire and Paradise. On another day, you can also head up to the Carbon River/Mowich Lake area.
Packwood is best for those wanting to explore both Ohanapecosh and Paradise. You can also visit Sunrise from here as well.
Enumclaw is a good base for exploring the Carbon River/Mowich Lake area.
The Crystal Mountain Resort is also an option, conveniently located just outside of the White River Entrance near Sunrise.
From all of these bases, expect to drive about an hour to get to the nearest hub like Sunrise or Paradise, and up to 2-2.5 hours to drive to other further out regions you might want to visit. Our advice to is map out all the distances on Google Maps to determine how much driving you’d have to do and if it’s best to plan for different stays each night to minimize driving time.
Camping in Mount Rainier National Park
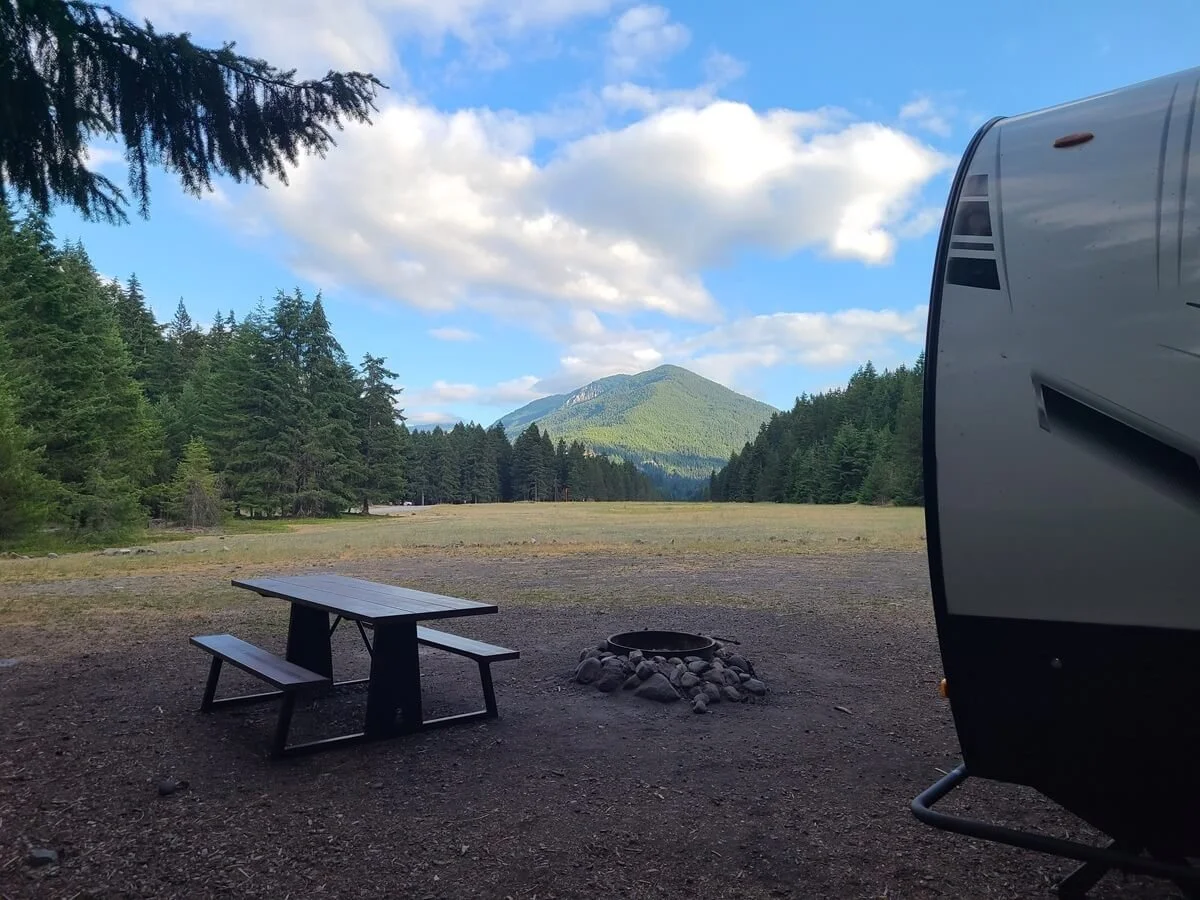
A National Forest Service campsite near Mount Rainier National Park
There are four main campgrounds in Mount Rainier National Park, each with different opening and closing dates and amenities.
Cougar Rock Campground is near Paradise and has both reservable and first-come first-served sites. This is a great base for exploring the Mount Rainier hikes in Longmire, Paradise, and Ohanapecosh.
Ohanapecosh Campground is in Ohanapecosh just outside the Stevens Canyon Entrance and has both reservable and first-come first-served sites. This makes a good base for exploring the Mount Rainier hikes in Ohanapecosh, Paradise, and Sunrise.
The White River Campground is near Sunrise and is a first-come first-served only campground. This, of course, is a great base for the hiking the trails in Sunrise, but you can also easily visit Ohanapecosh, and even Paradise with a long driving day.
Each of these campgrounds is $20. You can reserve sites for Cougar Rock and Ohanapecosh on recreation.gov up to four months in advance.
Mowich Lake Campground in the Northwest corner is a primitive campground with walk-in tent sites only. There is no potable water, and it has vault toilets only. A Wilderness Permit is necessary to camp here, so be sure to read about how to get these permits (via lottery and advanced reservation) on the NPS site. This campground is the best way to avoid a long drive to the Mowich Lake trails.
There are also several National Forest campsites found around the park, particularly near Sunrise and Ohanapacosh. Tip: If you have an America the Beautiful Annual Park Pass, you can stay at some of these campgrounds for free!
Tips for Hiking in Mount Rainier National Park
Here are just a few more tips for hiking in Mount Rainier before we wrap up!
Check Mount Rainier trail conditions and road status
Before hitting the trails in Mount Rainier, make sure to check trail status and road status for any closures or trail/road hazards. Particularly if you plan to hike in Mount Rainier in the transition periods of early summer (June to early July) or fall (mid-September /October), this is important as conditions can be variable, trails can have a lot of snow, and roads might not be open. We also like to look at recent trail reviews on AllTrails from fellow hikers to get an idea of the most up-to-date trail conditions.
Something else you should be aware of is that wildfires are very common out here, particularly in late summer (yup, just in time for clear trails and perfect weather!). Keep your eye on the air quality index and smoke forecast to know if it’s healthy to hike (and even worth it).
Check the weather and temper your expectations
A key element of having a perfect time on your Mount Rainier hike is, well…actually getting to see Mount Rainier. Unfortunately, this doesn’t happen all the time, as Mount Rainier likes to frequently hide in clouds. Even if the weather forecasts a sunny day, the mountain itself might still not be out (something we frustratingly experienced several times during our time in the park!). So, check the weather and use it to plan your day, but also still come prepared for the worst-case scenario. You can even check these handy Mount Rainier webcams to get real-time updates on what the mountain is doing!
Download everything to your phone
Cell service is limited in the park, so be sure to download any trail maps, park passes, and reservations to your phone ahead of time.
Fill up your tank
Make sure to keep an eye on your gas tank, and fill up when you can. There are no gas stations in the park, and as you know, driving distances in and around Mount Rainier are high. There are gas stations in Ashford, Packwood, Greenwater, and Enumclaw, and some well beyond Chinook Pass on WA-410, so plan accordingly! Also, expect to pay high prices, particularly in Greenwater, which we noticed was almost an entire dollar more per gallon than the gas in Packwood!
Get an early start
Okay, so in most cases, it’s generally best to get to popular trailheads early to beat the crowds. But, this Mount Rainier hiking tip is a little bit tricky now that timed entry reservations are a thing. When you can start a hike is really dependent on when you can get a reservation. But, the park is hoping that this new reservation system will reduce the crowding on trails and in lots as well as eliminate the queuing of cars to get through the park entrances.
You can still get a super early start on the trail by entering the park before the reservation time kicks in (so, before 7 am). With a reservation system in place, this may or may not be a good idea. Timed entry reservations might force more people who don’t have reservations to flock to the park before the 7 am cutoff, causing more crowding and congestion early in the morning (making getting an early start a bit counterproductive!). But, time will only tell how this will all play out here!
If you visit in the fall outside of the reservation period, we still think this tip will apply. Get to popular Mount Rainier parking lots early, particularly on the weekends (about 9 am or earlier). For reference, we visited Paradise on a weekday in July and noticed the lot filled up by about 9:30 am.
Leave no trace
While you’re on the trails in Mount Rainier, please remember to practice the principles of Leave No Trace. I know, it might be tempting to frolick and twirl through the wildflower meadows, or to feed that cute little chipmunk that’s begging you for food, but in a place as heavily visited as Mount Rainier, it’s particularly important to stay on the trails, preserve the fragile landscape, and keep the animals wild so visitors can continue to enjoy it.
Are dogs allowed on Mount Rainier hikes?
Unfortunately, dogs aren’t allowed on any trails in Mount Rainier National Park, so you’ll have to keep them at home!
Mount Rainier Trail Guides
Looking for more info on some of these Mount Rainier hikes? Check out our trail guides below for tons more helpful tips and information!
More Washington Travel Guides
If you’re planning a Washington road trip, you’ve come to the right place! We’ve got tons of guides with lots of helpful information about Washington’s National Parks and forests. Check out our other Washington travel guides to help kickstart your planning!
MOUNT RAINIER ITINERARIES: Check out how to spend one to four days in Mount Rainier National Park
NORTH CASCADES NATIONAL PARK: Check out the Hidden Lake Lookout Trail
MOUNT BAKER WILDERNESS: Check out our favorite hikes near Mount Baker
Are you planning to hike in Mount Rainier National Park? Which Mount Rainier trails are on your bucket list? Be sure to drop any questions you have in the comments below, and happy hiking!