Backpacking to Mount Assiniboine Provincial Park: Sunshine Village to Mount Assiniboine Hiking Guide
Are you looking to hike from Sunshine Village in Banff National Park to Mount Assiniboine Provincial Park? Then we got you covered! In this guide, we’ll go over everything you need to know to hike from Sunshine Village to Lake Magog, the core region in Mount Assiniboine, including how to get to the trailhead, how long and difficult the hike from Sunshine Village to Mount Assiniboine is, what to bring, where to stay along the way, and how to fit in the Sunshine Village to Mount Assiniboine hike into your larger Mount Assiniboine itinerary.
If you’re looking for an epic backpacking trip through the Canadian Rockies, you’ll be hard pressed to find anything better than those that traverse through Mount Assiniboine Provincial Park. Located in eastern British Columbia, just on the border with Alberta and the more famous Banff National Park, Mount Assiniboine holds some of the most breathtaking alpine scenery, and with substantially fewer crowds than those found in the popular neighboring parks.
While it’s true that you can take a helicopter to get into the core of Mount Assiniboine Provincial Park (the Lake Magog area), where’s the fun in that? (Okay, we know, it’s probably really fun…and we’ll talk more below about how to combine hiking into Mount Assiniboine with the helicopter…) But if you’re looking for a challenge, and a chance to spend more time hiking and camping in the backcountry to experience more of the park, then there are several ways you can hike into Mount Assiniboine instead.
One of the major hiking routes into Mount Assiniboine is from Sunshine Village in Banff National Park. The hike from Sunshine Village to Mount Assiniboine is long and challenging, often taking people two to three days, but the views along the way and the reward of making it to the beautiful Lake Magog on your own two feet is so worth it.
In this guide, we’ll go over everything you need to know to hike from Sunshine Village to Mount Assiniboine. We’ll cover important things to know about getting to the Sunshine Village trailhead, what reservations you’ll need for camping along the trail and how to make them, what to expect along the trail from Sunshine Village to Lake Magog and Mount Assiniboine, what to pack, when to go, how to plan your Mount Assiniboine hiking itinerary, and so much more.
So if you’re ready, let’s get into it!
In this Sunshine Village to Mount Assiniboine hiking guide:
Overview of the hike from Sunshine Village to Mount Assiniboine
How long is the hike from Sunshine Village to Mount Assiniboine?
How hard is the hike from Sunshine Village to Mount Assiniboine?
Campgrounds on the Sunshine Village to Mount Assiniboine hike
Hiking from Sunshine Village to Mount Assiniboine: Our experience
How to incorporate the Sunshine Village hike to Mount Assiniboine in your itinerary
Overview of the Hike From Sunshine Village to Mount Assiniboine
Mount Assiniboine Provincial Park is large, at just under 100,000 acres, but the coveted core region where all Assiniboine hikes lead to is centered around Lake Magog. Lake Magog is a stunning alpine lake at the base of Mount Assiniboine itself. Surrounding it are beautiful meadows, alpine lakes, larch forests, and epic hiking trails that lead to some of the most breathtaking alpine views we’ve ever seen. Anytime someone mentions backpacking to Mount Assiniboine, it likely means hiking to Lake Magog.
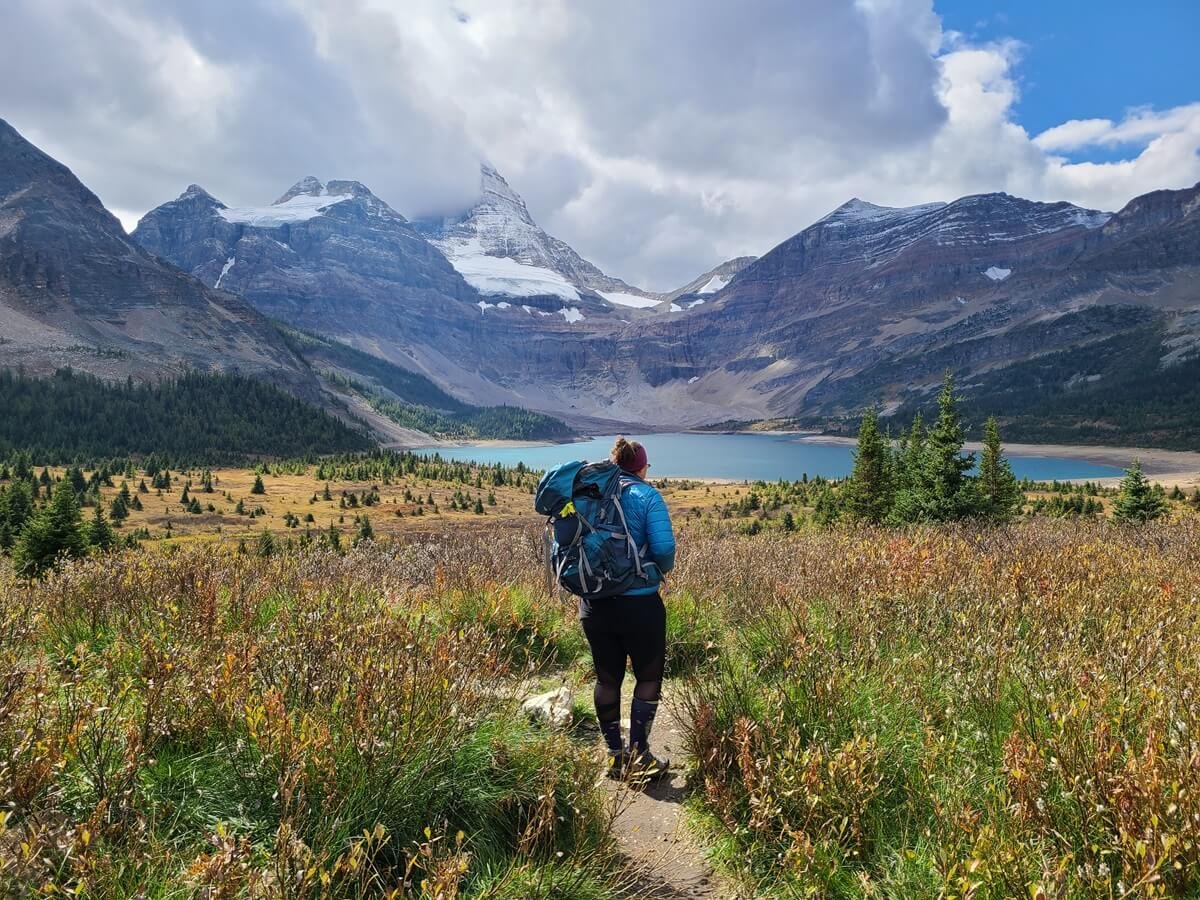
Lake Magog, with the top of Mount Assiniboine hiding in the clouds
There are a few different ways to get to Lake Magog. The simple and quick way (but also the most expensive way) is to take a helicopter. The harder, longer, and arguably more rewarding way is to hike to Lake Magog, and there are a few different hiking routes you can choose from. They each start from one of two trailheads. One is from the Mount Shark trailhead in Spray Lakes Provincial Park in Kananaskis. The other, which is the subject of this Assiniboine hiking guide, is from Sunshine Village in Banff National Park.
You can check out our complete guide to Mount Assiniboine to learn a ton more about all the different ways to get to Mount Assiniboine, where to stay in Mount Assiniboine, and much more. But if you’re main goal right now is to specifically learn more about the hike from Sunshine Village to Mount Assiniboine to see if it’s something you’d want to tackle, then stick around, because you’re in the right place!
On this route, your hike to Mount Assiniboine begins as an easy traverse across the scenic and popular Sunshine Meadows in Banff National Park before gradually climbing up to Quartz Ridge with views over Howard Douglas Lake, and then onto Citadel Pass. From the Pass, you’ll drop significantly down the other side into a valley. Short and steep bursts of climbing through the Valley of Rocks will eventually spill you out at Og Lake, with amazing views out to Mount Assiniboine on a clear day. From Og Lake, it’s a relatively easy and slight uphill walk to your final destination, Lake Magog in the heart of Mount Assiniboine Provincial Park.
Mount Assiniboine Trail Map
Here is a map of the hike from Sunshine Village in Banff to Lake Magog in Mount Assiniboine Provincial Park to help give you a general idea of where and how long the hike is.
This map shows trails leading into Mount Assiniboine from two different trailheads. The blue trail is the hike from Sunshine Village to Lake Magog and is the hike we describe in this guide. The green route is the hike from the Mount Shark trailhead in Spray Lakes Provincial Park. We talk about this route later in the post when we talk about ways to combine hiking routes to and from Mount Assiniboine.
Why Hike From Sunshine Village to Mount Assiniboine?
With multiple ways of getting to Mount Assiniboine, why choose the Sunshine Village hiking route?
There are a few reasons we decided to hike from Sunshine Village to Mount Assiniboine instead of the taking the route from Mount Shark in Kananaskis:
Sunshine Meadows: We liked the idea of starting from Sunshine Village because it would give us a chance to ride a scenic gondola in Banff National Park and visit Sunshine Meadows, something we probably wouldn’t have done otherwise, so it was kind of like killing two birds with one stone. The meadows are a popular and scenic place to visit in Banff, and while you’re up there, you can take little detours to explore the area.
Hiking around Sunshine Meadows before the start of the hike to Mount Assiniboine
The views: The first half of the hike to Mount Assiniboine from Mount Shark sounded a bit boring to us. It goes mostly through flat forest with minimal alpine views. The second half of the hike definitely delivers, though, with views over Marvel Lake and then from Wonder Pass. Still, that first half of the hike didn’t intrigue us one bit. The hike from Sunshine Village to Mount Assiniboine, on the other hand, sounded like it had way more to offer in terms of views. The hike starts off in Sunshine Meadows, with wide open views through to Citadel Pass, which continue much of the way to Lake Magog.
In fact, through a lot of the hike, you can actually see at least some part of Mount Assiniboine ahead of you in the distance. Even from the Meadows at the very beginning, you can see the tip of the mountain poking out on a clear day. And the last push from Og Lake to Lake Magog has incredible views to the mountain as you approach it. Alternatively, the hike over Wonder Pass from Mount Shark doesn’t reveal Mount Assiniboine until you’re almost at Lake Magog.
Mount Assiniboine can be seen early on in the trail from Sunshine Village to Lake Magog
We heard that the best part of the Mount Shark hike is the views from Wonder Pass, and since you can hike to Wonder Pass as a day hike from Lake Magog anyway, we decided we could hike to Mount Assiniboine from Sunshine Village and still be able to hike to Wonder Pass as a day hike. It was the best of both worlds to us.
Costs: In order to park at the Mount Shark trailhead, you have to have a Kananaskis Conservation Pass, which costs $15 CAD per day per vehicle (or $90 CAD for an annual pass). On the contrary, to park at Sunshine Village, you need a Banff National Park Pass ($10.50 CAD per person per day), or an Annual Discovery Pass ($75.25 CAD per person), which we already had. So to avoid paying a second set of fees for Kananaskis, we figured we’d start from Banff to save some money. Of course, if you opt for the gondola up to Sunshine Meadows then that will cost you as well (more on the gondola in just a bit!).
Difficulty: We had read in a few places that despite the hike from Sunshine Village to Mount Assiniboine being a little longer than that from Mount Shark, it was a little bit easier, which was appealing to us. However, I think that the general descriptions we had read beforehand underestimated the hike a bit, and if you’re looking for the easier hike to Mount Assiniboine, I wouldn’t say the Sunshine Village route it is. But more on the hike’s difficulty in just a bit…
If you can’t decide between Mount Assiniboine hiking routes (Sunshine Village to Mount Assiniboine or Mount Shark to Mount Assiniboine), you can certainly combine the two into a larger through- hike across the park where you hike into Lake Magog from Sunshine Village and out via Wonder Pass to Mount Shark. This is ideal, but the logistics of arranging a point-to-point hike are a bit complicated, which is why we didn’t do this.
Below, we’ll talk more about different Mount Assiniboine hiking itineraries and methods of getting to and from Mount Assiniboine, and go over ways you can incorporate the Sunshine Village to Mount Assiniboine hiking route into your larger itinerary, whether it be as an out and back hike, a point-to-point hike, or even combining this hike with the Assiniboine helicopter.
How Long is the Hike From Sunshine Village to Mount Assiniboine?
Hiking distances from Sunshine Village to Mount Assiniboine can vary slightly depending on where you start and stop the hike. Some people start their Assiniboine hike at the bottom of Sunshine Village and skip the gondola altogether, whereas some people start from the top of the gondola. Some people add detours around Sunshine Meadows while others hike straight through. Some people camp at Porcupine Campground, which adds some overall distance to the hike as it’s a bit off trail, and some don’t. Some people hike to Assiniboine Lodge or the Naiset Huts that sit at the foot of Lake Magog while others hike to the Lake Magog campground. Each of these starting and ending points add subtle differences to the total length of the Sunshine Village to Mount Assiniboine hike, so it’s important to clarify where the tracking started and ended.
Our stats for the hike from Sunshine Village to Mount Assiniboine start at the top of the Sunshine Gondola and chairlift, includes a detour to Rock Isle Lake, and ends at Lake Magog campground, with stays at Howard Douglas campground and Og Lake campground along the way.
Total distance: 30.5 km (19 miles)
Total elevation gain: 915 m (3,000 feet)
Total descent: 1,127 m (3,700 feet)
Total time to hike: 8.5 hours (this is “moving time”, but in reality, this was broken up over two days and with lots of breaks and rests, making the total time on the trail much longer- probably closer to 11.5 hours of on-trail time over the two days)
Elevation profile: This profile is broken up over two days of hiking. The first day we hiked from Sunshine Village to Og Lake, and the second day we hiked from Og Lake to Lake Magog campground.
Elevation profile of the hike from Sunshine Village to Og Lake, with key points along the trail labelled
Elevation profile of the hike from Og Lake to Lake Magog Campground
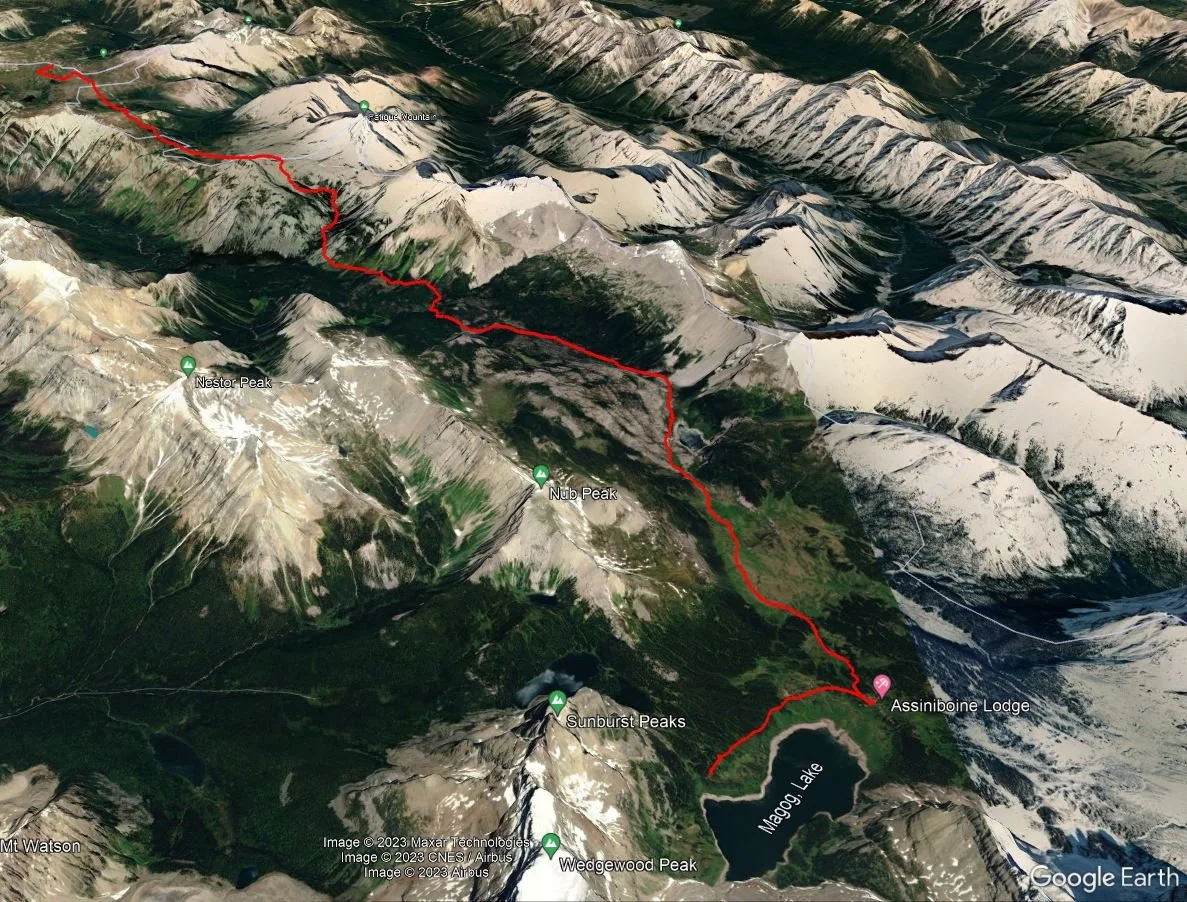
Map of our hike from Sunshine Village to Lake Magog:
A satellite shot from our tracking watch of our hike from Sunshine Village to Lake Magog
If you are hiking from Sunshine Village to the Assiniboine Lodge and not the campground, it’s about 2 km less than what we show here.
If you choose to hike up to the Meadows and not take the gondola, it’s about 6km more and 500 meters of additional climbing.
Here are some distances to the major points along the trail from Sunshine Village to Mount Assiniboine:
Sunshine Village to Howard Douglas Campground: 6.4 km (4.0 miles) - this is from the top of the chairlift and walking around Rock Isle Lake. If you start directly from the top of the gondola, this is more like 5.8 km (3.62 miles)
Howard Douglas Campground to Og Lake: 16.1 km (10 miles)
Sunshine Village to Og Lake: 22.7 km (14.10 miles). Again, this is with a little added distance (about .6 km extra) from starting at the top of the chairlift.
Og Lake to the Assiniboine Lodge: 5.3 km (3.3 miles)
Og Lake to Lake Magog Campground: 7.9 km (4.9 miles)
Note that these distances may be slightly off from what you’ll see on trail junction signs throughout the trail, but represent the distances we got from our tracking watch.
How long does it take to hike from Sunshine Village to Mount Assiniboine?
While a few particularly strong backpackers will make the hike from Sunshine Village to Lake Magog in one very long day, most take 2-3 days. There are three campgrounds en route to choose from (we’ll go over those more below), and choosing to spend a night or two on the trail will make the experience more enjoyable and leave you with more energy to explore Lake Magog and the core area once you’re there.
To give you an idea of hiking times on the trail, here are some of our times to key points along the hike from Sunshine Village to Mount Assiniboine (this is actual hiking time without factoring in breaks):
Sunshine Village to Howard Douglas Lake and campground: 1 hour 45 minutes
Sunshine Village to Citadel Pass: 2.5 hours
Citadel Pass to Og Lake: 3.5 hours
Og Lake to Lake Magog: 2 hours
How Hard is the Hike From Sunshine Village to Mount Assiniboine?
One of the reasons we decided to hike to Mount Assiniboine from Sunshine Village is because we had read that this Assiniboine hike was easier than the one from Mount Shark despite it being slightly longer. But we would have to disagree.
It might be that we underestimated the hike a bit based on what we had briefly read ahead of time and weren’t fully mentally prepared for the difficulty, but the hike from Sunshine Village to Lake Magog was challenging.
It might seem easy on paper given the low elevation gain over the distance hiked, but it is a long hike to do with full packs. Also keep in mind that the elevation profiles for these hikes can be a bit deceiving. Because these profiles have to squeeze in such a long distance hike into a small space, many of the details get lost in translation. While the elevation profiles may show, and others may describe, the last half of the hike from Sunshine Village to Mount Assiniboine to be a gradual uphill hike to Lake Magog, what it really was is a long series of short but steep bursts of ups and downs that really wear on you after a while, and with heavy packs on it makes the hike feel harder and like you’re doing more climbing than it actual is (at least for us!). In fact, as I was just writing this, Kevin peered over my shoulder and said all I had to write for this post is: “You go up and down and up and down and up and down and it’s miserable”. Good thing he’s not the one writing this post or that’s all you’d get! Though it is a good indicator of what the trail is like.
Something else that can make the hike from Sunshine Village to Mount Assiniboine more challenging is the weather. It’s typical mountain weather out here, and you can expect rain, hail, sleet, wind, thunder and sun all in one day. And unfortunately for us, we experienced it all on our day and a half of hiking in to Lake Magog. We experienced cold temperatures, hail, and non-stop rain that thoroughly soaked us, and it certainly tested us and our limits on the trail. We arrived at Lake Magog shivering, soaked, and hoping beyond all hope for just a little bit of sun for warmth. We eventually got it, but it was rough for a while!
We met many fellow hikers at Lake Magog who had hiked in from Mount Shark who had done it in just a single day, despite being almost the same distance as the hike from Sunshine Village. Because the first part of that hike is relatively flat and easy, it’s possible to cover that distance quickly. The second half becomes a bit more difficult as you have to climb a series of steep switchbacks up to Wonder Pass, but it’s one big climb and then an easy descent back down to Lake Magog. We think the number of people who more often hike that route in just a single day attests to it being a bit easier than the Sunshine Village route.
Another little anecdote that helps to compare hiking routes to Mount Assiniboine is that the night after we came off the trail from Mount Assiniboine, we found ourselves at a restaurant in Golden, B.C. commiserating with our waitress who had just happened to do the Mount Assiniboine hike two weeks earlier. She had the same plans as we did to hike in and out from Mount Assiniboine via Sunshine Village. After the hike in, she was so exhausted and over the trail from Sunshine Village that she abandoned her original plans to hike out that way and instead hiked out to Mount Shark in a day and hitchhiked back to Banff! She most definitely confirmed to us that the Mount Shark/Wonder Pass route was the easier hike to Mount Assiniboine.
Overall, we would say the hike from Sunshine Village to Mount Assiniboine is on the hard side of moderate. There’s nothing technical about it, and the trail itself is well-trodden, easy to follow, and well-signed at every junction. But it’s just an exhausting trail. Based on the elevation gain over the distance hiked, it didn’t seem that bad to us on paper, and we’ve done plenty of longer day hikes before, so we thought it would feel easier, but we will be the first to admit we bit off a little bit more than we’d care to chew on some of those longer days on the trail. We would suggest going onto AllTrails and reading through some realistic reviews from recent hikers to get a good feel for what to expect. And of course, the more you break it up into multiple days, the easier and less arduous the overall hike to Mount Assiniboine will be.
How to Get to the Sunshine Village Trailhead for the Sunshine Village to Mount Assiniboine Hike
The base of Sunshine Village is found just 20 minutes from downtown Banff as you head west on the TransCanada highway. In the winter, Sunshine Village serves as the gateway to epic skiing and snowboarding, but in the summer, it’s a beautiful spot for sightseeing and hiking in the meadows to views of mountains and alpine lakes, and also serves as a primary gateway into Mount Assiniboine Provincial Park.
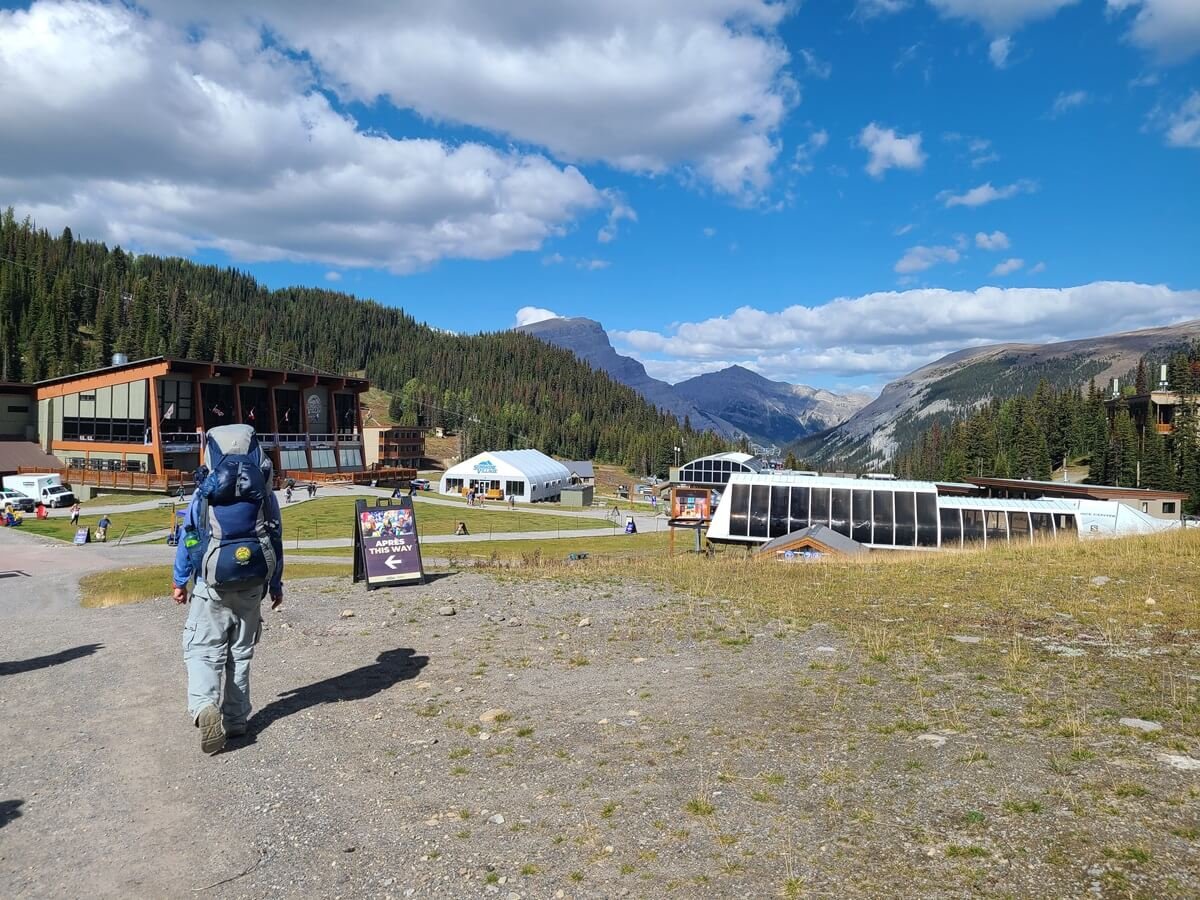
The base of Sunshine Village, where you can catch the gondola up to Sunshine Meadows and the start of the hike to Mount Assiniboine
There are two ways to get to Sunshine Village:
You can drive and park right at the free lot at the base of the Village. If you type “Sunshine Village” into Google Maps it will get you there. To visit and park here you do need to have a Banff National Park Pass. These cost $10.50 per person per day and can be bought online or at the park gates or visitor centers. If you plan on spending lots of time in Banff and/or other Canadian National Parks, getting the Discovery Pass is worth it. It’s $75.25 CAD per person but is good in all National Parks for an entire year.
You can park in downtown Banff and take a free shuttle up to Sunshine Village. You can find free parking in Banff by the train station, and then it’s a short walk into town. The Sunshine Shuttle picks up at various hotels in town. Check out the shuttle’s pick-up locations and times here.
We didn’t think much about parking, and figured it would just be more convenient to park right at the Village. And if you plan to hike both in and out of Mount Assiniboine via Sunshine Village, then this is definitely the most convenient thing to do.
BUT, if you plan on through-hiking from Sunshine Village to Mount Shark, or taking the helicopter out of Mount Assiniboine, you might want to consider parking your car in Banff and then taking the free shuttle up to Sunshine Village to start your hike. We would recommend doing this because based on when you plan on getting to Mount Shark or Canmore (via hiking or helicopter) and when you are able to get a ride back to Banff, you might have to worry about getting back in time to catch the last shuttle (5:20 pm) from Banff to the Village, and you don’t want to risk getting stranded without a way to get back to your car. Unless you have a guaranteed ride back to your car up in the Village after your hike, park in town. We’ll talk more about transportation logistics later in this guide.
The Sunshine Village Gondola
The Sunshine Gondola is a 20 minute ride that takes you from the base of Sunshine Village at 1,659 meters to the top of Sunshine Village and Sunshine Meadows at 2,159 meters. The top is where you can access the Sunshine Mountain Lodge, restaurants, an Interpretive Center and store, and all the sights and hiking trails of Sunshine Village.
Sunshine Village at the top of the gondola
At the top of the Sunshine Gondola, there are friendly rangers who greet you and orient you to the area, and remind you to not go off-trail (this is a fragile alpine environment!).
At the top of the gondola, there is also the Standish Express Chairlift, which is included in your gondola ticket price, and takes you up another 8 minutes to 2,385 meters to the Standish Viewing Deck, a well-known viewpoint over the Sunshine Meadows area where you can see 360 degree mountain views, as well as views over Rock Isle, Grizzly and Laryx Lakes.
A quick ride on the chairlift takes you to the Standish Viewpoint
You can start the hike from Sunshine Village to Mount Assiniboine at the top of the gondola, or at the top of the chairlift. From the gondola, it’s a shorter and more direct route through the meadows, but it’s all uphill and pretty steep and monotonous. From the chairlift, it’s a little bit of a longer route, but really it only adds about 0.6 km or so, and it’s mostly downhill. Plus, you get to see the views from the Standish Viewing deck and wander the trails in the area a little bit. This will also bring you right by Rock Isle Lake and the Rock Isle Viewpoint, which has a beautiful view. So we would definitely recommend taking the chairlift in addition to the gondola before starting your hike to Mount Assinboine.
Beautiful views at the top of the Standish Chairlift in Sunshine Meadows
Here’s the path you’d walk up to get to Sunshine Meadows if you skip the Standish Express Chairlift
Check out this map of the Sunshine Meadows area for further reference. Our recommendation would be to take the chairlift up to the Standish Viewing Deck. From there, hike down to the Twin Cairns Junction, and then take a left at this junction to Rock Isle Viewpoint. Then meet back up with trail number 1 and turn right to begin your hike to Mount Assiniboine.
We would also actually recommend the gondola if you’re hiking out from Mount Assiniboine this way, too. At first we weren’t sure if it would be worth it to take the gondola down, because hiking down is much easier than up! But again, we were so glad to see the gondola after five hard days on the trail…there was no way we wanted to even think about hiking the service road down to the base! And in fact, we also would recommend taking the chairlift down. It would be a slight uphill walk back up to the top of the hill that the Standish Viewing Deck is on, but to us, it beats the long steep downhill walk back to the gondola. Mine as well get full use out of your roundtrip ticket!
A view of the road you’d walk up if you opt out of the Sunshine Gondola
When does the Sunshine Gondola run?
Each year, the summer gondola operating dates are a bit different, so check the website in the spring to see if they are posted. The year we hiked to Mount Assiniboine, the summer dates for the Sunshine Gondola were June 23rd to September 10th, and it ran from 8 am to 6 pm, so keep these dates and times in mind when planning your hike to Mount Assiniboine. Keep in mind that the gondola can stop running in inclement weather, or may stop running earlier than the posted stop date if snow has come earlier in the season than expected.
How much does the Sunshine Gondola cost?
Check the Sunshine Gondola website for updated costs, but as of the year we visited, it was $70 CAD for a roundtrip ticket (this includes both the gondola and chairlift).
You can buy tickets online or at Guest Services at the base of the gondola. You don’t have to buy tickets ahead of time, but you might want to just to avoid long lines, especially on summer weekends.
Can you buy a one-way ticket for the Sunshine Village Gondola?
You can also buy a one-way gondola ticket if you plan on hiking one way from Sunshine Village to Mount Assiniboine, or if you decide you want to hike down and skip the gondola on the way out. These are $50 CAD and can only be purchased in person at Guest Services.
I had emailed Sunshine Village to ask them if it was possible to buy a roundtrip gondola ticket that could be used on different days (i.e. for the way up on one day for our hike in, and then for the way down on our hike out several days later). I was told via email that this was not possible, and I would have to buy two one- way tickets, which bummed me out because it would be significantly more expensive than a simple roundtrip ticket.
However, when we got to guest services to purchase our one- way ticket to take the gondola up, I asked them the same question in person on a whim, and to our surprise and delight, they said we absolutely could buy a single roundtrip ticket for use on separate days…score! They simply ask the date you plan on hiking out and write that on your gondola ticket. Make sure to keep your ticket somewhere safe so you don’t lose it on your hike!
How crowded is Sunshine Meadows?
A beautiful but busy day near Rock Isle Lake in Sunshine Meadows
We won’t lie…it can get pretty crowded, especially on a nice summer weekend day. When we hiked in to Mount Assiniboine from Sunshine Village, it was a rainy and overcast weekday, and it was pretty dead. There was barely anyone around, which was nice despite the views not being the best they could be. We hiked back on a perfect Saturday morning, and it was crazy busy, so we were super happy with the experience we had five days earlier.
If you’re hiking to Mount Assiniboine from Sunshine Village, don’t worry. Even on the busier day, the crowds quickly died down as soon as we left Rock Isle Lake and hiked further into Sunshine Meadows. From there and all the way to Lake Magog, the trails were peaceful and nearly empty!
Campgrounds on the Hike From Sunshine Village to Mount Assiniboine
We suggested above that it’s best to spend at least two days on the hike from Sunshine Village to Mount Assiniboine. So, where can you stay along the way?
There are three campgrounds on the trail from Sunshine Village to Lake Magog, and then one campground at Lake Magog itself. Here’s everything you need to know about these backcountry campgrounds.
Howard Douglas Campground
Howard Douglas Campground sits right next to this beautiful lake, providing views and water!
This is a small campground of five tent pads that sits on the edge of Howard Douglas Lake in Banff National Park. It’s not too far into the hike from Sunshine Village, so it’s a great place to stay if you got a late start on the hike in or if you want a short last day on the hike out. It’s also a good point to stop if you can’t or don’t want to take the gondola and so have the added distance at the beginning and/or end of your Assiniboine hike.
We stayed at this campground on our hike out. It was a long distance from Lake Magog to Howard Douglas, but we did it to avoid staying at Porcupine Campground (we talk about this one next).
Distance from Sunshine Village to Howard Douglas Campground: 5.8 km (3.6 miles)
Howard Douglas Campground reservations: You do need a Banff Wilderness Permit to camp at Howard Douglas Campground. You can make your reservation starting in March of the year you plan on hiking by going to the Parks Canada site.
Once you’re here, select the Backcountry tab, and then make sure the Backcountry Zone button is selected. Then select Banff, Kootenay and Yoho Backcountry from the dropdown menu, and your arrival date and party number. Finally, the access zone will be “Sunshine Village Access Point”. Once you’ve selected all of this and hit Search, it will bring you to a map of the area where you can click on the Howard Douglas (SU8) campsite to check for availability. Despite being a small and popular campsite, we were able to score a site just a couple nights in advance for a Friday night due to cancellations, so if you don’t have luck on the first try, always check back to see if something has opened up.
Here’s the selections you need to make when making reservations for Howard Douglas Campground
Cost to camp at Howard Douglas campground: The cost to make a backcountry reservation in Banff is $12.75 CAD per person per night, with an $11.50 one-time reservation fee. Make sure to either print your confirmation or save a screenshot of it on your phone to show a ranger if they come by.
Amenities at Howard Douglas Campground: There are five tent pads, an outhouse, an outdoor cooking area with a picnic table, bear lockers, and a ready water source (Howard Douglas Lake).
Porcupine Campground
This small campground is found at the base of Citadel Pass in Mount Assiniboine Provincial Park. It’s in a forested valley and quite a ways off the trail to Mount Assiniboine itself. The junction to this campground along the main trail states it’s 1 km away, but we’ve read from personal accounts that it’s more like 1.5 km. It also drops about 250 meters (~800 feet) down a steep rough trail that many call knee-busting and brutal, particularly with a heavy pack on. However, it’s at a convenient location, about halfway between Sunshine Village and Lake Magog, making it an ideal place to break up the hike to Mount Assiniboine.
If you’re hiking in from Sunshine Village to Mount Assiniboine and stay here, you’ll make the steep descent, but the good news is that you don’t have to climb up the same way to get back to the main trail. Instead, a trail runs through the valley for a bit before climbing up to meet the main trail a few kilometers down. However, if you’re hiking back out to Sunshine Village from Mount Assiniboine and stay here, you’ll have to make that steep rugged climb back up to the main trail and then continue climbing up to Citadel Pass. This is why we opted to skip this campground and push all the way from Lake Magog to Howard Douglas on our hike out. We wanted to avoid any extra climbing that we could!
Distance from Sunshine Village to Porcupine Campground: 12.5 km (7.75 miles) to the junction, then another 1-1.5 km down to the campground
Porcupine Campground reservations: No reservations required! This is a free campground.
Amenities at Porcupine Campground: There are about five sites to pitch a tent, along with an outhouse and bear lockers. There is a small stream that runs nearby but in the summer we hear that this could dry up, so it’s best to have plenty of water before getting here (fill up at Howard Douglas Lake!).
Og Lake Campground
Views over Mount Assiniboine from the Og Lake Campground
This small campground in Mount Assiniboine sits at the base of the scenic Og Lake, just 5 km shy of Lake Magog and the core area of Mount Assiniboine. There are ten tent pads here in an open meadow at the North end of the lake, all with an amazing view out to Mount Assiniboine on a clear day.
The hike from Sunshine Village to Og Lake is still quite long for a single backpacking day, and really only cuts out the easiest last 5 km of the hike to Lake Magog. But if you want to avoid Porcupine Campground and still break up the hike from Sunshine Village to Mount Assiniboine, it’s your best option. It’s also sometimes the campground people use as an alternative to Lake Magog Campground, which is right in the core area and very hard to get. So, people will instead reserve an Og Lake site and then day hike to Lake Magog for sightseeing and hiking.
Distance from Sunshine Village to Og Lake: 22.7 km (14.1 miles)
Og Lake reservations: A permit is needed to camp at Og Lake year-round, but reservations are only needed between June 26th to September 30th. You can make reservations for Og Lake by going to the BC Parks website four months ahead of the date you plan on camping. Click on the “Backcountry” tab, make sure “Backcountry Reservation” is selected, and choose Mount Assiniboine from the drop-down menu. Select the date you plan to arrive and your party size and hit Search. This will bring you to a map of the park showing the reservation status of the Mount Assiniboine campgrounds (Og Lake and Lake Magog). If they are green, which means available, click fast!
The selections you need to make for an Og Lake reservation (this applies to Lake Magog campground as well)
You can book a site for Og Lake starting four months in advance at 7 am PT, but sites go fast (within seconds)! I tried getting a reservation for a few days with no luck. I’d refreshed the page right at 7 am PT and would see the sites turn green as they became available, but as soon as I clicked, they were gone. When I returned back to the map, the status of both Og Lake and Lake Magog campgrounds turned red and that was that.
Our best tip for getting an Assiniboine camping reservation is to have an account made and ready and be signed on before reservations open for the day. Play around in the system a little bit beforehand to get used to how it works and which buttons you have to click to make a reservation, because it’s not the most intuitive interface we’ve ever dealt with.
Also, if you didn’t get a reservation right away, stay on the page for a bit and keep refreshing it. The status might turn green again as people contemplate whether they want the sites they got or not and return them. We saw this happen for Og Lake especially.
Cost to camp at Og Lake: $10 CAD per person per night plus one $6 reservation fee.
Amenities at Og Lake Campground: The Og Lake campground has one open-air designated cooking space (no enclosed or semi-enclosed shelters…so if there’s bad weather like we had, good luck!) with a bear box, bear hang, grey water pit, and one outhouse.
Lake Magog Campground
Awesome views from the trail into the Lake Magog Campground. Can you see our tent up ahead on the right?
This large, forested, 40- site campground is the most coveted campground in Mount Assiniboine because it lies right in the core area of the park alongside Lake Magog. From here, you have immediate access to all the best sites and hikes in the park, but because it’s so popular, it’s hard to secure a site. The only thing we didn’t particularly like about this campground was how hilly it was! The campground itself is centered around a hill on the edge of Lake Magog, and it was torture for our tired legs after the hike in.
Distance from Sunshine Village to Lake Magog: 30.5 km (19 miles)
Reservations for Lake Magog Campground: Like Og Lake Campground, reservations for Lake Magog are needed between June 26th to September 30th. You can make reservations by going to the BC Parks website four months ahead of the date you plan on camping starting at 7 am PT. Click on the “Backcountry” tab, make sure “Backcountry Reservation” is selected, and choose Mount Assiniboine from the drop down menu. Select the date you plan to arrive and your party size and hit Search (see our screenshot above for Og Lake reservations). This will bring you to a map of the park showing the reservation status of both Og Lake and Lake Magog campgrounds. If they are green, which means available, click fast!
Again, make sure you have an account ready, and you’re logged in before reservations open for the day to give yourself the best chances of scoring a site. If you don’t have any luck right away, keep refreshing the page for a little while to check if things become available again as people remove sites from their carts.
Be sure to check out our comprehensive Mount Assiniboine guide for more information about the Lake Magog campground and tips for getting these coveted reservations, plus our favorite campsite in the Lake Magog campground!
Cost of the Lake Magog campground: $10 CAD per person per night plus a $6 CAD reservation fee
Amenities at the Lake Magog Campground: Lake Magog Campground has 2 semi-enclosed cooking shelters that have picnic tables so you can hide from the elements, two open-air cooking areas, outhouses, grey water pits, bear boxes, and bear hangs located throughout. There are also water taps, however this water is untreated and must be filtered before you use it. Sometimes this may not be available and you’ll have to filter from the taps at the Assiniboine Lodge or from Lake Magog itself.
Other places to stay in Mount Assiniboine
The Assiniboine Lodge offers cabins near Lake Magog
The core area of Mount Assiniboine has two other accommodation options besides the Lake Magog Campground.
The Assiniboine Lodge is a full-service backcountry lodge that provides warm beds, prepared meals, hot showers and killer views of Lake Magog and Mount Assiniboine.
The catch for this kind of luxury in the backcountry? It’s expensive! Backpackers often don’t stay here and opt for the campground instead, but it is an option.
The Naiset Huts are a group of small 5-8 person huts located about 0.6 kilometers away from the Lodge. They are just a step up from tent camping, and often backpackers will opt to stay here for a night or two to get a break from their tent and the cold alpine weather. Each small hut has bunks and a woodstove, and all share a cooking shelter to cook and prepare meals.
The Hike From Sunshine Village to Mount Assiniboine: Our Experience
To give you a better and realistic idea of what the hike from Sunshine Village to Mount Assiniboine involves, we want to share with you our experience on the trail. Hopefully, this helps you decide whether this is the route you want to take to get to Lake Magog, and after, we’ll show you how you can combine this route with other ways of getting to and from Mount Assiniboine.
We also just wanted to preface this trail description by saying that for the day and a half that we hiked in from Sunshine Village to Mount Assiniboine, we had terrible weather! As we drove to Sunshine Village, it was rainy and gloomy, but when we got up to Sunshine Meadows, the meadows truly lived up to their name. The rain cleared out and the sun started poking out and our spirits were lifted. However, as soon as we crossed from the meadows and from Banff National Park into Mount Assiniboine Provincial Park at Citadel Pass, the weather turned again, and we were met with sopping rain, sleet, thunder, and freezing temperatures for the rest of the hike. The next morning was overcast, but as soon as we hit the trail, the rain, sleet and wind came back and didn’t clear again until the evening.
That said, most of our pictures on the trail from Sunshine Village to Mount Assiniboine that we will be sharing were taken on the hike back out to Sunshine Village, but occasionally we’ll share a picture of the hike in to show you the difference in views between bad versus good weather!
With that said, let’s get into what you can expect on the hike to Mount Assiniboine from Sunshine Village. We’ll break up our trail descriptions into the different sections along the hike.
Sunshine Village to Howard Douglas Campground
We arrived at the base of Sunshine Village on a cloudy and rainy morning, purchased our tickets at Guest Services, and hopped right on the gondola. There was barely anyone around because of the weather, which was actually really nice (when we came back through on a sunny Saturday, it was a completely different story!).
The gondola ride lasted about 20 minutes, and there are great views back towards the mountains as you get higher and higher. Keep your eyes out for bighorn sheep, too! We never saw any but we know people who did see a few at the point where the gondola makes a turn.
View from the Sunshine Village Gondola at the start of the Mount Assiniboine hike
At the top, we were greeted by a nice ranger who was orienting everyone to the area as they arrived. We asked her whether she thought it was worth taking the chairlift up with our heavy packs and how much distance it would add overall, and she convinced us that it would absolutely be worth it while we were up here, so off we went to the Standish Express Chairlift.
This chairlift ride was only about 5 minutes or so, and from the top, it was a very short and flat walk out to the popular Standish Viewing Deck. At this point, the rain had subsided and the sun was trying its best to make an appearance, so we did end up getting pretty good views over Rock Isle Lake, Grizzly Lake, and Laryx Lake and the surrounding mountains despite it being still a bit overcast, but we were happy with what we got! Plus, there was barely anyone else around.
The easy walk from the chairlift to the Standish Viewing Deck at the top of Sunshine Village
Getting views over Rock Isle Lake before starting our hike from Sunshine Village to Mount Assiniboine
From the viewing deck, the trail heads gently down the other side of the hill opposite the chairlift with great views all around. The junctions are all very well-signed so it’s easy to navigate up here. You’ll want to take a left at the first junction towards Rock Isle Lake, and again at the next junction. Eventually, Rock Isle Lake will be on your right as you hike, and the official lookout is a small path on the right just up ahead.
Heading down the trail from the viewing deck to Rock Isle Lake
Hiking in Sunshine Meadows, with Rock Isle Lake on the right
This small side trail leads to Rock Isle Viewpoint, an area with informational signs and benches, but the view from this point is slightly blocked from shrubs and small trees. Head down a small dirt path to get a perfect head on shot of the lake and the little rock island. We can see how this area can get cramped on a busy day, so we were again happy for the less-than-ideal weather which allowed us to have this spot all to ourselves!
This great view of Rock Isle Lake is worth the detour as you start your hike from Sunshine Village to Mount Assiniboine!
All in all, this small detour up the Standish Express Chairlift and to Rock Isle Lake was definitely worth it while you’re up here rather than going straight towards Mount Assiniboine from the top of the gondola. You might prefer to save this for when you’re hiking out, but we’ll just say that we hiked back out on a much sunnier and brighter day when the views were much better, but were too exhausted after five days of hiking to add on anything extra and we headed straight for the gondola!
From Rock Isle Lake, we continued on the trail until it met back up with the main trail heading towards Assiniboine and turned right on the path.
Hiking away from Rock Isle Lake and towards the trail to Mount Assiniboine
This shows the junction for the trail that leads from Sunshine Village to Mount Assiniboine. To the right is Rock Isle Lake and the trails of Sunshine Meadows. The left branch heads to Mount Assiniboine!
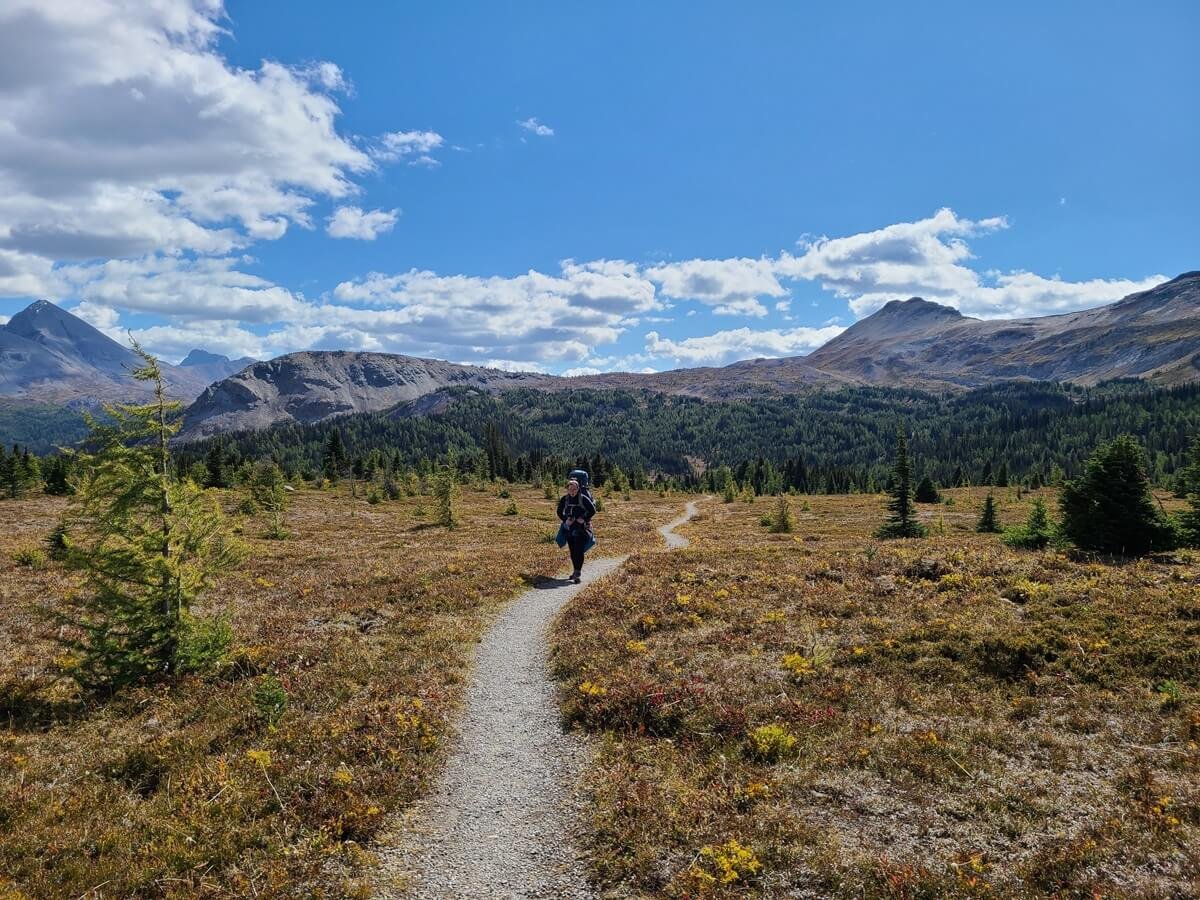
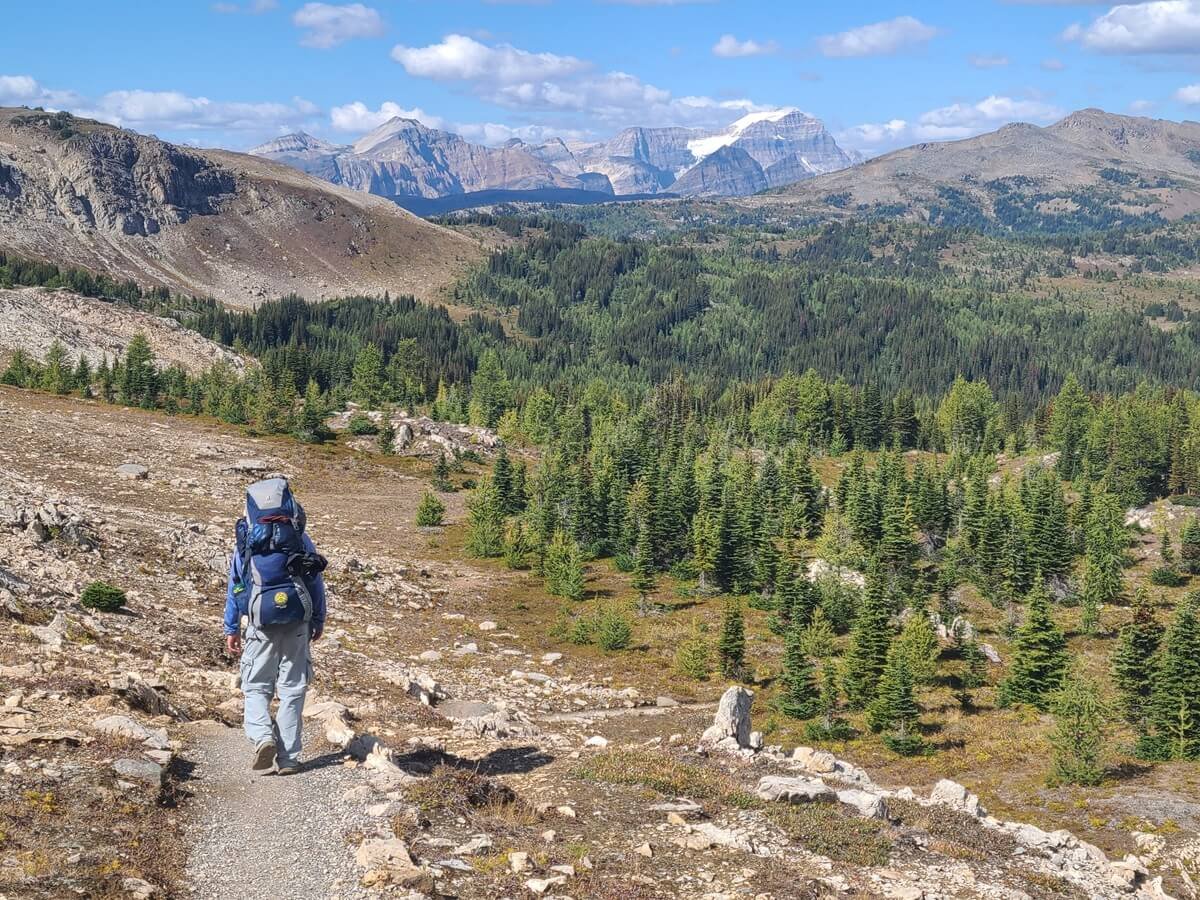
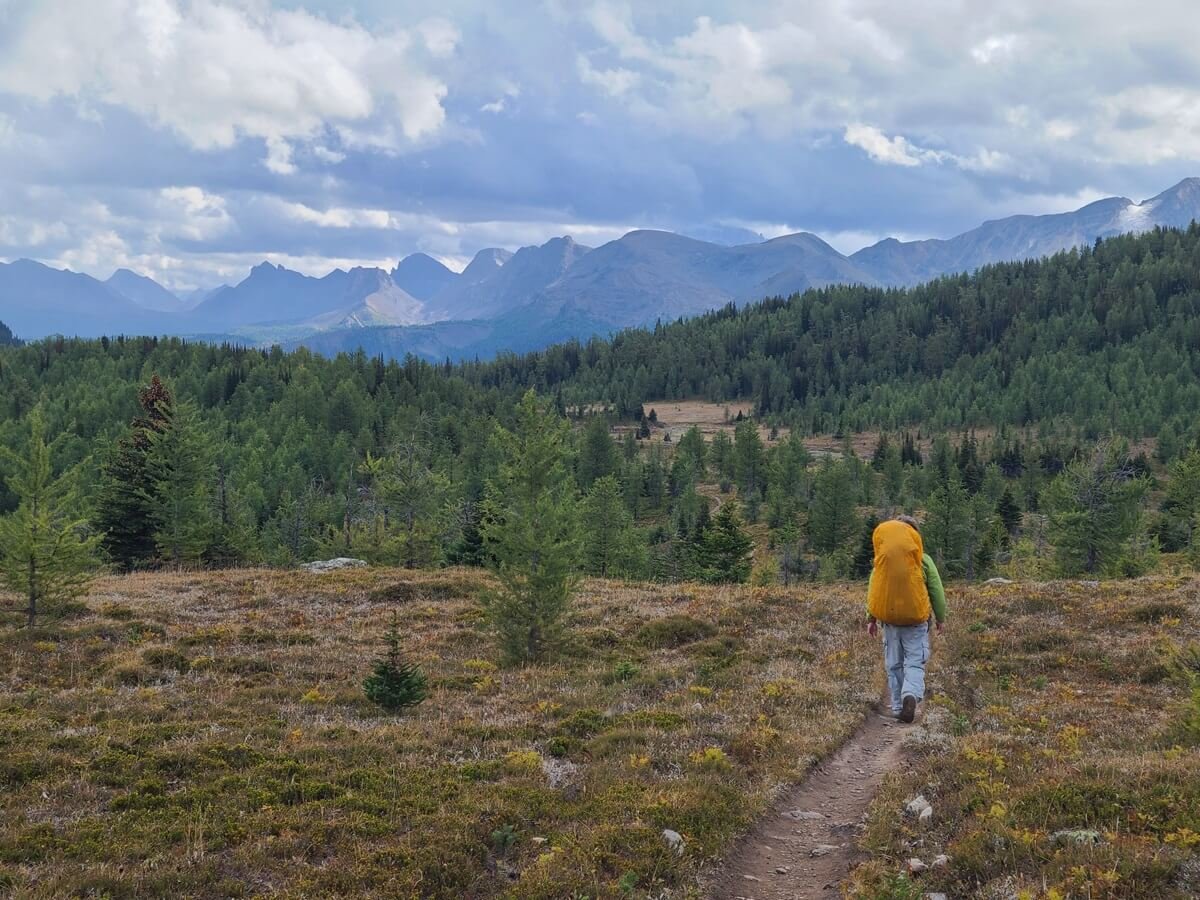
The hike to Mount Assiniboine from Sunshine Village starts easily enough here. Views of Rock Isle Lake will stay on your right for a little bit, while views of near and distant mountains open up around you as you traverse across the relatively flat Sunshine Meadows. Even from this early on in the hike, you can actually see the very tip of Mount Assiniboine poking out from behind the distant mountains on a clear day.
Kevin on the flat and easy trail through Sunshine Meadows
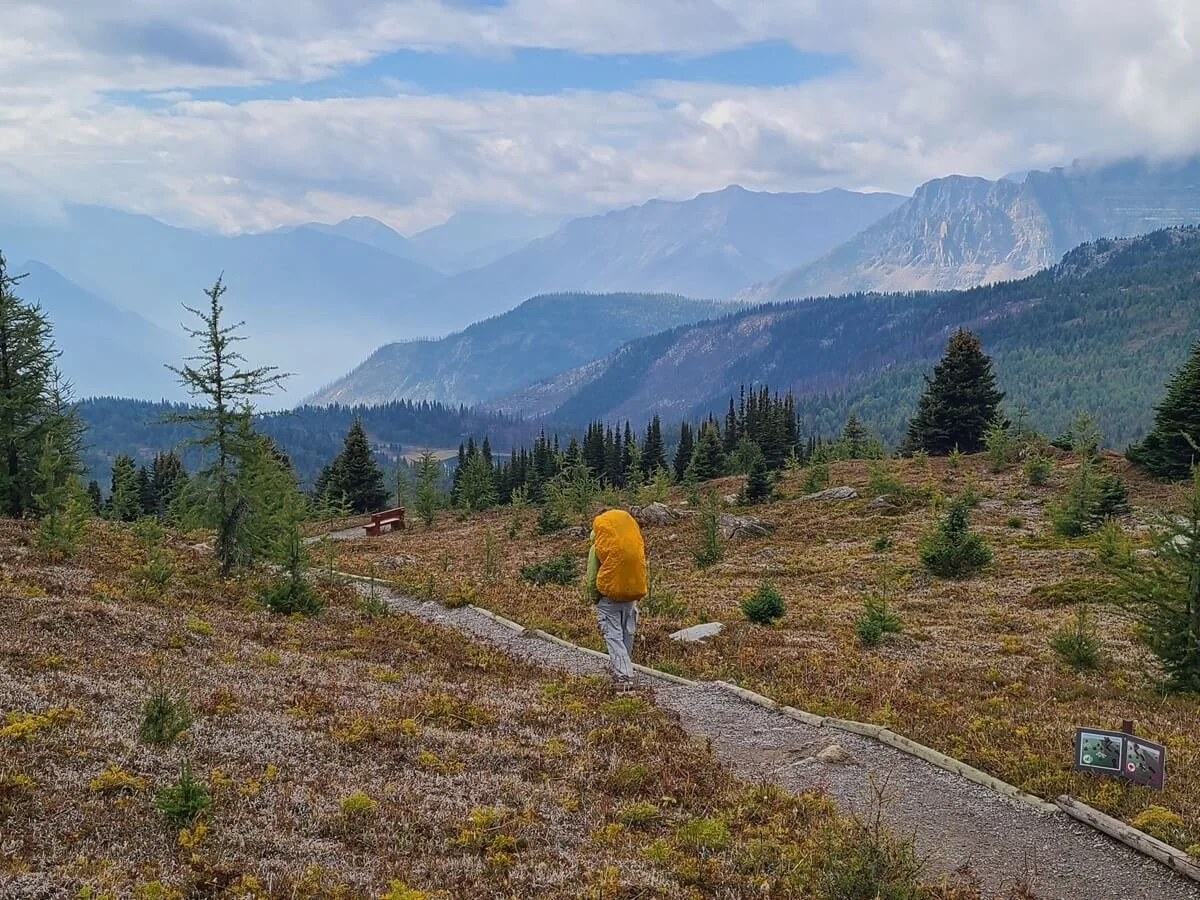
Hiking through Sunshine Meadows!
Rock Isle Lake is in view for the first part of the walk through Sunshine Meadows
Keep your eyes and ears out for the cute little ground squirrels, who have burrows all around the meadows. You’ll likely hear their high-pitched squeaks before you see their heads poking out of their dirt homes.
A cute little ground squirrel!
You’ll come across some small ups and downs before starting the more significant climbing along this part of the trail, first through forest, and then across an exposed gravel path with amazing views back over Sunshine Meadows behind you and the surrounding mountains in all directions.
Hiking through Sunshine Meadows, with the upcoming climb in view ahead
Once out of the meadows, the climb to Quartz Ridge begins
As you climb higher and higher, you can see Sunshine Meadows and the trail you just hiked sprawled out behind you. The small hill in the center is where you started from the top of the chairlift!
Continuing the climb up to Quartz Ridge, which you can see up ahead
Here’s the view back towards Sunshine Meadows as you continue the climb (this was taken on the day we hiked out, so here Kevin is hiking back towards Sunshine Meadows)
Endless views on the way to Quartz Ridge from Sunshine Village
On fresh legs, this climb is pretty easy, and will eventually spill you out on the top of what sometimes is referred to as Quartz Ridge, as it’s right next to Quartz Peak. From this point, you get a jaw-dropping view over Howard Douglas Lake, and your first real view of Mount Assiniboine in the distance.
The picture-perfect view over Howard Douglas Lake. Mount Assiniboine is peeking out in the background (it’s that pointed tip in the distance)!
From here, you can also see Citadel Pass in the distance, which is actually lower than the point you’re standing on now…something that surprised us! (From this side, Citadel Pass isn’t much!)
From here, you can see Citadel Pass…it’s just to the left of the prominent trapezoidal peak in the distance.
From here, there is a steep and slick dirt trail down to the shore of Howard Douglas Lake, which we reached at exactly four miles into our hike from the top of the chairlift. Here, you’ll find the Howard Douglas Campground, which has five tent pads tucked in the woods just beside the lake.
Looking back up the trail that descends from Quartz Ridge to Howard Douglas Lake
Descending the trail to Howard Douglas Lake and Campground
Made it to Howard Douglas Lake! The campground is on the far side.
This is a good place to filter some water if you’re low, as there really are no water sources between here and Og Lake along the trail from Sunshine Village to Mount Assiniboine.
Howard Douglas Campground to Citadel Pass
From Howard Douglas Lake, you have a short but steep climb out of this basin and then back down the other side (this is a lovely introduction to the up and down nature of much of the hike from Sunshine Village to Mount Assiniboine!). From this bump, you can again get views out to Mount Assiniboine on a clear day, and you can see the trail sprawl out in front of you as it heads to Citadel Pass.
Climbing out of the Howard Douglas Lake basin
…aaaand back down. Citadel Pass can be seen ahead.
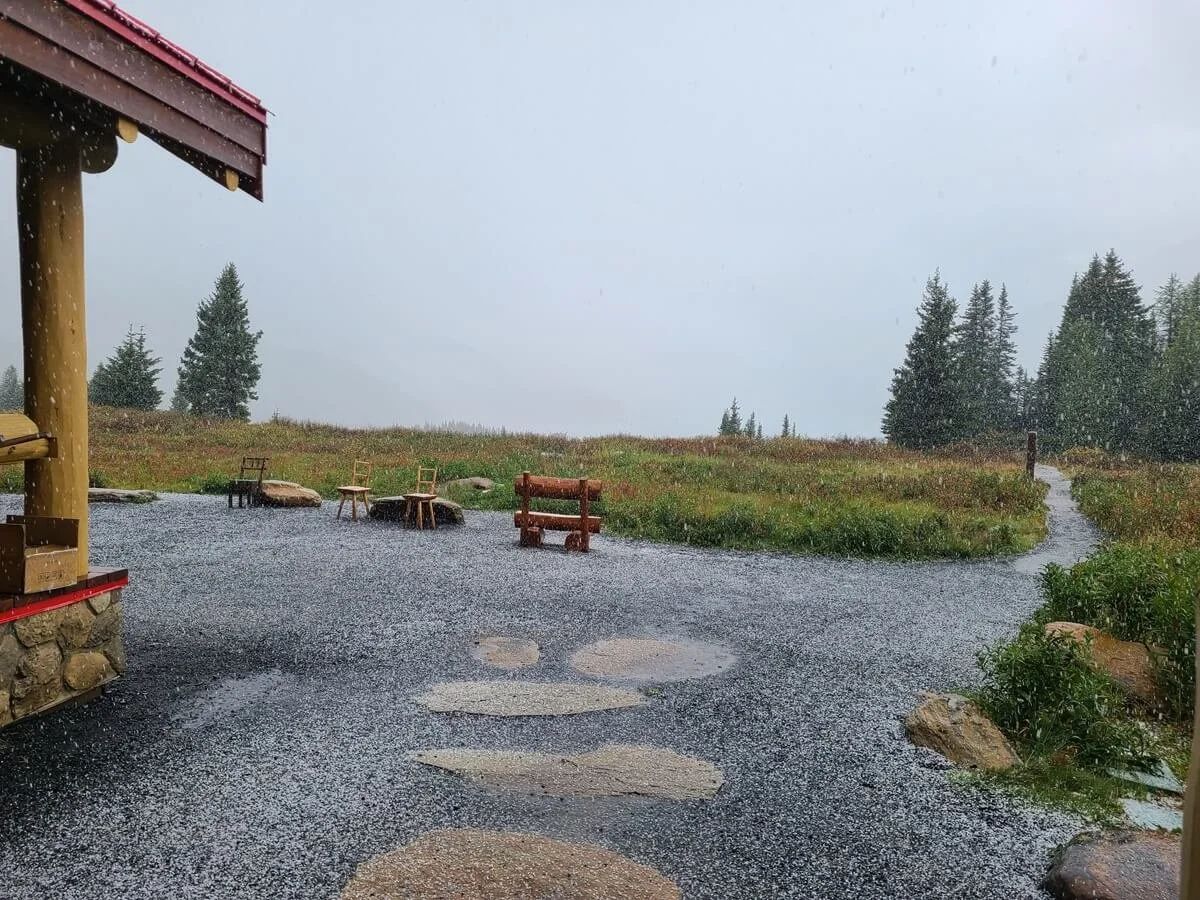
From here, it’s an easy and gentle climb up to Citadel Pass. It wasn’t until we were just nearly at the pass that we ran into our first pair of fellow hikers on the trail (this hike was delightfully uncrowded). It also started randomly hailing on us around this point! It lasted for just a few minutes before the sun poked back out…so be prepared for anything out here!
Hiking to Citadel Pass on the trail to Mount Assiniboine
A hidden lake near Citadel Pass
Citadel Pass up ahead!
Just before Citadel Pass, there is an unofficial split in the trail. We veered right and realized this small path for some reason just kind of climbs up the side of the pass and crosses the slope right beside it, so we had to cut back down to get to the actual pass. So, if you want to avoid this small bit of extra climbing, veer left at this split.
Here at Citadel Pass, you cross the boundary from Banff National Park into Mount Assiniboine…congratulations- you made it! Well, not quite yet. Here, we were about 6.2 miles into the hike from Sunshine Village to Mount Assiniboine, so just about a third of the way there. But at least you’re in the right park!
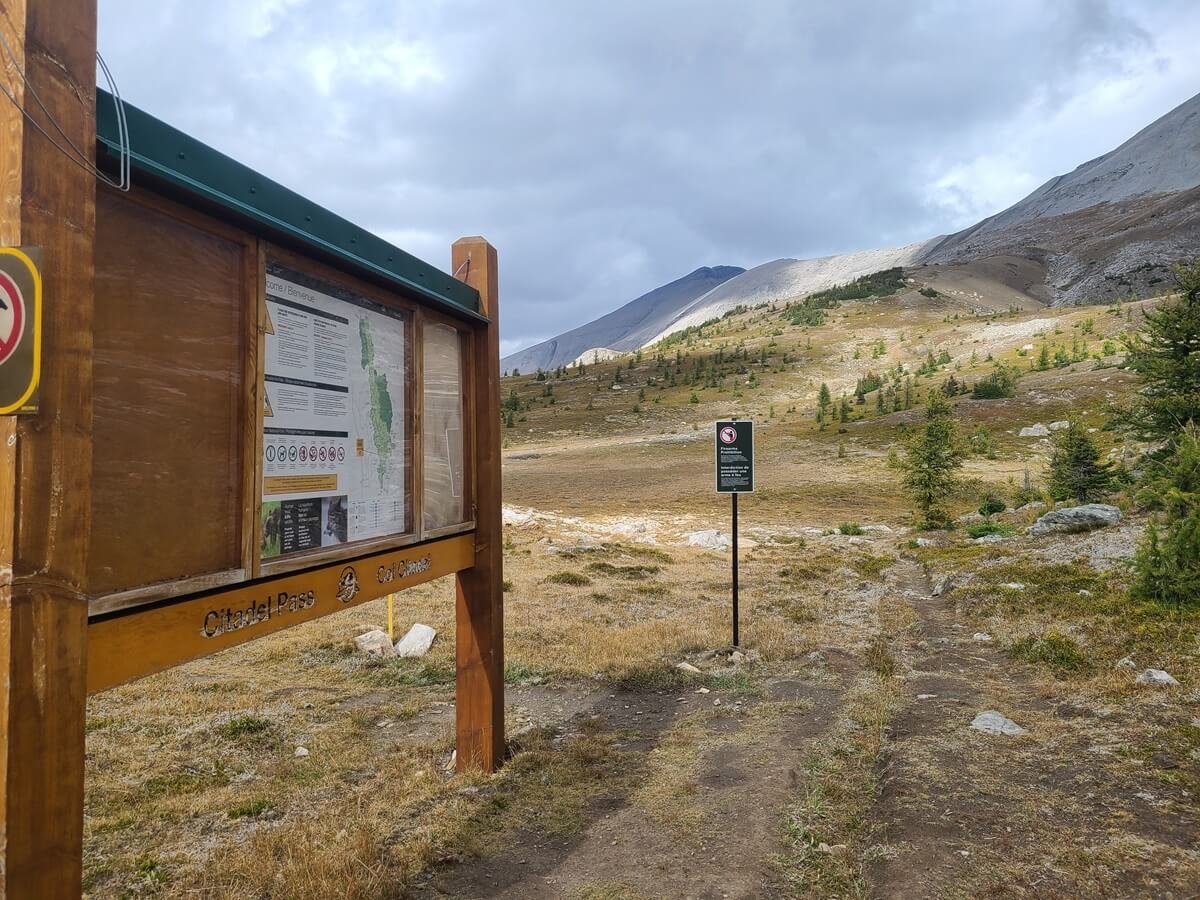
The sign at Citadel Pass marking the park boundary
At Citadel Pass, we took the opportunity to rest and eat some lunch. It took a little bit longer to get here than we thought (for some reason we thought the pass was much earlier on in the hike). As we ate, we glanced out over the gloominess looming over Mount Assiniboine Provincial Park, hoping that we wouldn’t get caught in any rain or bad weather (spoiler alert: we absolutely did!).
Citadel Pass to Porcupine Campground junction
From Citadel Pass, the trail drops slightly into a nice easy meadow walk. As we hiked in from Sunshine Village to Mount Assiniboine, we didn’t actually realize all the views we were missing due to the gloominess, but on a clear day, you can actually see Mount Assiniboine very well from here. To look on the bright side, seeing how far Mount Assiniboine still was probably would have been a bit disheartening, so maybe it was a good thing we couldn’t see it on the way in! But I’m sure glad we were able to see all the views on the hike out a few days later.
This is the view over Mount Assiniboine Provincial Park on a gloomy day
And this is the view on a much clearer day…much better! Mount Assiniboine is getting closer!
The final bit of meadow walking before the drop off the back side of Citadel Pass
At the end of the meadow, the trail begins its steep descent into the valley on the other side of Citadel Pass. A series of switchbacks brings you about 1000 feet down to the junction for the Porcupine Campground. Because we still had relatively fresh hiking legs, this descent didn’t feel too bad, actually, and it went pretty quickly.
Hiking the switchbacks down the backside of Citadel Pass into the valley below
A view into the valley below Citadel Pass where Porcupine Campground sits
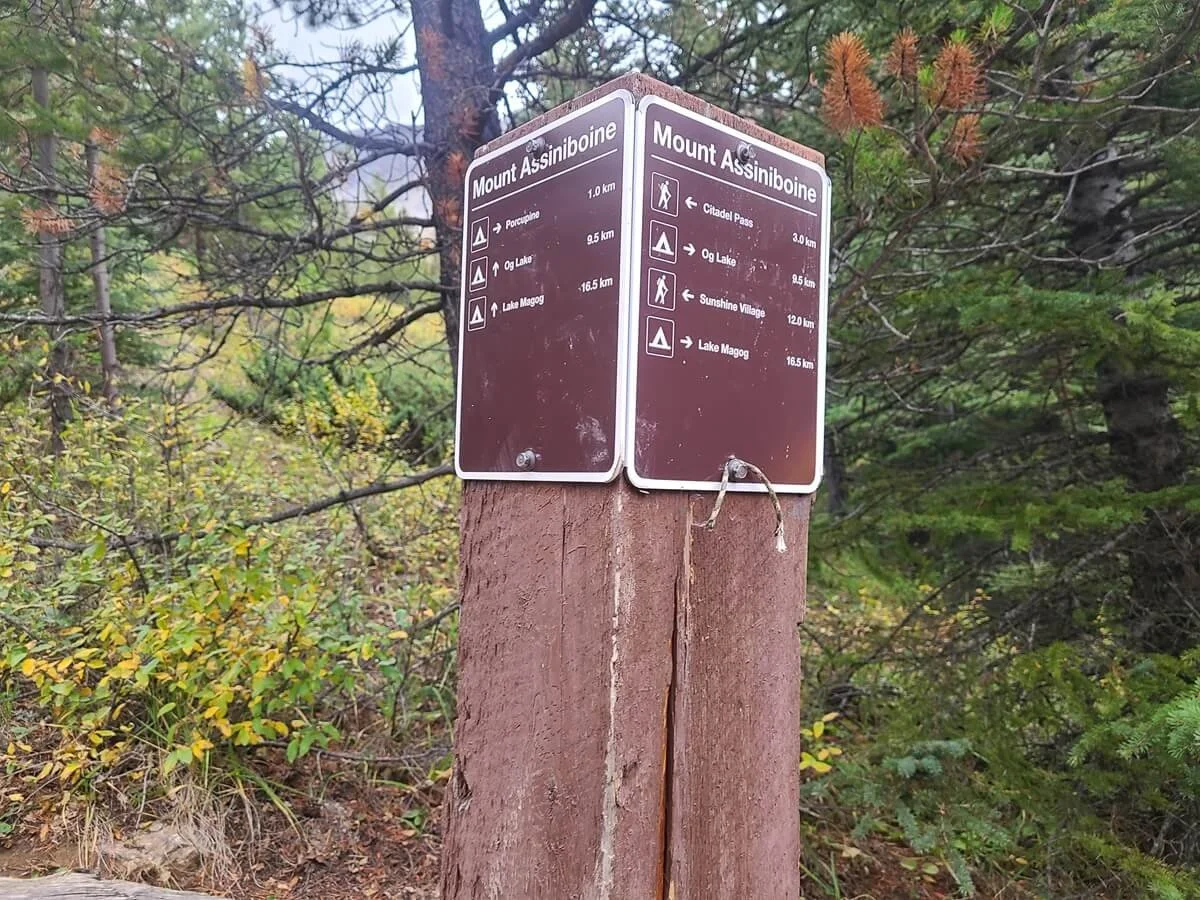
A clear sign marks the junction for Porcupine Campground. If you’re staying there, you’ll have to drop down a steep trail further into the valley to reach the wooded campsite. We were spending the night at Og Lake, so we continued on the main trail.
The junction for the Porcupine Campground on the way to Mount Assiniboine
Porcupine Campground junction to Og Lake
From this junction, the main trail continues steadily dropping elevation – about 400 more feet- but the trail becomes narrow and a little bit sketchy in places as it begins to traverse the side of a grassy slope. The dirt trail is quite narrow in places with a steep edge to your right, and sometimes the trail is a bit slanted down towards the edge and with overgrowth that you have to navigate around. At this point, I was starting to get a bit tired, and because of that in combination with the weight of a full pack, this was my least favorite section of the trail from Sunshine Village to Mount Assiniboine. The only good thing were the views of the mountains across the valley.
Hiking the narrow trail on the way to Og Lake
Views from this part of the hike to Og Lake were amazing on a clear day
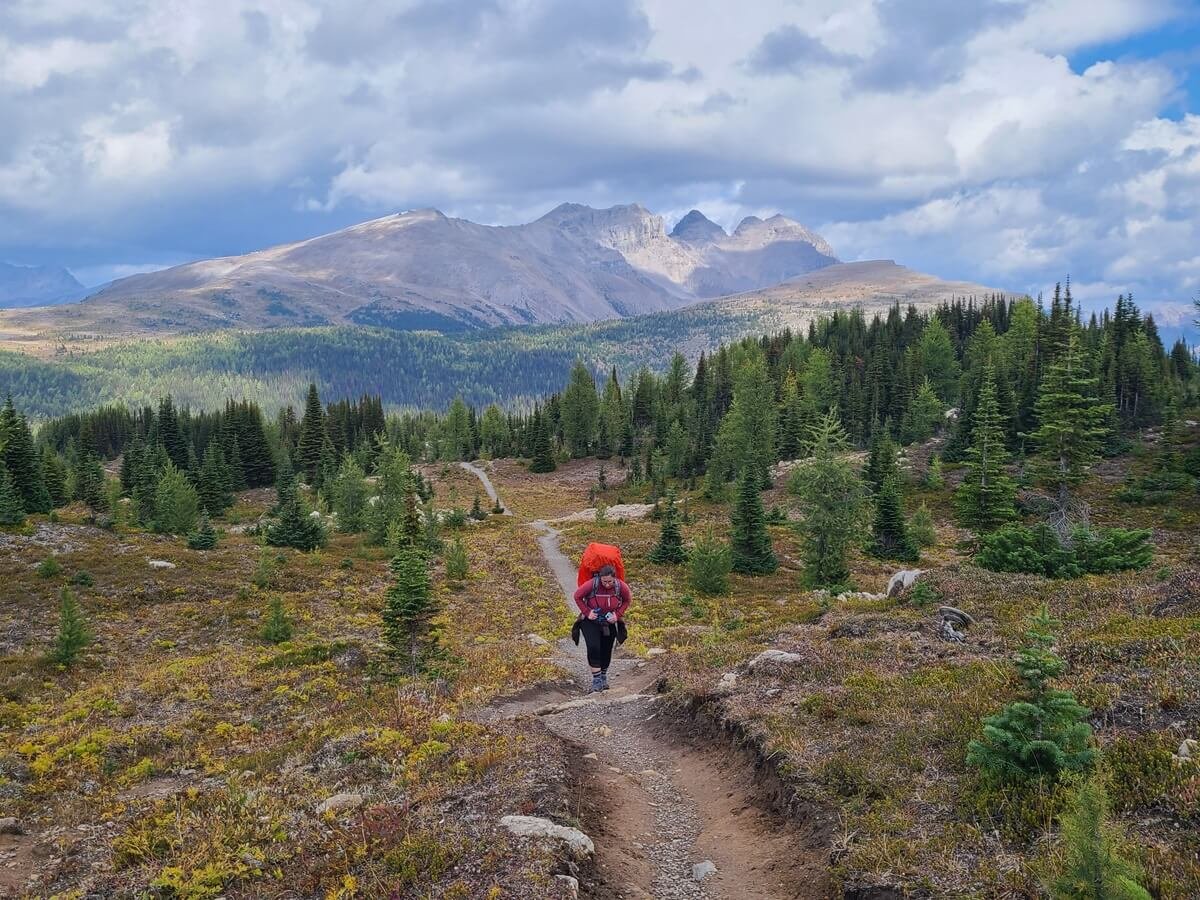
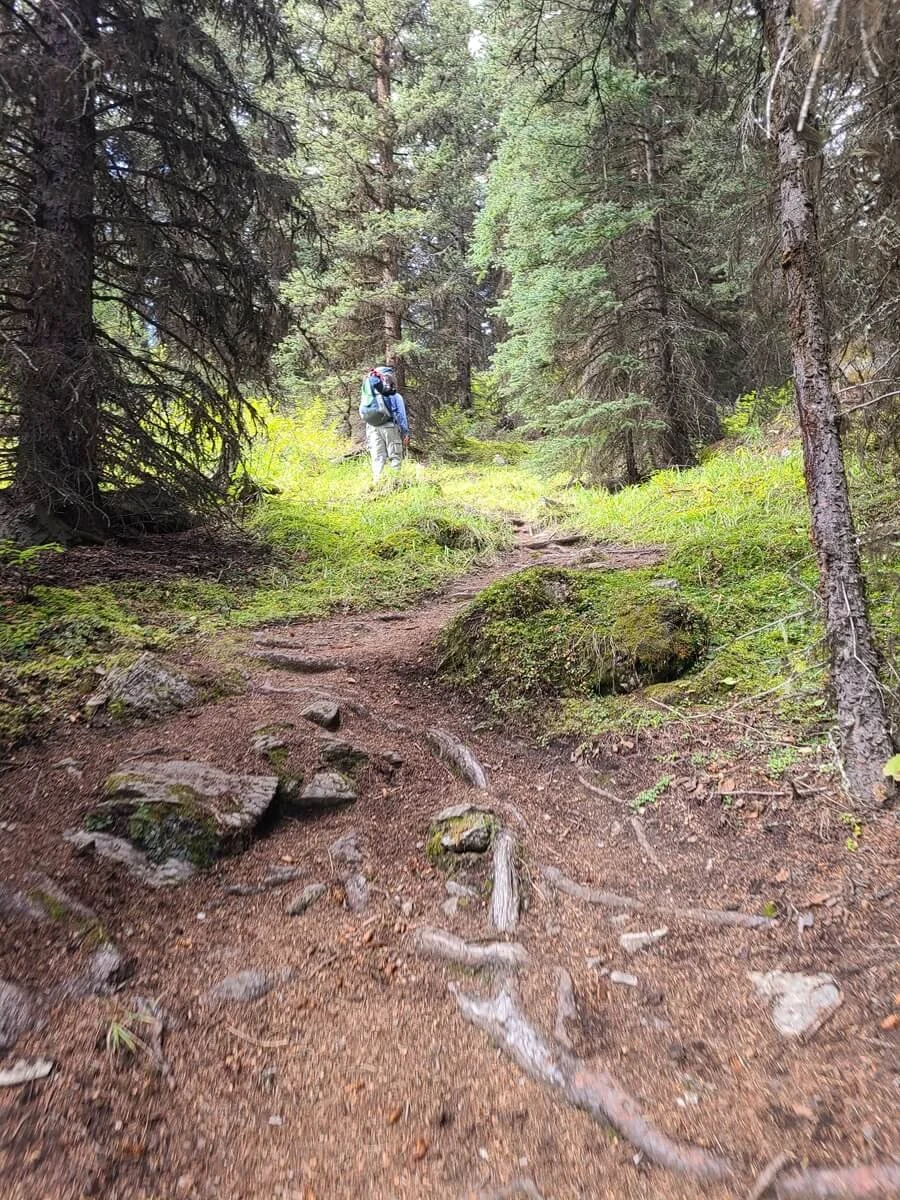
Once you reach the other side of this narrow part, you begin the more exhausting back half of the hike from Sunshine Village to Mount Assiniboine. Here, the trail begins its long series of ups and downs until you reach Og Lake. Mentally, we were expecting just a gradual uphill from here to Og Lake like we read in some trail descriptions, which may be why we found this part of the hike particularly tiring. While it is indeed overall uphill to get to Lake Magog from here, it wasn’t just a gradual incline, but instead a series of small bursts of steep ups and downs, which, with a heavy pack on, weren’t very fun and a little mentally draining. These small bursts are especially evident between the junction to Porcupine Campground and the next junction for Police Meadows.
At this junction, you’ll find the trail which also connects back to Porcupine Campground, so if you did opt to stay there, you’ll rejoin the trail here the next day. Alternatively, if you’re staying at Porcupine Campground while hiking out, this is the trail you’d take to get there (and then you’d climb out the steep rugged path on the other side the next day to continue the climb out to Citadel Pass).
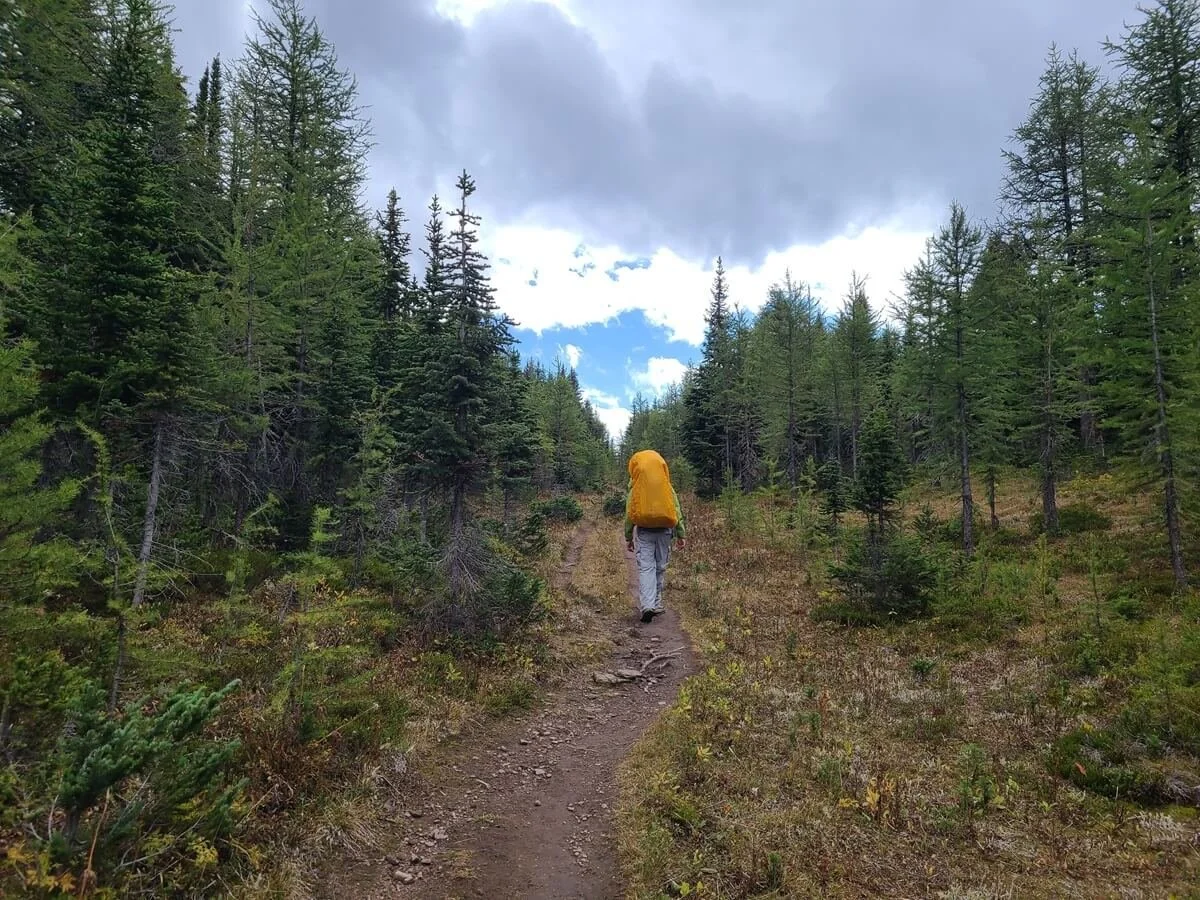
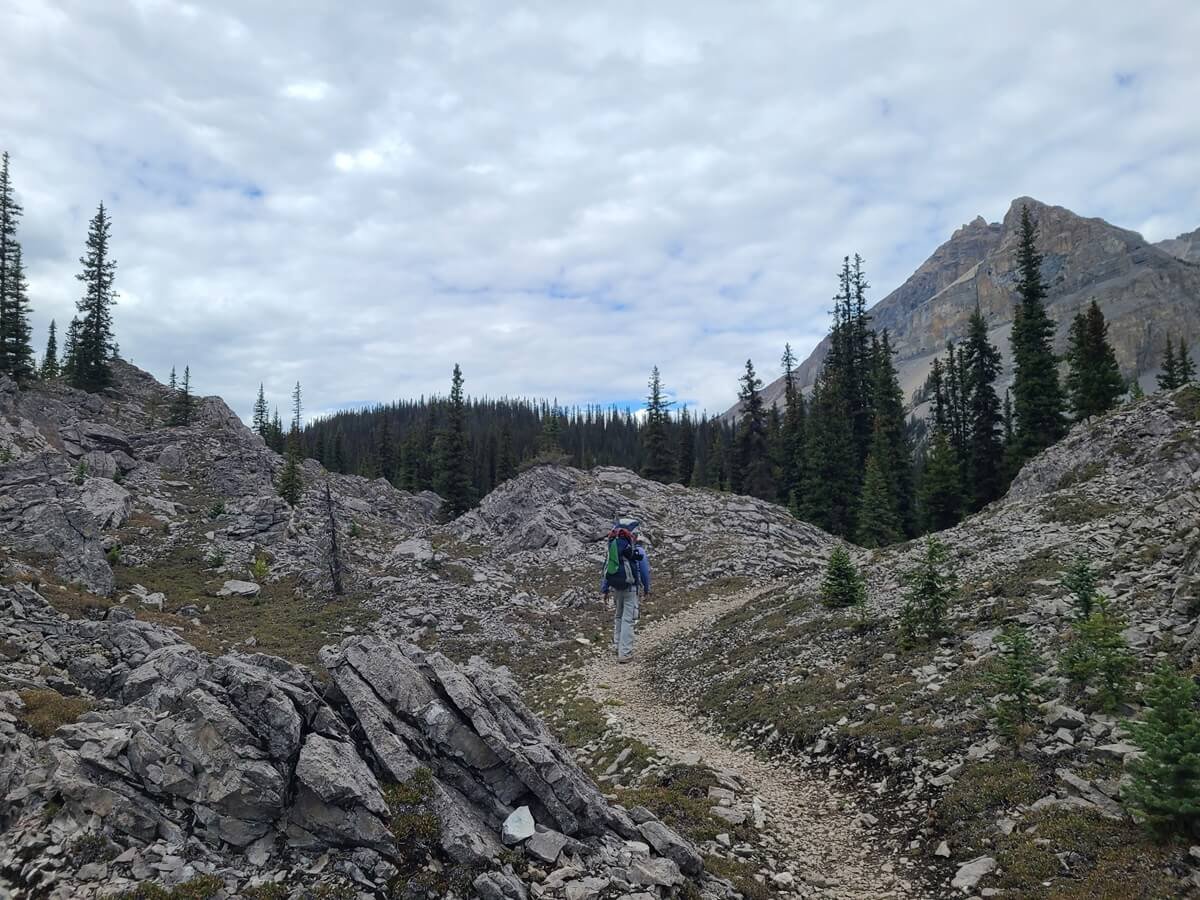
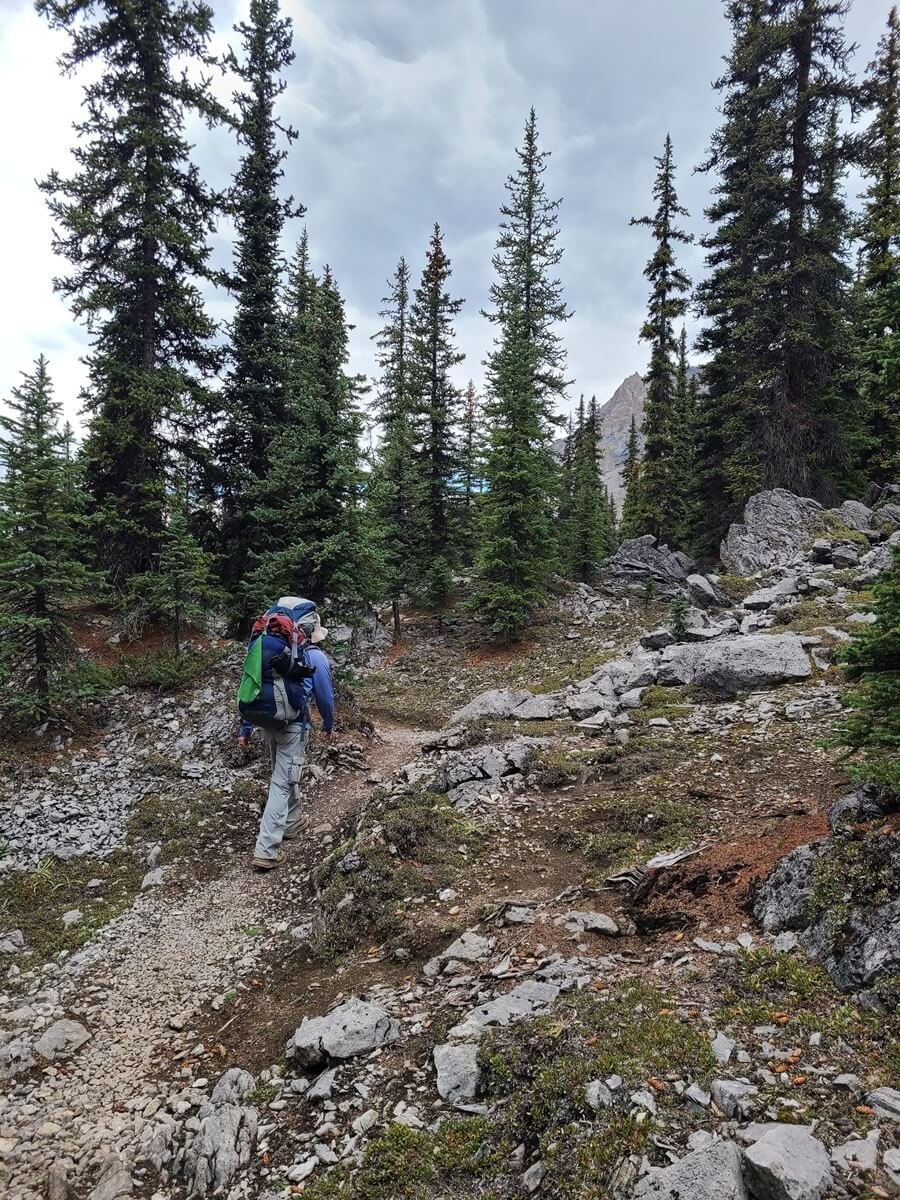
From the junction with Police Meadows, the trail climbs as you now enter what’s known as the Valley of Rocks. Through here, the gravel path meanders through an exposed rocky landscape interspersed with small spurts of forest. We did read in advance on multiple AllTrails reviews that the Valley of Rocks seems to go on forever, and we thought, “It can’t be that bad”. Well, it was… it really does feel like it never ends. The views from the trail here are pretty, but after miles and miles, and after constant ups and downs, it gets a bit old.
Hiking through the aptly named Valley of Rocks on the trail to Og Lake
The Valley of Rocks on the way to Og Lake
Before setting off on this trail, I was under the impression that the crux of the hike from Sunshine Village to Mount Assiniboine would be getting to Citadel Pass and the rest would be a pretty gentle uphill to Lake Magog, but it was in fact the complete opposite. The first part of the hike up to the pass was gentle and easy, and this back half was pretty brutal, and our pace slowed way down. It might be because we were already a ways in and on tired feet and legs at this point, but even on the hike out, we didn’t care too much for this section of trail.
The hike from Sunshine Village to Mount Assiniboine has lots of bursts of steep ascents and descents along the trail, especially through the Valley of Rocks
On top of the tiredness, it had gotten pretty cold and had started raining right as we reached the Valley of Rocks, and pretty much didn’t let up until we were inside our tent at Og Lake, with a few thunders here and there to rattle us just a bit. So from the bottom of Citadel Pass to camp, it was just pure mental struggle to get through the rest of the hike.
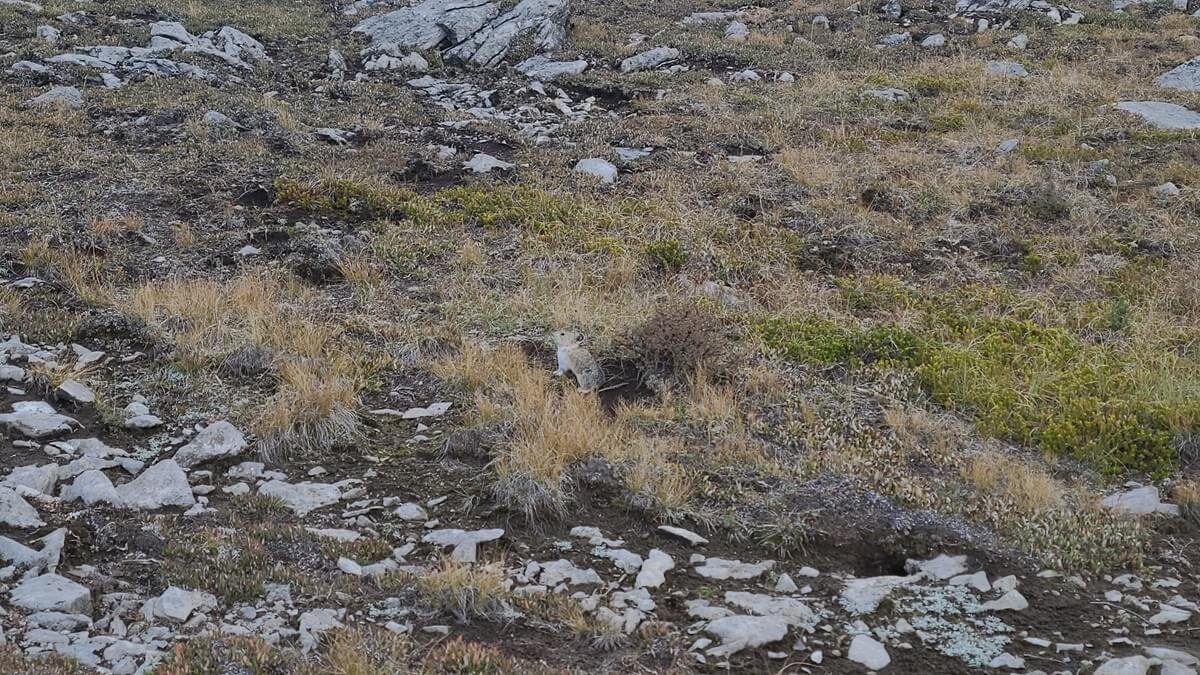
The only good thing I remember from this part of the hike in was the constant squeaks of pikas that were scurrying all around the rocks throughout the Valley of Rocks. It was almost as if they were cheering us on and encouraging us to get through the hike!
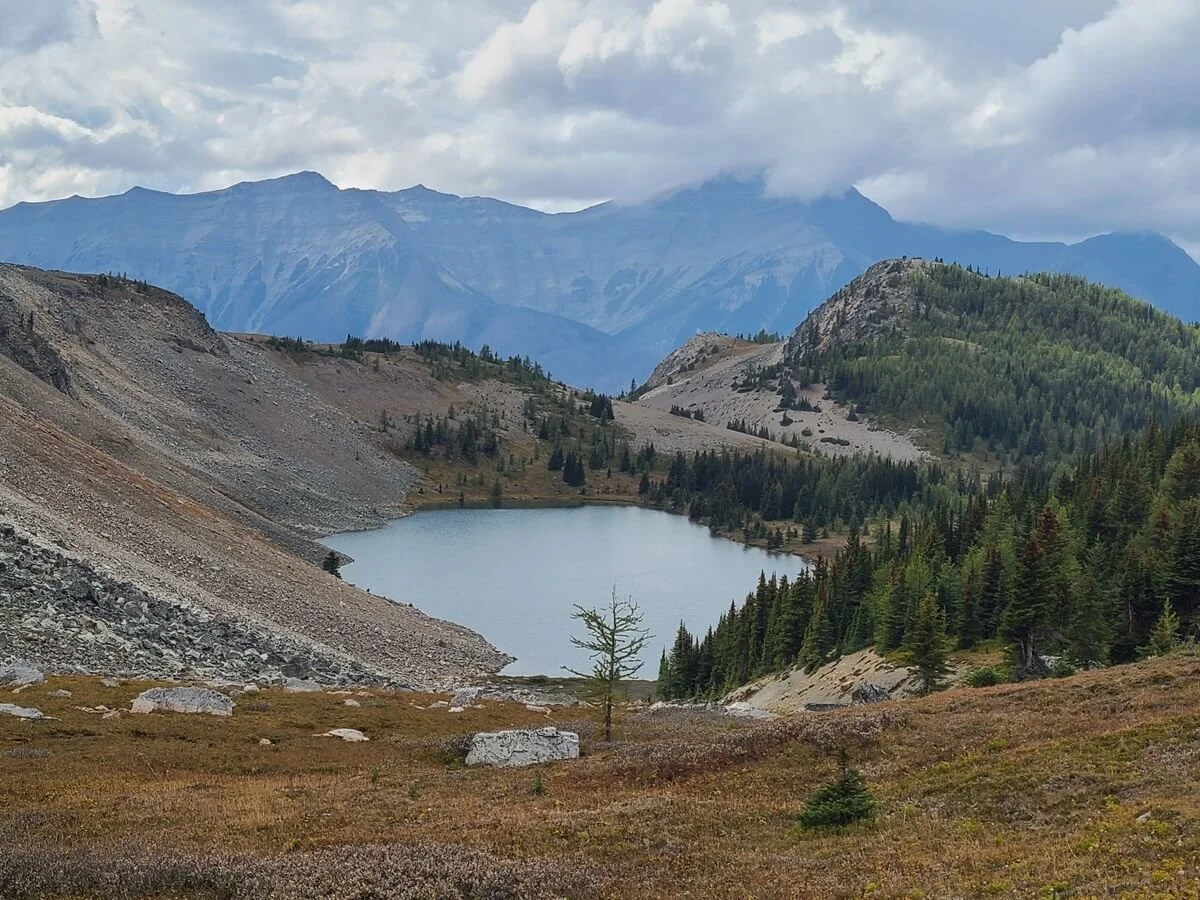
As you reach the end of the Valley of Rocks, you’ll crest a hill overlooking Og Lake, and on a clear day, Mount Assiniboine towers over it. From here, it seems so much closer. We weren’t able to appreciate this view on the hike in, as it was pretty much nonexistent in the bad weather and because we were just on a mission to get to camp, but on the hike out we discovered all the views that we had missed. The meadows around Og Lake had turned beautiful colors with the start of Fall, and Mount Assiniboine loomed over the lake. Og Lake itself had unusually low water levels due to a shortage of rain that summer (go figure….as we were sopping wet!), so the view wasn’t as picturesque as it could be, but it was still pretty good.
Overlooking the final stretch of trail through the Valley of Rocks, with Og Lake just ahead (but still hidden from view here). Mount Assiniboine is in clear view from here!
Fall colors surround Og Lake in early September
We arrived to Og Lake campground sopping wet, cold, and a bit miserable, just before dark (around 8:15 pm). We set up our tent and got right in to warm up without even eating dinner that night, hoping for better weather tomorrow.
A gloomy morning at Og Lake campground, with Mount Assiniboine hidden behind clouds
Overall, making the long stretch from Sunshine Village to Og Lake in one push was a bit more challenging than expected, partly due to the weather, but also due to just the sheer length and profile of the trail itself. While we could easily do this trail and distance as a day hike, it was a lot for backpacking. However, it is a common way to break up the Sunshine Village to Mount Assiniboine hike, so if you’re a strong backpacker used to these kinds of distances, then you should be okay…just hope for good weather!
Og Lake to Lake Magog
We woke up to another cold and gloomy morning, and we still couldn’t see Mount Assiniboine.
We ate breakfast at the open air cooking area while we watched the little pikas scurrying around the rocks around us before setting off to Lake Magog. We weren’t in a huge rush as we knew the weather wasn’t looking too good for today and we wouldn’t be able to get any hikes in in the core area as we originally had planned for today, so we got a lazy and slow start.
The first part of the trail from Og Lake to Lake Magog involved navigating the rocky area around the west side of the lake. Keep your eyes out for the little pikas scurrying around!
Hiking the trail near Og Lake
The cute pikas are found all throughout the Valley of Rocks and near Og Lake!
Very shortly after we started, so did the pouring rain, sleet, and wind, and we had another not-so-great time on the trail. Luckily though, this section of trail between Og Lake and Lake Magog is considerably easier than anything we hiked the day before, and only about 5 km long.
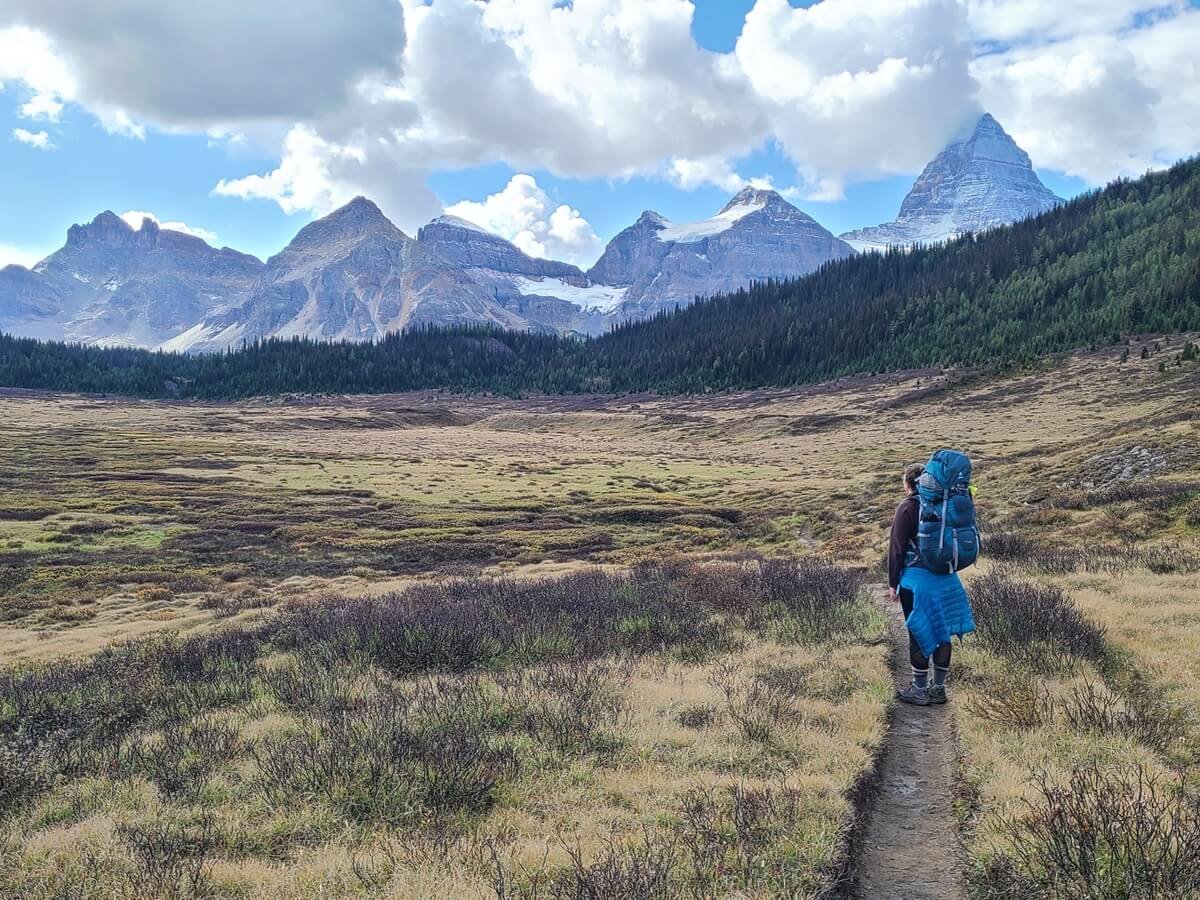
Once around the rocky section of the lake, the trail traverses a flat meadow with wide open views over to Mount Assiniboine and the surrounding mountains. On the hike in, we had no idea what we were missing, but on the way out, we luckily were able to see the gorgeous views from this part of the trail.
Beautiful views of Mount Assiniboine from the easy walk between Og Lake and Lake Magog
Clear views of Mount Assiniboine from the trail
Looking back towards Og Lake
At the end of the long meadow walk, there are some short climbs through the woods that pour you out at Assiniboine Lodge. Through this last section of the hike, there are quite a few trail junctions, but they are all well-signed, so it’s easy to find your way to Lake Magog.
As you approach the Lodge, there are two nearby junctions that you can take to head directly to the Lake Magog Campground. Otherwise, you can continue straight to the Assiniboine Lodge just ahead (it’s just past these junctions so doesn’t really add any distance to your hike if you wanted to stop here first before heading to camp).
We decided to head to the Lodge to see if it was possible to take shelter on a covered porch or anything while we waited for the rain to subside. There is a small porch, but it is technically frowned upon for backpackers to use this and hang out around the Lodge. We didn’t realize at first until a nice ranger came by and explained it to us and another group with the same idea, but he let us stay (I think he was sympathizing with us with the terrible weather!). From the front steps of the Lodge, we watched as waves of rain, sleet, and even pea-sized hail blew in and out across Lake Magog. Sometimes the entire mountain itself and the lake would totally disappear. And for all too brief and fleeting moments, the sun would pop out just for a minute, giving us a teaser of warmth before being shrouded in again by clouds and we started shivering again.
Hail and no views while sitting at Assiniboine Lodge!
The view from Assiniboine Lodge on a beautifully clear day…much better!
By mid-afternoon, the rain was gone for good and we headed towards the Lake Magog campsite. From the Assiniboine Lodge, the Lake Magog Campground is 2 km. The trail wraps around the western side of the lake and has frequent good views of Lake Magog and Mount Assiniboine, and even of the famous Niblet, Nublet, and Nub (one of the best day hikes in the area). Of course on this day, we didn’t see any of this, but in the following days as we explored the area, we were able to see all the amazing sights we had missed on the way in.
The beautiful trail from Assiniboine Lodge to the Lake Magog Campground
Thankful to finally be at Lake Magog Campground, we picked a site, pitched our tent, and ate dinner for the first time since we set out on the trail. By evening, Mount Assiniboine finally started to show itself, and the entire campground came together to watch it happen, which was pretty cool!
Everyone at the Lake Magog Campground gathering to see the top of Mount Assiniboine appear for the first time in days!
Hiking out: Lake Magog to Sunshine Village
The hike out from Mount Assiniboine to Sunshine Village is actually a bit tougher than the hike in, in our opinion anyway. Our spirits were higher for the hike out knowing that we had a good weather outlook for the next two days and we would stay warmer and drier, but the trail in this direction has much more elevation gain to climb to Citadel Pass from this side.
The first part of the trail from Lake Magog to Og Lake was easy and fast, as you start off by hiking through the flat and scenic meadow with great views behind you back to the mountain.
Saying good-bye to Mount Assiniboine
Once you hit Og Lake, you begin the path through the Valley of Rocks. Again, just as it was before, you’ll be going on a lot of steep ups and downs. However, this time, you’re overall going downhill, and you’re on fresher legs (at least for the day, but overall you might be a bit more tired since at this point you’ve been in the backcountry now for at least a few days!). It’s not too bad at first as you alternate between rocky landscapes and forest, but as before, this part never seems to end.
The never-ending Valley of Rocks on the way out to Sunshine Village
When we got to the Police Meadows junction we thought the worst of it was over, completely forgetting about the terrain between here and the Porcupine Campground junction. This small section was mentally the worst part of the entire hike for us in this direction! Every time we started a climb I kept thinking, “Okay, at least this climbing is part of the climb up to the pass”. And just as I thought we were making progress with our climb, the trail would suddenly begin descending steeply back down. It was a bit disheartening because I knew how much we had to climb back up this side of the pass, and I felt we just weren’t making any progress.
After crossing the narrow ridge-like portion of the trail and reaching the Porcupine junction, the true climb up Citadel Pass began. It’s a steady and constant climb to the meadows at the top just under the pass.
The hike through the valley just before the start of the climb to Citadel Pass
Just before Citadel Pass (the ridge on the left up ahead)
We decided to have a bit of a rest on top of Citadel Pass and eat dinner while it was still light out, and then got to experience golden hour on the mountains as we made the last push to Howard Douglas Campground where we would spend the night. The last short climb up and over the ridge in front of the Howard Douglas Lake basin was rough on tired legs, but we made it to camp just as darkness set in.
The end of golden hour as we hike from Citadel Pass to Howard Douglas Campground
Again, we made another long stretch hiking all the way from Lake Magog to Howard Douglas Lake. For a day hike, it’s doable, but it’s a very exhausting up-and-down trail for backpacking. At the time, it was worth it for me to make the extra push to avoid the steep climb out of Porcupine Campground right before the climb up to Citadel Pass, but overall I think it might be better to break the hike up by staying at Porcupine.
From Howard Douglas Lake, it’s a short hike back to Sunshine Village. The climb out from the lake onto Quartz Ridge was a rough way to start the day, but it’s the hardest part of this section of the hike out. A few minor ups and downs over small bumps will bring you back to the flat Sunshine Meadows area, where the end is in sight!
Back to Sunshine Meadows! You can see the chairlift at the top of the hill ahead.
Instead of taking the junction towards Rock Isle Lake and back to the chairlift, we hiked the wide gravel path down to the top of the gondola. This seemed like it was never-ending and dragged on forever, probably because I was just so eager to be off the trail, and at the time, I had wished we had hiked back up to the chairlift and took that down instead. In my state of pain, I thought that would have been quicker and worth it, but we did actually take the shortest and most direct way back to the gondola by hiking this way.
The hike from Sunshine Meadows back to the top of the Gondola
We were so happy we ended up purchasing round trip gondola tickets to avoid the long walk down the service road…again, so worth it!
What to Do in Mount Assiniboine
Hiking to the Nublet is one of the best things to do in Mount Assiniboine
Once you’ve made all this effort just to hike to Mount Assiniboine, what’s there to do? Plenty! There are tons of amazing views and hiking trails in the core area of Lake Magog, and we recommend you spend a minimum of two days here to get to all the must-see places in Mount Assiniboine while still being able to work around weather.
While in Mount Assiniboine, you can:
Hike to the Niblet, Nublet, and Nub, three famous viewpoints in the Canadian Rockies that are the place to go in Mount Assiniboine.
Visit Wonder Pass, which involves a relatively easy hike up to a gorgeous pass overlooking both Mount Assiniboine Provincial Park and Banff National Park.
Hang out by Lake Magog! Enjoy the views from its shore or walk around the nearby trails around the lake.
Visit Sunburst and Cerulean Lakes, which have beautiful blue water, awesome mountain reflections, and epic views of Sunburst Peak and Mount Assiniboine.
Check out our complete Mount Assiniboine guide for more information about things to do in Mount Assiniboine!
How to Incorporate the Sunshine Village to Mount Assiniboine Hike in Your Itinerary
There are a number of ways to get to and from Mount Assiniboine, and the hike from Sunshine Village to Mount Assiniboine is just one of them. Here are a few different ways you can include this hike into your overall Mount Assiniboine itinerary.
Hike in and out from Sunshine Village
Hiking around Sunshine Meadows near Rock Isle Lake
The most straightforward way to include the Sunshine Village to Mount Assiniboine hike in your plans is to simply hike both in and out this way. You’ll have the same starting and ending trailhead, and the logistics are therefore very simple. This is what we did, but honestly, it’s not the option we would recommend. The hike from Sunshine Village to Mount Assiniboine is long and challenging, and doing it twice isn’t necessary when there are other methods for getting to and from the park. We’d recommend hiking in via this trail (since it’s easier than hiking out this way) and then using one of the other methods below to leave the park in order to have different views and experiences on the way out.
Through-hike from Sunshine Village to Mount Shark
Hiking near Wonder Pass on the hike from Lake Magog to Mount Shark
Another very popular way to hike into Mount Assiniboine is from the Mount Shark trailhead located in Kananaskis (in Spray Lakes Provincial Park). On this route, you can go one of two ways- over Wonder Pass or over Assiniboine Pass- but the route over Wonder Pass is the preferred route for the incredible views around Marvel Lake and from the pass itself. The Wonder Pass route is about 27 km (16.7 miles), and is arguably a little easier than the hike from Sunshine Village to Mount Assiniboine, particularly on the way out.
We would recommend a through-hike through Mount Assiniboine to see more of the park and to never hike the same thing twice. We’d do this by hiking into Mount Assiniboine from Sunshine Village, and then hiking out to Mount Shark, as this would be the easiest direction and with the best views. However, through-hiking Mount Assiniboine requires a bit of complicated transportation logistics, as the trailheads are 80 km apart with no public transportation between them. Check out our Mount Assiniboine guide to learn more about ways you can arrange transportation between the two.
In short, our recommended way of through-hiking Sunshine Village to Mount Shark would be:
Park your car in Canmore and take the public bus from Canmore to Banff.
Take the free shuttle from Banff to Sunshine Village.
Hike from Sunshine Village to Mount Shark. Enroute, find a fellow hiker who will be hiking out on the same day as you and is heading back to Canmore.
Hike to Mount Shark and catch a ride back to your car in Canmore.
Hike from Sunshine Village to Mount Assiniboine and take the helicopter out
The helicopter into and out of Mount Assiniboine is a quick and scenic ten minute ride over the peaks of Mount Assiniboine and Kananaskis. If you want to combine the best of both worlds by hiking and taking the helicopter, it’s possible! We would recommend hiking in first from Sunshine Village to Mount Assiniboine and then helicoptering out so that you can hike the easier direction on the trail, and also because the views are better in this direction. Again, this will require some logistical planning, but we’re here to help make it easier for you! Check out our Assiniboine guide for more information on the flights to Mount Assiniboine, like schedules, costs, and booking.
The key thing to know here is that there are two places the helicopter leaves from- Canmore and the Mount Shark helipad located in Spray Lakes Provincial Park, about an hour drive from Canmore through Kananaskis. We would highly recommend booking the helicopter out that goes to Canmore instead of Mount Shark, as there is public transportation that runs between Canmore and the town of Banff. There is no public transportation between the Mount Shark helipad and Canmore or Banff, so if you flew here, you’d have to rely on hitchhiking or finding someone en route along the trail or at Lake Magog who will be taking the same flight out as you and willing to give you a ride to Canmore. If you parked in Banff, you can then take the public bus from Canmore back to your car.
The second thing to note is that you should definitely park your car in downtown Banff and take the free shuttle up to Sunshine Village, rather than park at the Village itself, to start your hike to Mount Assiniboine. That way, when you arrive back in Canmore, you can simply take the public bus back to Banff where your car is waiting, and not have to worry about making it back in time to also have to catch the last shuttle up to the Village (which is a little after 5 pm). This might not be a huge issue, since the helicopter flies back early in the morning, so if you fly directly to Canmore, it will be easy to get back in time to catch a Sunshine Village shuttle. But, if you could only book a flight to Mount Shark and are relying on hitchhiking, it might be risky. Alternatively, park in Canmore before your hike in the morning, and then take the public bus to Banff and the shuttle up to the Village to begin. That way, when you fly back to Canmore, you’ll arrive right back at your car.
In short, here’s our recommendation for combining the Sunshine Village hike to Mount Assiniboine with the helicopter:
Park in Canmore.
Take the public bus from Canmore the Banff.
Take the free shuttle from Banff to Sunshine Village.
Hike from Sunshine Village to Mount Assiniboine.
Take the helicopter out to Canmore.
Booking a last-minute helicopter at Assiniboine Lodge
We admit, our biggest regret during our visit to Mount Assiniboine was not pre-arranging a one-way helicopter ride out. We chose to do a roundtrip hike to save money and to sort of preserve the backcountry experience of visiting the park, but in the end, we got what we were seeking from just the one-way hike in, and by the time we had to start our hike all the way back out, we were already pretty tired. Taking the helicopter one-way would have saved us lots of time and energy and would have us seeing different views over the other side of the park. Luckily, once you’re in the core area, the Assiniboine Lodge does let you book last minute flights out if they are available, which is exactly what we tried to do!
Some things to know about booking a helicopter at Assiniboine Lodge:
You can only do it at the lodge’s tea time, which is from 4-5 pm on non-flight days (Mondays, Tuesdays, Thursdays, and Saturdays).
We were told that we could pay with card, but I believe there would be a pretty high fee to do so, and also if the card reader is down for any reason, you’d be out of luck. Bring CAD with you just in case.
Likely, the only flights available will be the ones to Mount Shark, as the flight to Canmore usually books up in advance and there are less spaces available in general (there’s only one flight to Canmore everyday but multiple to Mount Shark).
Because you’d likely be flying to Mount Shark, you’ll have to find someone that would be willing to drive you back to Canmore. This is surprisingly easier than it sounds! The first group of people we asked just happened to be hiking back to Mount Shark the same day we would be flying out, and they had space for two people back to Canmore. Score! The problem we had was timing. We would get to the Mount Shark helipad earlier in the day, whereas they wouldn’t be hiking out until about 3 pm or so. By the time they could drive us back to Canmore and by the time we could take the public bus back to Banff, it was likely that we would miss the last shuttle back up to Sunshine Village where our car was parked, so it was too risky for us to take up their offer. We didn’t really make too much more effort in asking more people, especially those staying in the Lodge who were more likely to be taking the helicopter as well, so we stuck with our original plans to hike out.
The lesson here: If you plan a roundtrip hike from Sunshine Village to Mount Assiniboine but want the option to bail out via helicopter, park your car in downtown Banff prior to your hike instead of up at Sunshine Village. It will make getting back to your car much less risky and stressful if you decide to take the helicopter out!
Sunshine Village to Mount Assiniboine Itinerary
There are lots of different ways you can arrange a Mount Assiniboine hiking itinerary involving the Sunshine Village to Mount Assiniboine hiking route. It all depends how much time you have, what campgrounds you are able to secure, and how strong of a backpacker you are and what distances you are able to cover with a heavy pack.
We saw a whole spectrum of itineraries as we were talking with people on the trail and at camp. Here are some ideas for how you can structure your own Mount Assiniboine itinerary involving the hike to and/or from Sunshine Village and Mount Assiniboine.
Sunshine Village to Mount Assiniboine hiking-only itineraries
5 day Sunshine Village to Mount Assiniboine hiking itinerary
We did a five day Sunshine Village to Mount Assiniboine hiking itinerary and thought it was an ideal amount of time. It was a good balance between having enough time to do and see everything we wanted without killing ourselves on the trail, but also not taking a huge amount of time for the trip overall. Here is our recommended Mount Assiniboine hiking itinerary:
Day 1: Hike from Sunshine Village to Og Lake campground. This is a long hike, but we preferred to do this so that we could spend almost a full day in the core area by Lake Magog the next day. However, if you think you need to break up the hike into more manageable distances, hike to Porcupine Campground tonight instead.
Day 2: Hike to Lake Magog campground. Spend the rest of the day doing a day hike in the core area. We would suggest the hike to Wonder Pass today, as it’s a pretty easy one to do after coming in from Sunshine Village. You can spend the evening either hanging out at the shore of Lake Magog, or at Sunburst and Cerulean Lakes, which are a very short and easy hike from the campground.
Day 3: Do the Niblet/Nublet/Nub hike, the area’s most famous and picturesque hike to three viewpoints over Lake Magog, Sunburst Lake, Cerulean Lake, Elizabeth Lake and the surrounding mountains. Each of the three successive viewpoints gets a little bit more challenging to get to, but the great thing about this hike is that each viewpoint is stunning, so if you can only do the first one or two, you’re still getting amazing views.
Day 4: Pack up and start your hike back out to Sunshine Village. Camp at Howard Douglas Campground. Again, this is a pretty big push for one day, so if you need to, camp at Porcupine Campground instead. We chose to camp at Howard Douglas in order to avoid the rugged climb out of Porcupine before the pass, and to have a short easy last day of hiking out.
Day 5: Hike out to Sunshine Village.
Alternatives to this Sunshine Village to Mount Assiniboine itinerary
If you have more time, spend an extra day or two in the core region. This will allow you to have more wiggle room to work around bad weather, which is likely. During our trip, bad weather forced us to squeeze in all the hiking we wanted to do in the core into just one day, so we weren’t able to do everything we intended (like the entire hike up to the Nub), but luckily we got in our must-dos (Wonder Pass and the Niblet and Nublet hike). Even if you have ideal weather the whole trip (lucky you!), it never hurts to have more time in this stunning area.
If you have less time, you can absolutely shorten this itinerary, but you’ll have to be a strong hiker! The most aggressive itinerary we saw someone do from Sunshine Village to Mount Assiniboine and back is three days:
Day 1: Hike from Sunshine Village to Og Lake
Day 2: Hike from Og Lake to Lake Magog and do a day hike (the best one would be the Niblet/Nublet/Nub hike)
Day 3: Hike from Lake Magog all the way back to Sunshine Village
This is a tough itinerary, and we wouldn’t recommend planning something like this, but if you have a short amount of time and you know you’re a strong and experienced backpacker, it’s an option.
Another way you can do a three day Sunshine Village to Mount Assiniboine itinerary would be to base yourself at Og Lake:
Day 1: Hike from Sunshine Village to Og Lake
Day 2: Hike from Og Lake to Lake Magog, do a short day hike (to Wonder Pass or the Niblet/Nublet) and hike back to Og Lake (so this would be one big day hike from Og Lake)
Day 3: Hike from Og Lake back to Sunshine Village
This would break up your hiking a little better so you would never have one big push from Lake Magog to Sunshine Village.
The shortest Sunshine Village to Mount Assiniboine itinerary we’d recommend is four days. Follow our five day itinerary above but just eliminate day 3. Use day 2 to hike to either Wonder Pass or the Niblet/Nublet (maybe both if you’re fast and a strong hiker!).
Again, these shorter itineraries will be tough and require a lot of hiking in a short period of time, so just know your limits when planning out your time on the trail. Many people want to visit Lake Magog and Mount Assiniboine solely to see the amazing view from the Niblet/Nublet/Nub, so if that’s your only goal, a shorter itinerary may work for you, but just remember you may not be able to work around bad weather in a shorter time frame, which would be a huge let down after making all these plans to get out there!
Sunshine Village to Mount Shark through-hike itinerary
Heading up to Wonder Pass on the hike from Mount Assiniboine to Mount Shark
If you can arrange the right transportation logistics, then we would absolutely recommend a Mount Assiniboine through-hike! This is our recommended itinerary from Sunshine Village to Mount Shark (the ideal direction for views and ease):
Day 1: Hike from Sunshine Village to Og Lake (again, stop at Porcupine Campground instead if necessary)
Day 2: Hike to Lake Magog. Spend the day exploring the area around the lake, and hiking to and relaxing at Sunburst and Cerulean Lakes.
Day 3: Hike the Niblet/Nublet/Nub
Day 4: Hike out via Wonder Pass to Mount Shark, spending the night halfway through at one of the three campgrounds enroute
Day 5: Hike to the Mount Shark trailhead in Kananaskis
Alternatives to the Sunshine Village to Mount Shark itinerary
Again, we think five days on the trail is ideal, but you can absolutely shorten this if you need to. Given that the hike from Mount Assiniboine to Mount Shark is arguably easier than that from Sunshine Village, a strong backpacker can hike this trail in one long day. So to shorten this itinerary to four days, combine days 4 and 5 into one long push to Mount Shark without camping. Alternatively, combine days 2 and 3 by hiking in from Og Lake to Lake Magog, and then doing the hike to the Niblet and Nublet (going all the way to the Nub would probably be too much), and spend the night at Lake Magog. If you make both changes, this itinerary could be as short as three days:
Day 1: Hike from Sunshine Village to Og Lake
Day 2: Hike from Og Lake to lake Magog and hike the Niblet/Nublet
Day 3: Hike from Lake Magog to Mount Shark
This would be super aggressive and not account for bad weather, so we would recommend a minimum of four days for this itinerary that would look something like this:
Day 1: Hike from Sunshine Village to Og Lake
Day 2: Hike from Og Lake to Lake Magog and spend time in the core region by the lakes
Day 3: Hike to the Niblet/Nublet/Nub
Day 4: Hike from Lake Magog to Mount Shark via Wonder Pass
Days 2-3 can be arranged however you need to in order to account for bad weather in the core.
Hiking plus helicopter Mount Assiniboine itinerary
If you’d like to combine the Sunshine Village to Mount Assiniboine hike with the helicopter, here’s our recommended itinerary:
Day 1: Hike from Sunshine Village to Og Lake
Day 2: Hike from Og Lake to Lake Magog. Hike to Wonder Pass and spend time by Lake Magog.
Day 3: Hike the Niblet/Nublet/Nub
Day 4: Take the helicopter out in the morning to Canmore or Mount Shark
Sunshine Village to Mount Assiniboine Hike: Costs
Camping in Mount Assiniboine is a great way to visit this park on a budget. Pictured here is one of the cooking shelters at Lake Magog Campground with an epic view.
Here are some potential costs for your hiking trip to Mount Assiniboine from Sunshine Village:
Campground fees: Mount Assiniboine core campgrounds are $10 CAD per person per night plus reservation fees while Banff National Park campsites are $12.75 per person per night plus reservation fees. This is by far the cheapest way to spend the nights in the park!
Lodge fees: The Assiniboine Lodge can run you close to $1000 CAD per stay. Often, backpackers don’t choose to stay here, but it is always an option!
Naiset Hut fees: These can be as cheap as $30 CAD per person per night up to $180, depending on how many people stay with you in the hut, so it’s a good intermediate in between camping and the Lodge.
Assiniboine helicopter: This costs between $215-$245 CAD each way depending on where you fly from.
Sunshine Village gondola: This costs $50-70 CAD depending on if you get a one-way or roundtrip pass.
Park passes: If you park or camp in Banff National Park, you’ll need the Banff Park Pass, which costs $10.50 CAD per person per day, but it may be more economical to get the Annual Discovery Pass which costs $75.25 CAD per person but lasts an entire year and is good for entry into all Canadian National Parks. Alternatively, parking in Kananaskis requires the Kananaskis Conservation Pass which is $15 CAD per vehicle (not per person) per day, or $90 for an annual pass.
Transportation fees: If you choose to through-hike or take the helicopter, you’ll have to factor in additional fees for the public buses to get between trailheads.
The cheapest way to visit Mount Assiniboine is to backpack both ways from a single trailhead and camp in the core. Any other method of getting and staying there will tack on additional, and sometimes hefty, costs (I’m looking at you, Assiniboine Lodge and helicopter!) but they can absolutely be worth it!
Sunshine Village to Mount Assiniboine Hike: What to Pack
Filtering water at Howard Douglas Lake
Aside from the usual necessities, here are some things we would specifically recommend or highlight for the hike from Sunshine Village to Mount Assiniboine.
Rain gear: This is an absolute must, as the weather can be crazy and unpredictable out here. At the minimum, bring a rain coat, pack cover, and waterproof hiking boots. But something else that saved our life (in multiple places, not just here!) were rain pants. They easily slip right over my hiking boots and pants and keep me super dry, even in the heaviest of rain, which we encountered for two days straight on the trail!
Layers: Even on warm days in the summer, the temperatures dip in the evening and morning, and it can be cold and windy on high points of the trail and on passes and summits in the core region. Bring a hat and gloves, too.
Cold weather gear: On that note, also make sure you have gear that can withstand freezing temperatures, even in the summer. Make sure you have a properly-rated sleeping bag (I used a zero degree Fahrenheit bag), a good insulating sleeping pad, and even an additional sleeping bag liner for extra warmth.
Bear spray: Banff, Mount Assiniboine, and Kananaskis are all Grizzly territory, and you absolutely need bear spray when hiking the trails out here. Wear it somewhere that’s easily accessible and know in advance how and when to use it.
Bug spray: Especially if coming in the summer months, the bugs can be bad.
Sunscreen and hat: Much of the core area is exposed to the sun.
Water filter, bladder, and Nalgene: A filter is absolutely necessary, even at Lake Magog where there are water taps (at both the campground and Lodge). The water from these taps is not potable and needs to be filtered. It is also often not working if the reservoir that supplies the water is dried up, so you’d need to filter from the lakes or streams anyways. Have a bladder for easy drinking on the trail and for storing water for cooking, but also bring a Nalgene for drinking from around camp. It also comes in handy on cold nights – fill it with hot water and put it in the foot of your sleeping bag to help you keep warm!
Copies of reservations: Print out any camping reservations and bring them with you, as rangers may come around and check for them. Also save to your phone anything else you may need- maps, trail information, important phone numbers, schedules for public transportation, etc. There is absolutely no service out here, even at the Lodge, so you want to have all necessary information you might need saved onto your phone, just in case it may come in handy on the trail.
External battery pack: This will help keep your phone and electronics charged. Make sure this is fully charged before you hit the trail!
Cash (CAD): This is to make any purchases at the Lodge during tea time, or if you may want to book a last-minute flight out from Assiniboine Lodge.
First aid and emergency device: Out in the backcountry, you should be self-sufficient for treating minor cuts and bruises, but it’s also good to have an emergency device/satellite phone in case of an emergency (getting lost, hurt, etc).
Best Time to Hike From Sunshine Village to Mount Assiniboine
Early fall colors around Og Lake in September
The best time to hike to Mount Assiniboine is from July to early-mid September. This is likely when the trails will be snow-free and navigable, and the temperatures will be most ideal.
Mid-July to mid-August has the warmest weather and is also when the wildflowers are in bloom, but it’s also the buggiest. During these months, daytime temps are in the 70s, but the nights are still cool and in the 50s.
By September, the bugs and wildflowers are gone, but the temperatures start to really get cold (into freezing temps at night). We visited Mount Assiniboine in early September, and it was already very cold at night (many fellow campers including myself struggled to get warm and sleep) and we woke up a few mornings to frost on our tent and snow on the mountain tops around us.
Mid-to late September means larch season, so it’s a popular time to hike to Mount Assiniboine. There are tons of larches in the core area of Mount Assiniboine, particularly on the way up to Wonder Pass from Lake Magog, but it will be cold, and you might risk the possibility of snow. If you’re staying in the warm cozy lodge, it won’t be a huge deal, but if you’re camping, it could be a challenge.
A frosty and cold morning in the Lake Magog Campground in September
During any time of year, be prepared for unpredictable and varying weather, despite what forecasts may say. In one day, you may get rain, hail, wind, and sun.
Also, if hiking Sunshine Village to Mount Assiniboine, keep in mind the gondola schedule and dates of operation. The gondola often stops running in early September, so if you plan to hike in and out any later, you’ll have to factor in the hike from the base of Sunshine Village up to the Meadows, which adds considerable distance and elevation gain.
Tips for the Hike From Sunshine Village to Mount Assiniboine
Be bear aware. This is prime Grizzly country, and bear sightings do happen out here. Be sure to hike with bear spray that’s easily accessible (this can be rented in Banff in various outdoor stores, or if you know you’ll be in the area for a while, consider buying some, which may be more economical). Make sure to use the bear boxes at each campground for all food and scented items and only cook in the designated cooking shelters/areas. And make sure to pack out everything that you pack in (including all trash).
Are dogs allowed in Mount Assiniboine? Dogs are allowed on the trails in Banff and Mount Assiniboine, but not on the Sunshine Village gondola or in any buildings, like the Lodge. Just be extra vigilant and cautious in bear country.
Water availability. On the trail from Sunshine Village to Mount Assiniboine, the main places to filter water are at Howard Douglas Lake and Og Lake, so plan accordingly. We each had a 3 L bladder that we filled at each spot with our water filter, and this worked just fine for us.
Cell service. This is no service in the park. Make sure to have everything you need either printed out or saved on your phone. Things that would be helpful to have include: all reservations for campgrounds, accommodations, and the helicopter, transportation schedules for public buses and shuttles if planning on through-hiking or combining the hike and helicopter, trail maps and descriptions that will help with navigation, and Google Maps downloaded to your phone (you might lose service on the way to the trailhead).
Be prepared for all sorts of weather. As we said above, no matter what time of year, you can get any kind of weather on the trail and at Lake Magog. Over five days, we saw rain, sleet, hail, thunder, fog, wind, and sun.
Check trail alerts and conditions. Check the park’s website for any closures due to weather, trail conditions, or bear activity. Also, because wildfires are so common here throughout the summer, be sure to check smoke forecasts and air quality forecasts before deciding to head out on the trail.
More Guides for Mount Assiniboine and the Canadian Rockies
MOUNT ASSINIBOINE GUIDE: Looking for more information on Mount Assiniboine? Check out our complete guide for everything you’d need to know to visit Mount Assiniboine, including all the ways to get there, what to do, where to stay, and all our tips and tricks for making your trip to Mount Assiniboine smooth.
HIKING TO THE NIBLET AND NUBLET: The Niblet and Nublet hike is by far the best hike in Mount Assiniboine. Read more about it in our Nublet hiking guide.
More guides for the Canadian Rockies
Plan on visiting more than just Mount Assiniboine during your visit to the Canadian Rockies? We got you covered! We’re creating a ton of guides and resources for planning a trip to the Canadian Rockies. Check out what we have so far!
THE TENT RIDGE HIKE: Check out our complete guide to one of the best hikes in the Kananaskis region of the Canadian Rockies!
EASY CANADIAN ROCKIES HIKES: Check out the easy hike to Boom Lake in Banff National Park, or hike the short and easy trail to Wapta Falls in Yoho National Park.
GLACIER NATIONAL PARK OF CANADA: The Hermit Trail and the Glacier Crest Trail are two challenging and steep trails that lead to epic views over glaciers and jagged peaks and are just a few hours from Banff.
MOUNT REVELSTOKE: The Eva and Miller Lakes hike is the best hike in Mount Revelstoke National Park, showcasing alpine meadows and two beautiful alpine lakes.
Are you planning to hike from Sunshine Village to Mount Assiniboine? We hope this guide helps you plan an epic and memorable Mount Assiniboine hike. Let us know your questions! And if you’ve done it, let us know how it went and what you thought!

